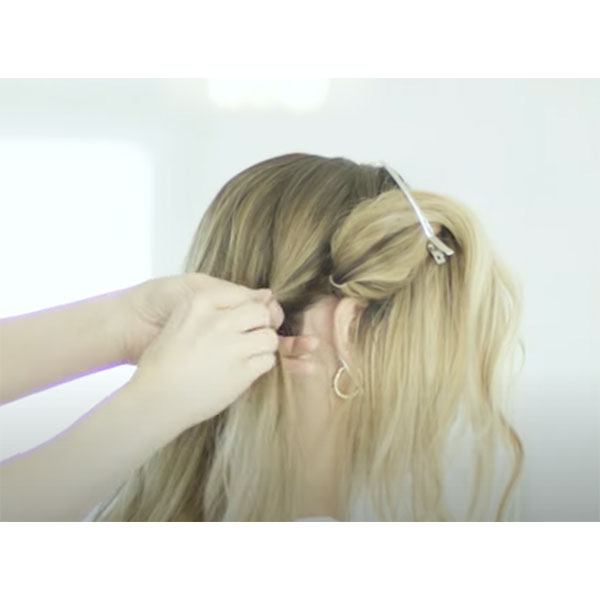
Begin with a full head of beach waves and Kenra Professional Volume Spray Clay 15 for texture and body. Secure the first ponytail behind the ear with an elastic, leaving out a face framing section along with a small amount of extra hair that will be used to complete the braid in the final steps.
Show Steps
2
Hold the ponytail secure and slightly tug on the roots to give the hair in the elastic volume. Make sure elastic is tight to the scalp.
Show Steps
3
Clip the first ponytail out of the way and create a second ponytail, repeating the same technique by securing a new elastic and creating volume.
Show Steps
4
Release the first ponytail from the clip and section in half.
Advertisement
Show Steps
5
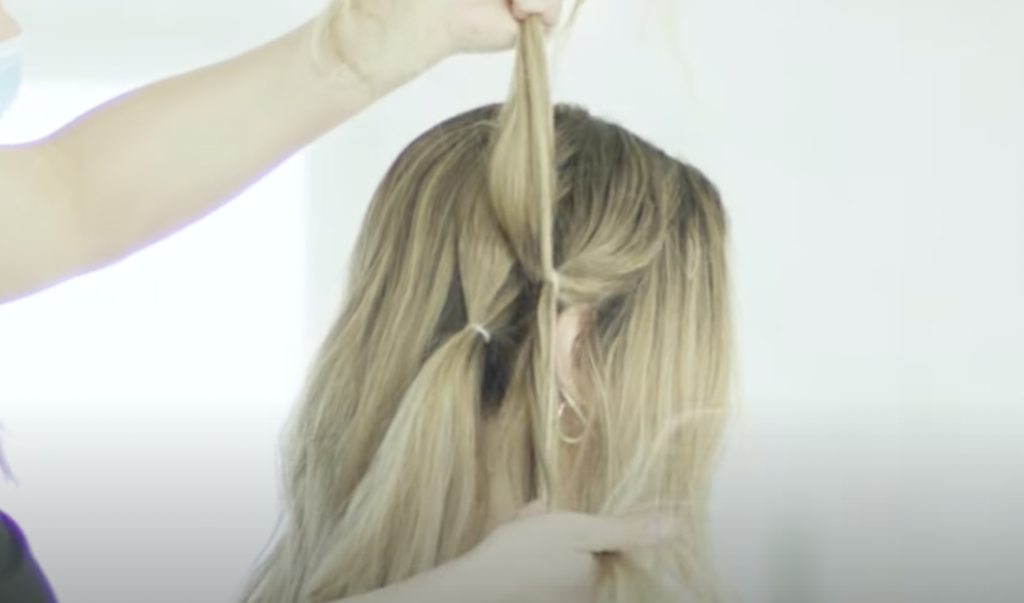
Take the second ponytail and lay it in between the half sections that were just created out of the first ponytail and clip it out of the way. Using the half sections, wrap them around the second ponytail and add in another vertical section of hair. Use an elastic band to secure the three sections together, creating the third ponytail.
Show Steps
6
Begin gently pulling the braid pieces, creating bulk and definition. This may also need to be done through the crown to redefine volume.
Pro Tip: The placement of the elastics determines the placement of the braid. Be conscious of how high or how low you are placing the elastics.
Show Steps
7
Take the second ponytail that was clipped out of the way, release it from the clip and split it in half. The third ponytail will be laid across the previous 1 and 2, being clipped out of the way to repeat the wrapping step from above and secured with an elastic to create the fourth ponytail.
Show Steps
8
Continue these steps around the head. Make sure the vertical sections being added in are large sections of hair to incorporate most of the hair in the back of the head. This avoids a heavy, uneven look on the sides.
Advertisement
Show Steps
9
Once you reach the opposite ear than where you started, incorporate the entire remaining ear section and secure it with an elastic. Remember to leave out the face framing accents in front. This is where we will begin to direct our braid upwards, wrapping back around the top of the head. Continue the braiding and elastic band process.
Show Steps
10
With the second to last elastic, add in some of the front piece that was originally left out in the first step to complete the braid. This adds a bit of extra length for the braid to look seamless. Secure the last elastic section, not to worry if this hair is very short at this point.
Pro Tip: Be sure to not incorporate the face framing pieces!
Show Steps
11
The last ponytail will not be split into half sections. Instead, twist the hair into the beginning of the braid incorporating the last small bit of hair that was originally left out. Now, details! Be sure the shape is cohesive and balanced on both sides and around the head. Because this is an intricate style, pay special attention to angles that will be photographed.
Show Steps
12
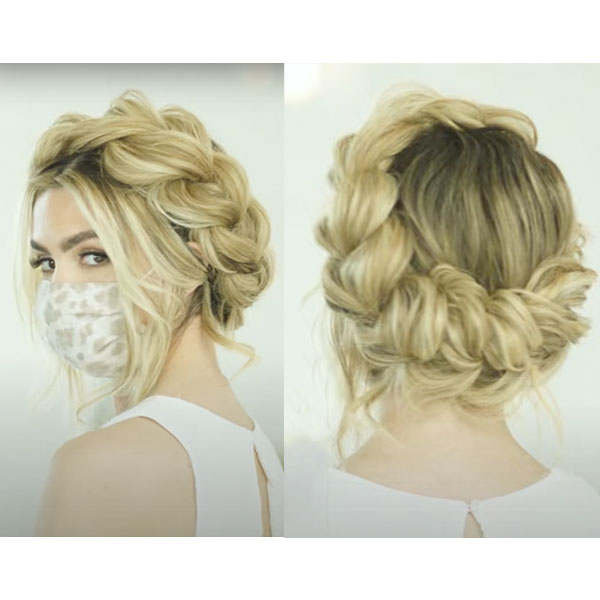
The finished look. Style the face framing section as desired by pinning a few pieces back, adding in light curls, accessorizing with decorative hair pins, and detailing with Kenra Professional Volume Spray 25.
This gorgeous, whimsical bohemian inspired bridal look from @hairandmakeupbysteph has us swooning. The elegant braid features a vintage wrap-around style with a modern twist, making it a trendy look for brides all year long!
Begin with a full head of beach waves and Kenra Professional Volume Spray Clay 15 for texture and body. Secure the first ponytail behind the ear with an elastic, leaving out a face framing section along with a small amount of extra hair that will be used to complete the braid in the final steps.
2
Hold the ponytail secure and slightly tug on the roots to give the hair in the elastic volume. Make sure elastic is tight to the scalp.
3
Clip the first ponytail out of the way and create a second ponytail, repeating the same technique by securing a new elastic and creating volume.
4
Release the first ponytail from the clip and section in half.
5
Take the second ponytail and lay it in between the half sections that were just created out of the first ponytail and clip it out of the way. Using the half sections, wrap them around the second ponytail and add in another vertical section of hair. Use an elastic band to secure the three sections together, creating the third ponytail.
6
Begin gently pulling the braid pieces, creating bulk and definition. This may also need to be done through the crown to redefine volume.
Pro Tip: The placement of the elastics determines the placement of the braid. Be conscious of how high or how low you are placing the elastics.
7
Take the second ponytail that was clipped out of the way, release it from the clip and split it in half. The third ponytail will be laid across the previous 1 and 2, being clipped out of the way to repeat the wrapping step from above and secured with an elastic to create the fourth ponytail.
8
Continue these steps around the head. Make sure the vertical sections being added in are large sections of hair to incorporate most of the hair in the back of the head. This avoids a heavy, uneven look on the sides.
9
Once you reach the opposite ear than where you started, incorporate the entire remaining ear section and secure it with an elastic. Remember to leave out the face framing accents in front. This is where we will begin to direct our braid upwards, wrapping back around the top of the head. Continue the braiding and elastic band process.
10
With the second to last elastic, add in some of the front piece that was originally left out in the first step to complete the braid. This adds a bit of extra length for the braid to look seamless. Secure the last elastic section, not to worry if this hair is very short at this point.
Pro Tip: Be sure to not incorporate the face framing pieces!
11
The last ponytail will not be split into half sections. Instead, twist the hair into the beginning of the braid incorporating the last small bit of hair that was originally left out. Now, details! Be sure the shape is cohesive and balanced on both sides and around the head. Because this is an intricate style, pay special attention to angles that will be photographed.
12
The finished look. Style the face framing section as desired by pinning a few pieces back, adding in light curls, accessorizing with decorative hair pins, and detailing with Kenra Professional Volume Spray 25.