6 Tips For Faux Blowouts & Effortless Waves
How-To: Effortless Waves, Pin Curl Sets & Timesaving Cheats
You’ve just given your client the transformation of a lifetime: A fresh new cut, maybe a fringe and a dye job they dedicated an entire Pinterest board to. Now—after however many hours behind the chair—it’s time to finish strong with efficient styling that will show off your client’s new look.
Need some inspo? Keep scrolling to learn ultra trendy faux blowout and wave techniques with Ulta Beauty‘s Elite Design Team Stylist Beto Sanchez (@betoloveshair) and Elite Stylist Zoe Starovich (@zostarstylez).
Want to work at an Ulta Beauty salon? Get paid education, benefits, PTO & more!
1. Trendy faux blowout
With an influx of blowout clients and high-volume hairstyles, it’s easy to go straight for the round brush. But Beto’s fast pin curl set technique creates the same—if not longer-lasting—results. Sounds like a win-win to us! Follow these steps to recreate the look:
Swipe to see Beto’s before and after:

1. Wash and towel-dry the hair, then prep with Wella Invigo Nutri-Enrich Nourishing Antistatic Spray to smooth.
2. Power dry (Beto prefers ghd‘s Helios™ Professional Hair Dryer) to remove extra moisture from the hair, moving in circular motions to ensure the scalp doesn’t get burned by the steam.
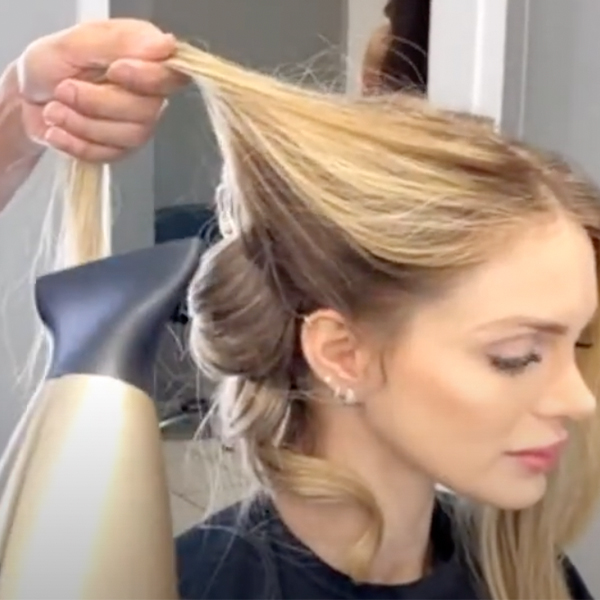
3. Once the hair is 75 percent dry, divide the hair into quadrants. Beto recommends zigzag sectioning to avoid harsh lines.
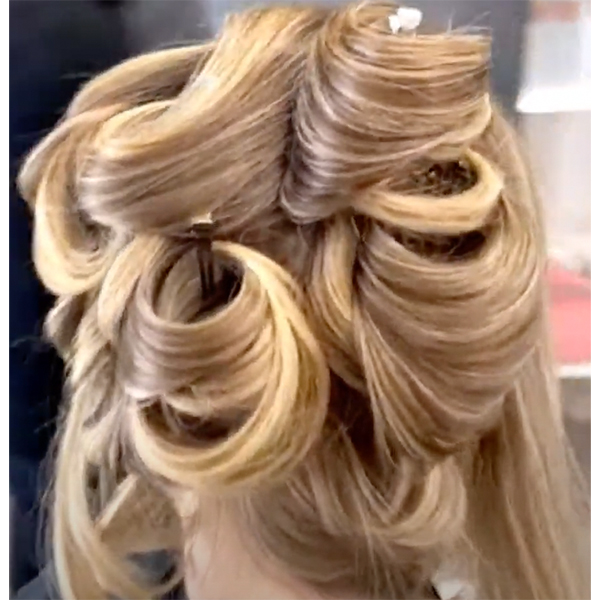
4. Then blow-dry with tension, using a detangling or round brush to smooth the hair at its natural fall. This gets rid of any excess moisture and smoothes the hair for styling.
5. Time to get curling. Note: You’re trying to create a wave that looks more like a blowout than a curl. Close the styler (Beto uses ghd Platinum+ Styler) around the section, give it a full turn, then overdirect it away from the scalp for a larger wave. Think of it more as “sculpting” the hair rather than curling it.
Pro tip: When styling the back sections, be sure to curl them toward the front of the head to avoid having too much weight in the back.
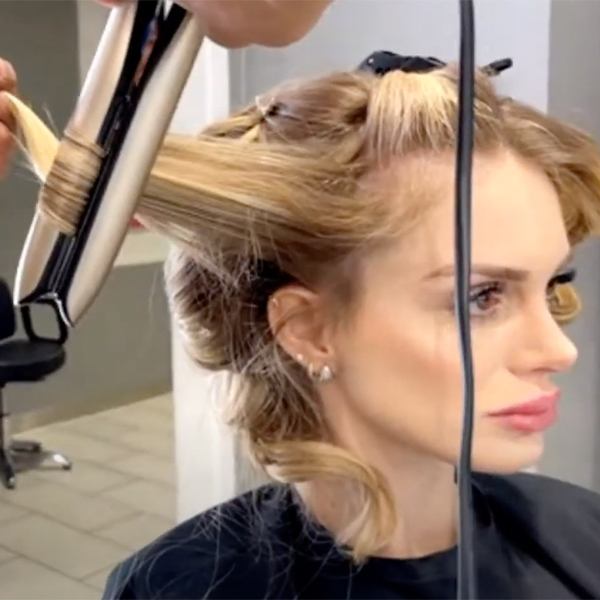
6. After creating a wave, apply Sebastian Professional Re-Shaper Hairspray for a strong hold you can keep brushing through. Repeat with each curl.
7. Set each curl to create stronger shape and longevity. To do this, wrap the curl around your fingers, making sure the loop is as big as possible, then pin it in place. It’s key to do this while the hair is still warm for optimal hold.
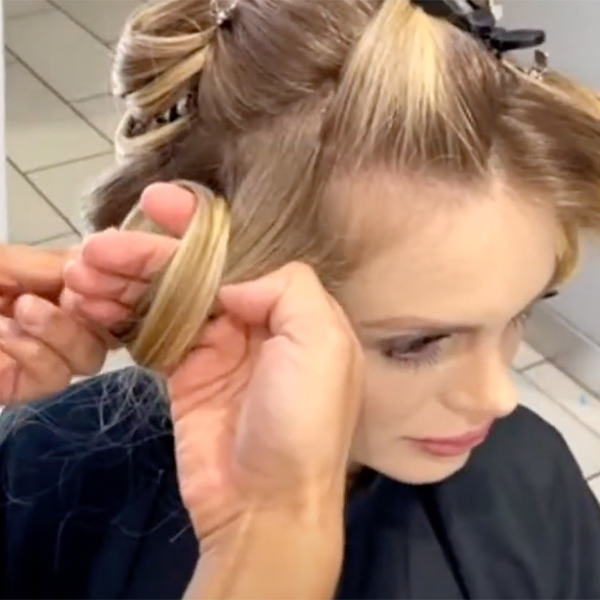
8. Remove the pins after a few minutes and redirect the curls toward the front or back of the head. Beto’s advice: If your client has a lot of layers, you can curl the hair in the same direction with no problem. If your client doesn’t have layers or has longer layers, you’ll want to curl in opposite, alternating directions.
9. Gently brush the hair out, finishing with hairspray. Add volume to the money piece by applying hairspray, then using the round of the can to successfully set the hair away from the face. See Beto’s method:
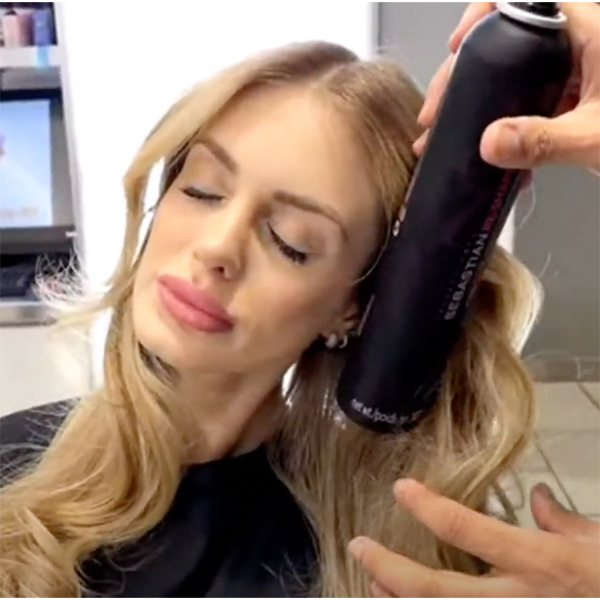
10. Finish with a cocktail of Sebastian Professional Dark Oil and hairspray. This way, the two products neutralize each other to create shine and definition with hold—no tackiness included!
Watch the full technique by Ulta Beauty’s six figure stylists on BTCTV!
2. Effortless, high-volume waves
Redhead-expert Zoe knows how to make those finite details and color accents really pop. The secret: A ribbon curl technique that takes no time behind the chair and gives your client a style that lasts all day. Here’s how it’s done:
We’re loving Zoe’s client’s wavy transformation:

1. Prep the hair with OLAPLEX No.9 Bond Protector Nourishing Hair Serum. Prepping with oil will protect the hair from heat, add shine and ensure a frizz-free brush-out without sacrificing texture and volume.
2. Follow with a rough blow-dry, then preheat the hair with your curling iron. Zoe’s iron of choice is the BaBylissPRO Nano Titanium XL Curling Iron.
3. Start curling at the back of the head where there’s the most density and weight. Zoe also recommends using a rocking method to avoid any harsh lines from the clamp and to curl all sections away from the face.
Pro tip: Personalize your waves with elevation while curling! The longer and higher you hold the hair, the more elevation you’ll get for more defined highs and lows. When you pull down and provide less tension, you’ll get more of a subtle, relaxed wave.
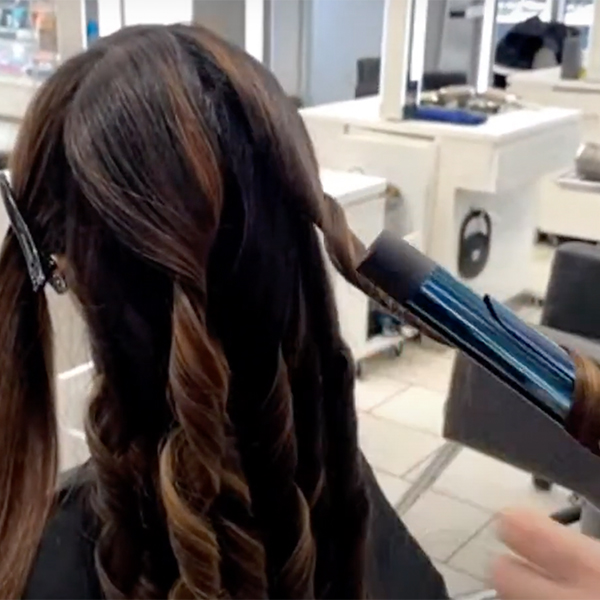
4. Keep in mind where you’re placing your curls. Zoe prefers her clients to have rippling sections where the curls fill each other’s gaps rather than sit on top of each other. Strategic placement = more volume!
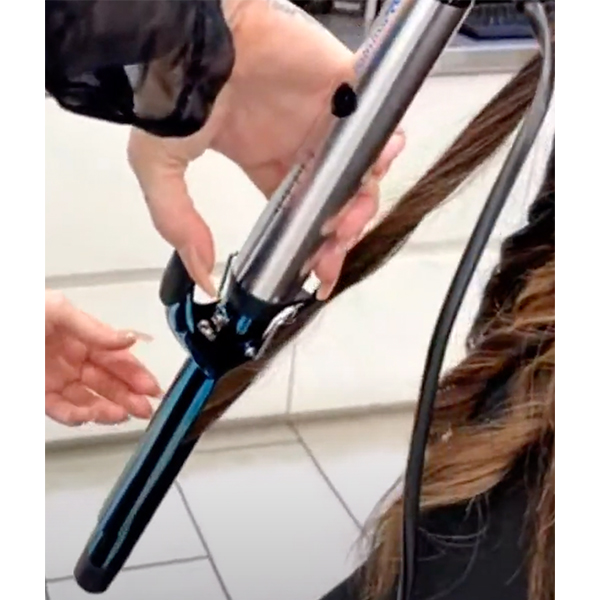
Pro tip: When curling, be sure to leave out the last couple inches of hair on the ends to avoid damage and maintain the silhouette after brushing out. If the ends do curl up, simply flatten them out with your iron.
Zoe smoothes out any curled ends to maintain shape:
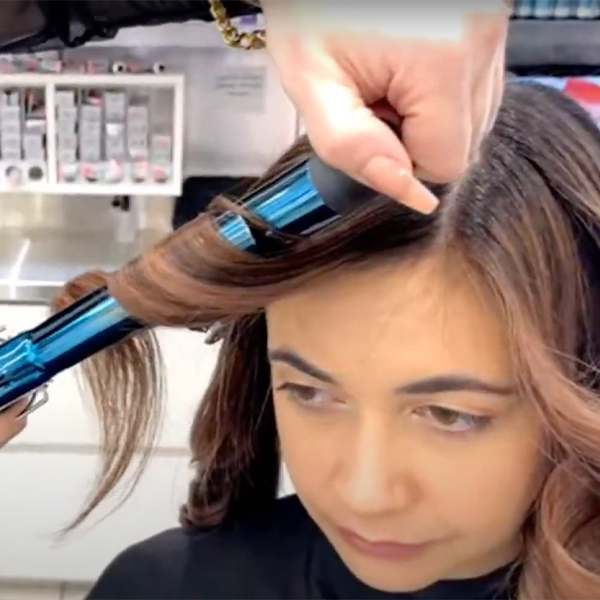
5. When you reach the front section and fringe, hold your iron at a diagonal angle rather than straight out. You’ll also want to start rocking the iron at the client’s eye-level to avoid gaps near the head.
6. Once the curls are done, finish with Andrew Fitzsimons Après Sexe Texture Spray. Then, gently brush the hair out, adding more texture spray and OLAPLEX No.9 as needed.
Pro tip: Give shorter-haired clients a similar look by combining Zoe’s technique with Beto’s. This will result in waves with lots of body and bounce without any mechanical lines.
Like what you see? Click here to learn more about joining the Ulta Beauty team.
This content is sponsored.
Products Used
More from
Ulta Beauty
-
Hair Color
The Bubble Technique: 5 Tips To Create Rainbow Hair Color
-
BTC Hair Trend Report
The Biggest Haircut Trends of 2024
-
Business
New To Budgeting & Investing? Start Here!
-
Business
The Ins & Outs Of Assisting: How To Be & Choose The Right Hair Assistant
-
Curly
Curly Consultation & Haircutting: Watch The Full Tutorial!
-
News
How Maui Hairdressers Are Rebuilding Post-Lahaina Fires
-
Business
How To Make 6 Figures From Stylists Who Actually DID IT
-
BTC Events
AI, Mental Health & Social Media: 7 Business Tips You Can’t Live Without
-
Business
6 Saving & Investing Tips To Grow Your Profit
-
Facebook Lives
Volume Guaranteed: Try This Layering Technique For Fine Hair
-
Bobs
The Biggest Haircut Trends of Summer 2023
-
Industry News
Vernon François Joins Ulta Beauty Pro Team of Industry-Leading Artists & Educators
-
Industry News
6 Award-Winning Hairstylists Join the Ulta Beauty Design Team
-
BTC Hair Trend Report
2023 Hairstyling: 11 Trends You Need To Know
-
BTC Hair Trend Report
2023’s Biggest Haircut Trends
-
Business
5 Steps You Must Take To Build A Strong Salon Culture
-
Blonde
The Biggest Hair Color Trends Of Winter 2023
-
Accessories
15 Styling Trends That Will Be Everywhere in Winter 2023
-
Balayage
5 Tips To Upgrade Your Cutting, Blonding & Styling Techniques
-
#ONESHOT HAIR AWARDS
Modern Art
-
BTC University
Dear Stylists, 4 Smart Ways To Protect Your Income
-
Facebook Lives
25-Minute Butterfly Layers Cut & Style
-
Business
Client Retention Checklist: 7 Ways To Keep Them Coming Back
-
Fine/ Thinning
Fine Hair: Do You Know How To Handle It?


