
How To Cover Grays & Open Air Balayage At The Same Time

3 Tips For Covering 100% Gray & Achieving A Ribbon Balayage In Just 45 Minutes
We know that root touch-up clients are consistent and dependable, but that doesn’t mean they should be limited to one service. Adding a balayage or highlight application to their appointment can modernize their look AND up their ticket price on a regular basis.
Think it can’t be done in one appointment? Think again! BTC Team Member Chrissy Danielle (@hairbychrissydanielle) shared her go-to technique for achieving full gray coverage AND a balayage application at the same time! Want to learn the full technique? Click here to become a BTC-U Member and receive unlimited access to Chrissy’s class on BTC University!

What We Learned:
You can learn Chrissy’s full technique in her 90-minute course, but we’re teasing these tips you need to know now!
Tip #1: Use Zone Placement For A Time-Saving Application
A strategic application helps Chrissy save time behind the chair AND avoid unwanted warmth in the final result. Here’s her zone placement breakdown:
Zone #1 (Base Color): Apply permanent color on the regrowth only. Keep scrolling to learn how to blend this zone!
Zone #2 (The Danger Zone): This is the area between the base color and the balayage. Depending on the balayage placement, this section will be roughly two to three inches that is free of color or lightener. Keeping this area clean of any product will help to avoid creating warmth.
Zone #3 (Balayage): Chrissy initially applies the lightener a little lower than midway on the section and fully saturating through the ends. Then, she uses the side of her brush to blend the product up to create a gradient, making sure not to blend up into the danger zone.
Tip #2: How To Tackle Gray Regrowth
To guarantee maximum coverage AND achieve a seamless blend, Chrissy uses a two-step process when covering grays. Here’s how:
Step #1: Apply base color on regrowth, making sure to fully saturate for full coverage. Allow the color to process for at least 10 minutes before moving on to the next step.
Step #2: Grab a comb and place it just above the regrowth line. Then, very gently melt the color down. This subtle blending will help avoid any hard color lines.
Pro Tip: Chrissy works in quadrants, so she suggests applying the root color to the entire quadrant before blending, giving the color enough time to penetrate the cuticle. If more base color is needed, apply it after finishing the quadrant but before blending down.
Tip #3: Make Blondes Pop With This Weave Placement
Thick weaves are key to creating bold, dimensional ribbons, but Chrissy also shared a small sectioning secret: Don’t weave from end to end. Instead, only pull weaves from the center of each panel, leaving the ends out to create more depth. Why? “I like my balayage to live between depth. Leaving that little bit of depth on the sides goes a long way for the overall end result and creates a beautiful dimension for the blonde to pop,” she explains.
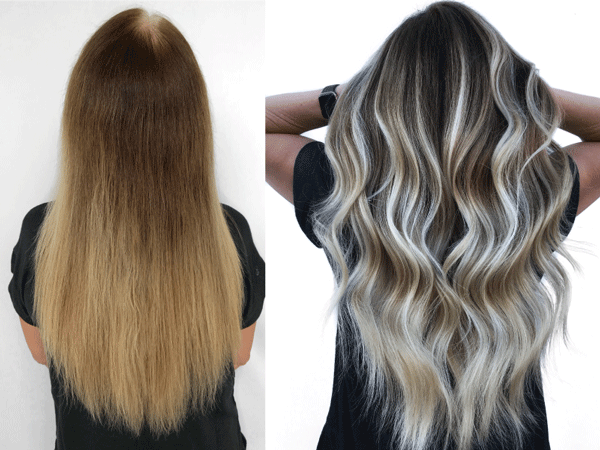
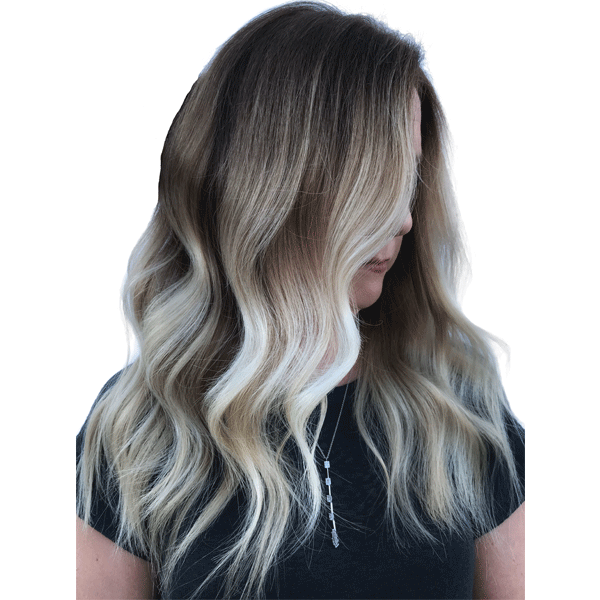
Slide For The Before & After!
Click The Beaker For Chrissy’s Full Formula!
Have Questions? Chrissy Has Answers!
One of the benefits of watching a course on BTC University? Artists are able to answer your questions in REAL TIME! Here are some technical questions viewers had for Chrissy during her livestream:
Question: Do you always apply permanent color to cover grays? Would you ever use a demi or semi-permanent color?
Answer: “If the client is 100% gray I will apply a permanent color, a demi-permanent color wouldn’t give me the needed coverage. If you have a client that is not looking for something high-maintenance and they only have a small amount of gray, you can definitely apply a demi. I love to use demis for color melts and more lived-in looks. So if you have a client that wants to blend gray, you can melt the root on dry hair and create a beautiful look that is less maintenance.”
Q: What questions do you ask your clients who are requesting a gray coverage and balayage service?
A: “One of the most important questions to ask a client requesting gray coverage is: ‘Are they looking for 100% gray coverage or a gray blend?’ I think it’s super important that you take into account how gray that client is. For example: If you have a client who’s regrowth is white, you definitely want to go in with a permanent color. As a hairstylist, it is up to you to lead your client in the best direction about their color choices. Another thing I also think is super important to ask is, ‘What is their maintenance schedule?’ If the client is not trying to be in your chair every 4 weeks, then a gray blend might be best for them.”
Click Here To Become A BTC-U Member & Receive Unlimited Access to Chrissy’s Course On BTC University!

More from
Chrissy Danielle
-
Balayage
3 Placement Tips For Expensive Blondes in Half The Foiling Time
-
Best Of 2022
10 Toning Tips You’ll Need in 2023
-
Blonde
4 Prep Steps For The Perfect Bleach & Tone Retouch
-
Blonde
The More You Know: Hair Appears Warmer When Wet
-
Blonde
8 Smart Blonding Tips We Learned This Year
-
Blonde
Booking Blondes: When To Schedule Retouch Services
-
Extensions
5 Extensions Mistakes You’re Probably Making
-
THE BTC SHOW 2021
Social Climbing At #THEBTCSHOW
-
BTC Events
Line One Hair Extensions at #thebtcshow 2021
-
Ask A BTC Expert
5 Tips For Balayage + Gray Coverage
-
Blonde
Gray Coverage & Blonding Services: Apply At The Same Time, Or Separately?
-
Balayage
5 Mistakes To Avoid When Foiling The Hairline At The Nape
-
Best of 2020
10 Of The Best Toning Tips We Shared In 2020

