
Graham Webb “Modern Face Frame” by Nick Arrojo

Advertisement
Advertisement
Advertisement
Graham Webb “Modern Face Frame” by Nick Arrojo
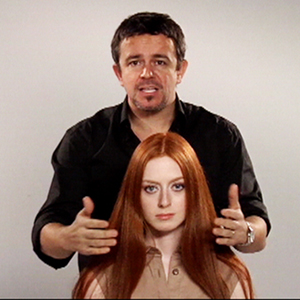
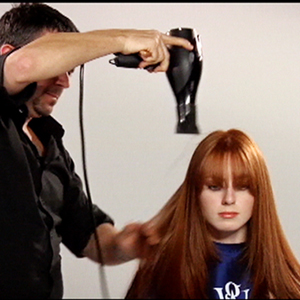
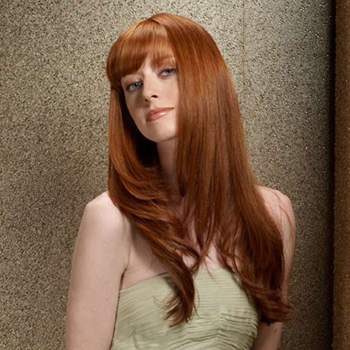
Graham Webb and Nick Arrojo are back with another gorgeous Step-by-step from the “Modern Icon” Collection! This “Modern Face Frame” Step-by-step demonstrate how to create classic refined face-framing layers with a long modern fringe.
Highlights and lowlights are used to create movement and texture within this cut. Nick uses Graham Webb’s Vivid Color regimen to keep the hair color looking healthy, vibrant and beautifully intense.
Get Nick Arrojo’s Best Selling 3 DVD Special: Razor Fundamentals, Advanced Razor and Razor Texture!

Subscribe to behindthechair.com “On Paper” Magazine–4 Issues Only $29.95!
Next Issue: COLOR with Beth Minardi!
HOW-TO STEPS 
-
 1
1 -
 2
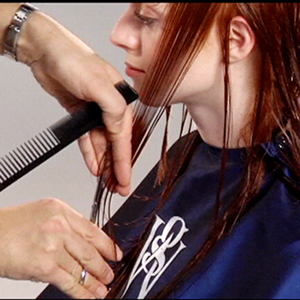
2Prepare hair with Vivid Color Color Locking Shampoo and Color Locking Conditioner. Towel-dry. Apply Vivid Color Color Locking Leave-in Conditioner for body and softness. Comb through. Next, comb hair and create a quarter part from hairline to nape and ear to ear.
-
 3
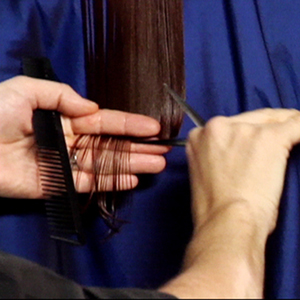
3Back: Starting in the back, create first parting just above occipital bone from ear to ear. Comb section down and cut approximately 3” of length using shears. Take approximately a 3” section, comb down andrepeat to perimeter. Continue until you reach the crown.
Sides: Subdivide side section and comb back to meet perimeter in back. Release next section. Comb back from middle part and repeat cut.
Once front and back perimeter sections have been cut, comb hair down in front and check that sides are even. -
 4
4Next, create a horseshoe parting from just above temples to slightly below crown.
-
 5
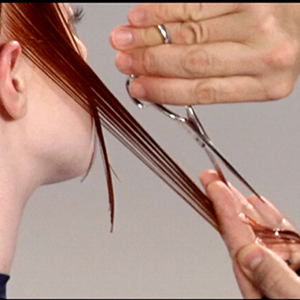
5At bottom section, part hair just in front of the ear. Comb front section toward face with even tension. Start your cut at the bottom of the jaw using small cutting strokes and sliding your hand down in a steep angle, combing down and swinging over to cut.
-
 6
6Take a 3” section from behind the ear. Comb down & swing over to cut. Meet length as you move toward the bottom. Repeat and stop when you reach the center part in back. Move to opposite side.
-
 7
7Divide front section and cut in an upward direction toward the jawline (this is opposite from the first side but will give you the same result). Repeat, moving front to back.
-
 8
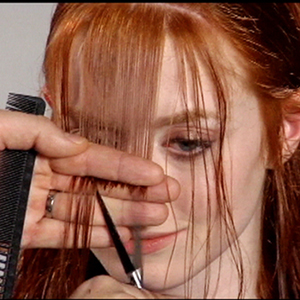
8Fringe: Take a 1-inch section from the hairline back to create the fringe.
-
 9
9Comb fringe down, subdivide and cut an inverted U-shape fringe,keeping shortest point at the bridge of the nose. Use a point-cutting technique. Repeat with second section.
-
 10
10Crown/Top: Starting at the hairline, take a 2-inch deep part at a slight diagonal. Comb forward with slight elevation and cut a longer angle to fall over bottom frame. Let bottom fall out to create a new guide. Work back to center part and repeat on opposite side.
-
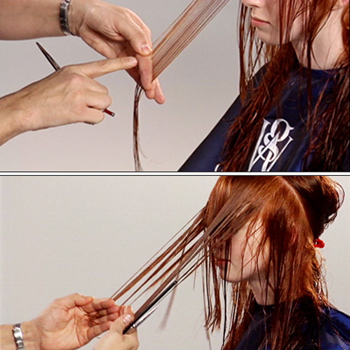
 11
11To remove the corners of the layers and add softness, comb hair down and take a 2-inch section at the center part in the back. Elevate to 90 degrees and remove corner of the section. Move around head, overdirecting to blend into the back.
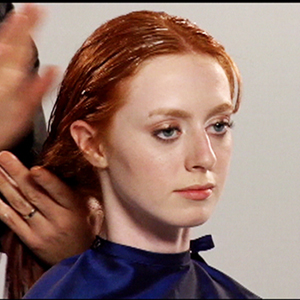
Styling: Before blow-drying hair, add Vivid Color Color Locking Firm Hold Foam and Reparative Shine for body and sleek shine. Blow-dry with a flat nylon and plastic bristle brush. Create direction by following the contour of the head shape. -
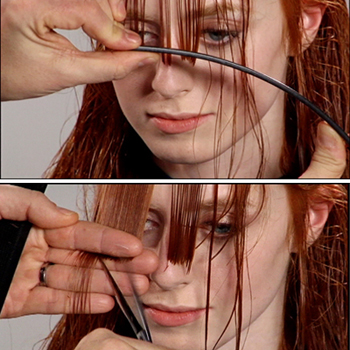
 12
12Finish the cut by refining the fringe and adding lightweight texture to the ends with deep point cutting technique.
-
 13
13
YOU MIGHT LIKE THIS
-
Hair
Graham Webb “Modern Box Bob” by Nick Arrojo
-
Hair
Graham Webb “Modern Long Layer” by Nick Arrojo
-
Haircuts
Hot Tip: Creating Volume with a Razor
-
Haircuts
WATCH: Texturizing and Adding Movement to Dense Hair Using a Razor
-
Hair Color

Classic Concave Cut
TRENDING NOW!
-
BTC Hair Trend Report
The Biggest Haircut Trends of 2024
-
Copper
What Is The "Cowboy Copper" Hair Trend? Here's What It Really Means...
-
Uncategorized
TikTok's Viral "Scandinavian Hairline" Is Actually Not New...
-
Business
3 Reasons Why Today's Highlights Are So Expensive
-
BTC Hair Trend Report
Quiet Luxury Blonde: The "Old Money" Trend Explained
-
Blonde
Toning: 5 Fast Purple Shampoo Ideas For Blondes, Silver & Gray
-
Blonde
3 Purple Toning Tips For Clear, Bright Blondes
-
Bobs
How to Avoid a Bulky Bob: 4 Techniques To Try

