Articles > BTC University > Short Layers: How To Build Weight With Sectioning
Last updated: October 13, 2022

Short Layers: How To Build Weight With Sectioning

short-layered-haircut-joico
close formula

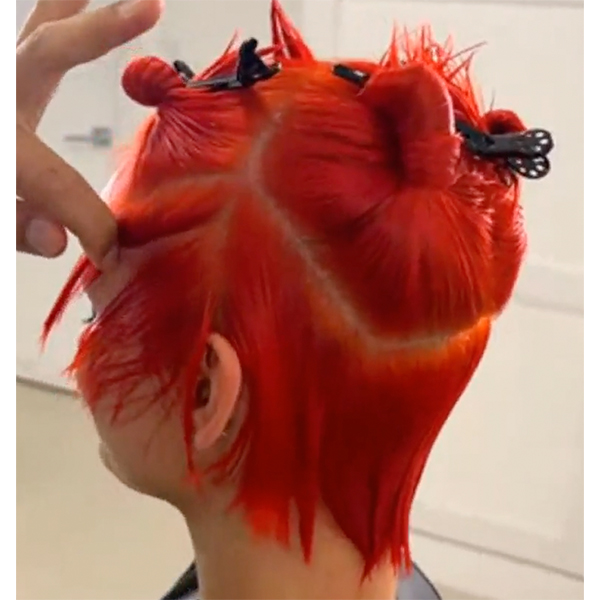
4 Sectioning Tips To Add Weight To Short, Layered Haircuts

TREND ALERT: Short, layered cuts are EVERYWHERE this fall. While shorter styles can be a little more intimidating than their longer counterparts, Joico Global Artistic Director Richard Mannah (@richardmannah) is sharing his technical haircutting technique for modern, wearable cuts that embody four essential ingredients for success: suitability, individuality, technique and taste. 


Keep scrolling for a sneak peek into Richard’s exclusive sectioning method to get the PERF cropped, layered result. 


Richard’s finished look!

Photo Credit: Joico


1. Prep the hair with a cutting agent

Clean sections are ESSENTIAL for an even, balanced cut. A reliable protein spray can help the hair hold its shape by retaining moisture. Richard personally recommends Joico’s K-Pak Color Therapy Luster Lock Multi-Perfector Spray because it also protects against thermal styling and UV. 


Pro tip: Save time by strategically sectioning out the hair. A pre-planned roadmap allows you to focus on creating the shape, rather than trying to balance the cut and fix any mistakes.


Want to watch Richard’s entire short, layered cutting technique in action? Click here to watch his full course at BTC University!


2. Section following the hairline to stay organized

Start with a center part all the way down the head and a radial parting from the top of the head to the top of each ear. Richard suggests working down and back, resulting in a triangular shape that follows the hairline.


Pro tip: Clean up the nape with scissors rather than a razor for a more natural and less spiky grow-out. Remember that practice makes perfect—scissors MUST be kept flat against the skin with zero elevation to avoid nicks.


3. Combine diagonal sections with horizontal cutting for a natural grow-out

Richard creates a more natural, wearable look by combining diagonal sections with horizontal cutting. Why? Taking vertical sections would only result in a short-to-long pattern without the distinct square shape Richard is looking for, he explains.


Pro tip: It’s really easy to have an initial consultation and leave it at that, but the REAL consultation ends when the client actually leaves the salon. As you’re cutting, you might see something you like or want to add to the cut. For instance, Richard consults about adding a fringe once the cut is already done, so the client can choose. Remember, clients LOVE flexibility and spontaneity—even if they don’t necessarily go along with it from time to time.


4. Start cutting at the top of section rather than the bottom

To best tailor the cut to the client’s head shape, plan on debulking each section starting from the top instead of the bottom. This way, it’s easier to overdirect lower sections from longer lengths.


Pro tip: Since the goal of Richard’s cut is to go shorter through the sides and back, he builds weight before layering and adding internal movement.


Enroll in Richard’s course at BTC-U to learn all of his tips for the perfect short cut!


Products Used

More from
Joico