
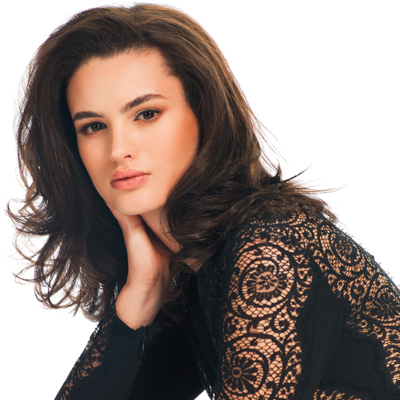
Square Layers from TONI&GUY

Advertisement
Advertisement
Advertisement
Advertisement
Square Layers from TONI&GUY
Products Used
HOW-TO STEPS 
-
 1
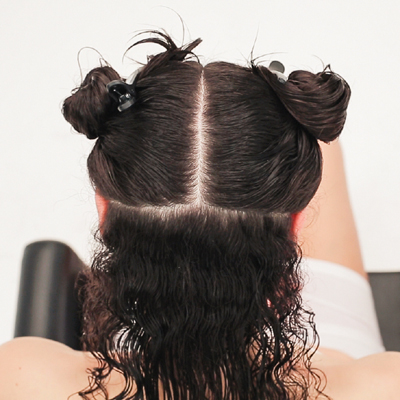
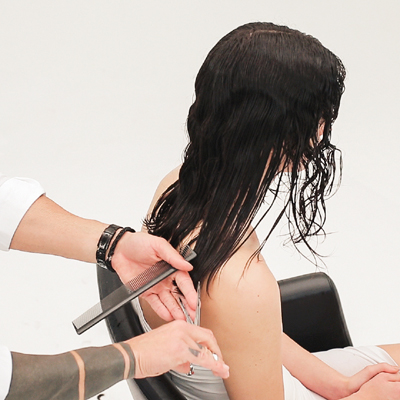
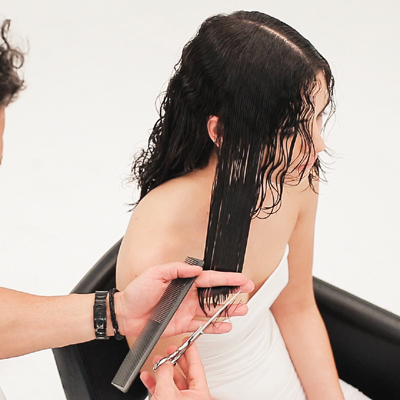
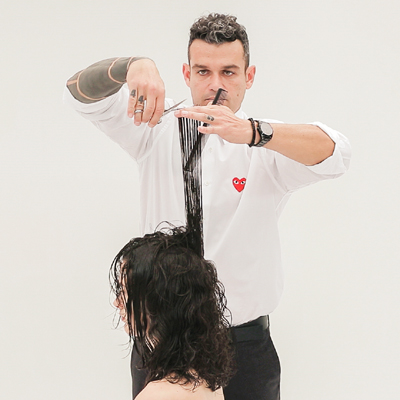
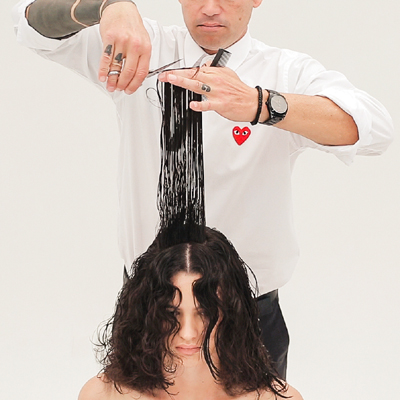
1Establish a profile parting from the forehead to the nape. From the profile, take horizontal partings to the ear.
-
 2
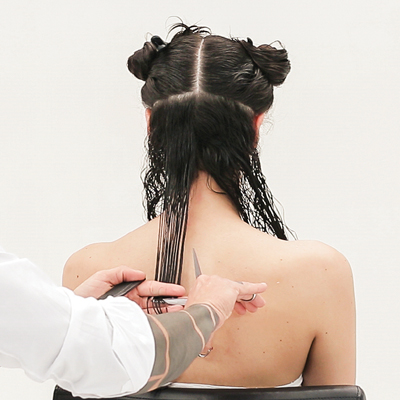
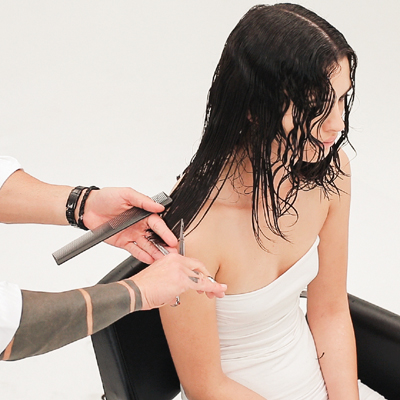
2With the head position slightly forward, keep the profile in place. Comb the hair to natural fall, hold at one finger’s depth, and with minimal tension, cut the line square.
-
 3
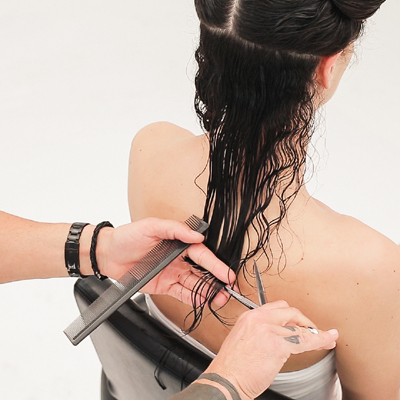
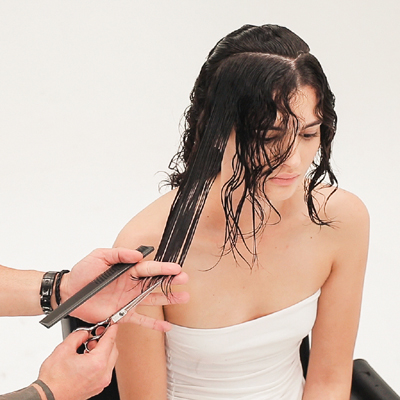
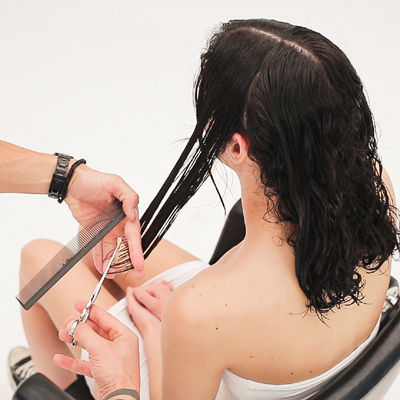
3On the opposite side, start from the center, and work outwards in small increments to cut the line square to the guide.
-
 4
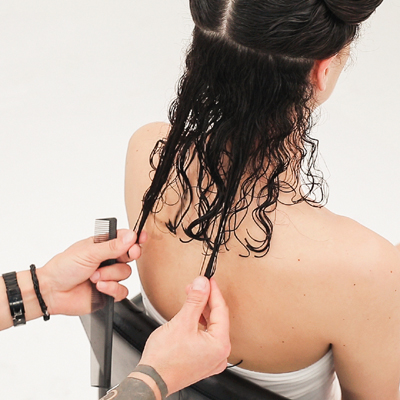
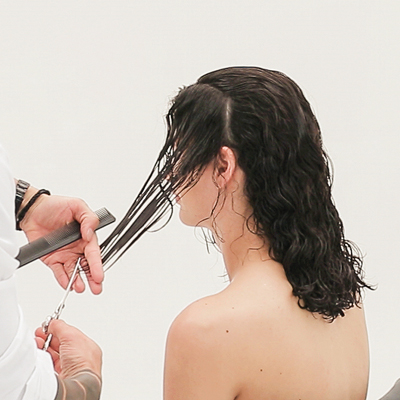
4Cross-check by pulling equal amounts of hair from the same reference point and measure to see if the lengths are balanced.
-
 5
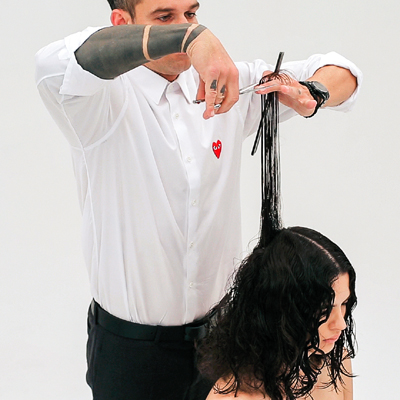
5Release the remaining hair, comb the sides at natural fall, place it behind the shoulders and cut to follow the guideline.
-
 6
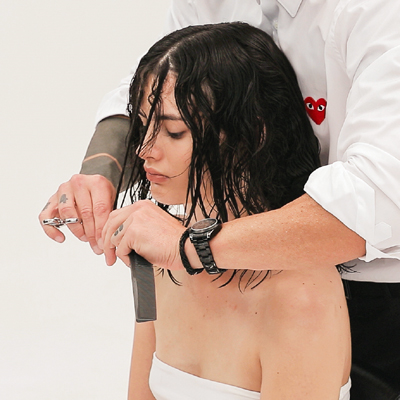
6To complete the line through the sides, comb the hair to natural fall, hold at one finger’s depth and cut square.
-
 7
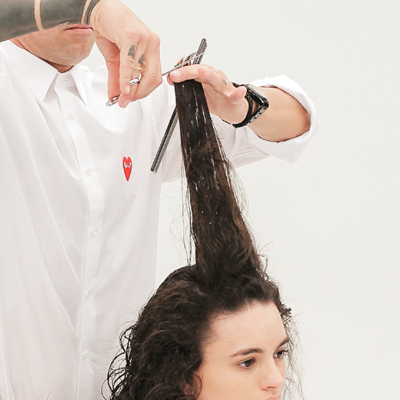
7Take diagonal back sections from the profile to just behind the ear. Make a vertical division from the high point of the ear. Overdirect forward, elevate to 45 degrees and cut from the corner up toward the chin.
-
 8
8Repeat the technique on the opposite side. Notice the change in hand position.
-
 9
9Release the remaining hair and cut on the guide with the same distribution and elevate to a stationary 45 degrees.
-
 10
10Repeat the same technique on the opposite side. Notice the change in hand position, the hair is held from top and the fingers are pointed down.
-
 11
11Cross-check by pulling equal amounts of hair from the same reference point and measure to see if the lengths are balanced.
-
 12
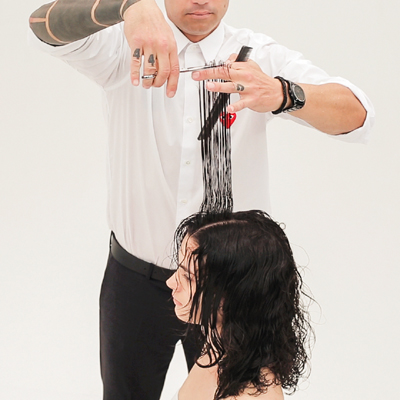
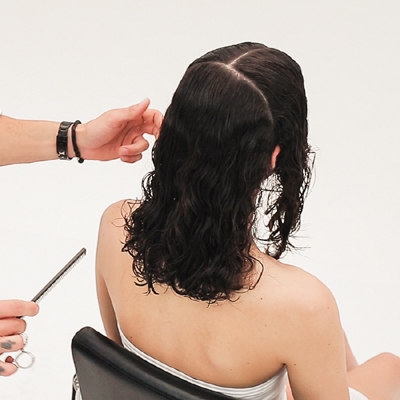
12Take a profile section from the front hairline to the top of the occipital. Start 2 inches behind the front hairline and use this as a guide to length. Comb perpendicular, elevate to 90 degrees and cut square.
-
 13
13Continue your profile section past the crown, comb perpendicular, elevate to 90 degrees and cut the line square.
-
 14
14Take a radial parting from the crown through to the top of the ear on both sides.
-
 15
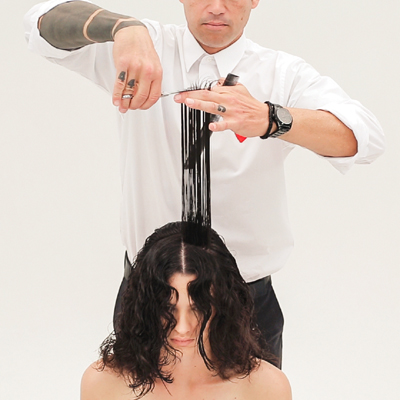
15Take pivoting sections, comb perpendicular, elevate to 90 degrees and cut square until you reach the radial on both sides.
-
 16
16Across the top take horizontal sections, comb perpendicular, elevate to 90 degrees and cut square from the profile guideline.
-
 17
17Across the top take horizontal sections, comb perpendicular, elevate to 90 degrees and cut square from the profile guideline.
-
 18
18Finish by over-directing the last horizontal sections back to the previous guide and cut square.
-
19
Finish by over-directing the last horizontal sections back to the previous guide and cut square.
-
 20
20
More from
TONI&GUY
-
Award-Winning
Luminescent
-
Collections
Reverie
-
Award-Winning
London Hairdresser Of The Year Winning 2020 Collection
-
Manufacturer
Join TONI&GUY For A Free Hour-Long Education Experience
-
Business
Assistants & Apprentices: 5 Pieces Of Advice To Read ASAP
-
BTC "On Tour"
BTC Hosts First Ever International Show: “On Tour” London
-
BTC Events
BTC “On Tour” London
-
BTC "On Tour"
“On Tour” London Cocktail Party
-
BTC Events
BTC “ON TOUR” DALLAS
-
BTC ON TOUR
“On Tour” Dallas Cocktail Party
-
BTC Events
BTC “On Tour” Dallas Show—Here’s Everything That Happened!
-
Barbering
Low Skin Fade On Textured Hair
-
Salon Decor
TONI&GUY Galleria Salon Gets A New Look
-
Chain Salons
TONI&GUY Renovated Its NorthPark Location
-
Barbering
Our 5 Most Popular Men’s Haircuts
-
Business
TONI&GUY Debuts Á La Carte Style Menu
-
Manufacturer
TONI&GUY Announces Winners Of The 2017 Photographic Awards
-
Haircuts
10 Cuts For Every Client In Your Chair
-
Bobs
Shattered Inversion
-
Events
TONIandGUY 2016 Creative Release and Photographic Awards
-
Business
Ready To Own? Four Things You Should Know
-
Business
Ready to Open Your Own Salon? Read This First
-
Celebrity
FKA Twigs’ Quirky VMA Curls
-
Hair
Men’s Scissor-Over-Comb from TONI&GUY
YOU MIGHT LIKE THIS
-
Haircuts

How-To: Versatile Layers
-
Haircuts
Straight Shag
-
Blonde
Five-Section Cut For Updated Layers
-
Barbering
Soft Crown Layers + Clipper-Cut Fade
-
Barbering
Men’s Clipper Cut + Softly-Faded Crown Layers
TRENDING NOW!
-
BTC Hair Trend Report
The Biggest Haircut Trends of 2024
-
Copper
What Is The "Cowboy Copper" Hair Trend? Here's What It Really Means...
-
Uncategorized
TikTok's Viral "Scandinavian Hairline" Is Actually Not New...
-
Business
3 Reasons Why Today's Highlights Are So Expensive
-
BTC Hair Trend Report
Quiet Luxury Blonde: The "Old Money" Trend Explained
-
Blonde
3 Purple Toning Tips For Clear, Bright Blondes
-
Blonde
Toning: 5 Fast Purple Shampoo Ideas For Blondes, Silver & Gray
-
Bobs
How to Avoid a Bulky Bob: 4 Techniques To Try

