
Ken Paves for Hairdo: Fineline® 1 pc Clip-in Extensions

Advertisement
Advertisement
Ken Paves for Hairdo: Fineline® 1 pc Clip-in Extensions
HOW-TO STEPS 
-
 1
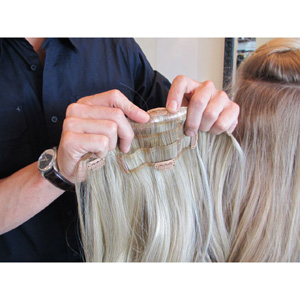
1Practice opening and closing the clips. With the clip side of the piece facing away from you, put both thumbs on each side of the clip and the index fingers at the other side. Snap the clip open by applying pressure away from yourself with the thumbs. Similarly, close the clip by applying pressure toward yourself with the index fingers.
-
 2
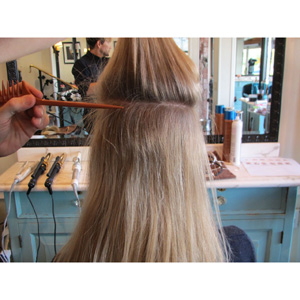
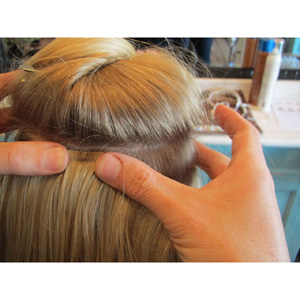
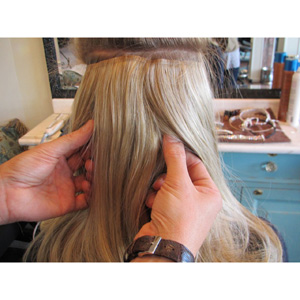
2Separate the hair. Using a tail comb or your index fingers, practice parting the hair horizontally from one side of the head to the other. Starting about two inches above the ear, part the hair from one temple, around the back of the head, to the other temple.
-
 3
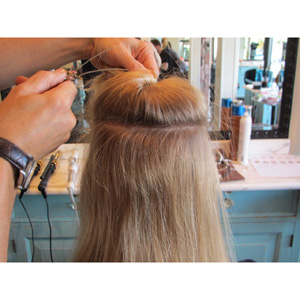
3Lift up all the hair above the part and clip it out of the way.
Styling Note: Before attaching the three clips along the top of the piece, tease your client’s hair at the roots for a more secure attachment.
-
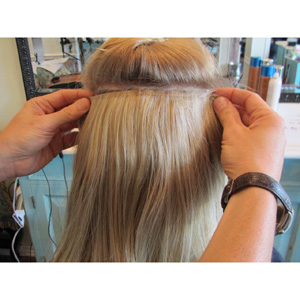
 4
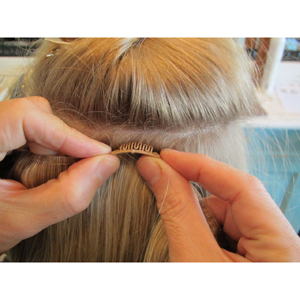
4Open all the clips on the piece. The top middle clip should be attached first by placing it at the middle of the back of the head just below the part so that the top of the weft is even with the part when attached.
-
 5
5Moving the clip downward, catch your hair in the clip and snap it shut.
-
 6
6The left and right top clips are next. Once the top middle clip is securely attached, gently pull the top weft as far as it will go toward both temple areas. As above, place the clips on the hair just below the part, and moving them downward, catch the hair in the clips and snap it them shut.
Styling Note: Now that the three top clips are attached, run your fingers along the top weft to make sure it lies flat against the head along the entire width. If there are any gaps, correct this by snapping the clip open, lifting it off the hair and repositioning it so that the weft lies flat.
-
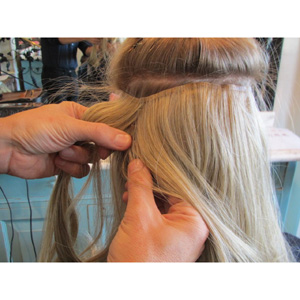 7
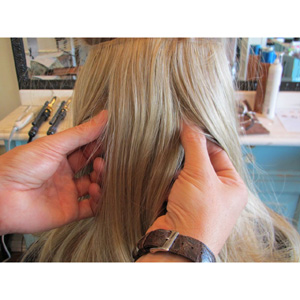
7Now that the three top clips are attached, it is time to attach the two side clips at the left and right ends of the third weft. Starting with either the left or right side clip, gently pull the piece over as far as it will and slip the clip into your client’s hair, and making sure the clip goes all the way to the scalp, snap it shut.
-
 8
8As in the above step, gently pull the other side of the piece over as far as it will go, slip the clip into your hair, and making sure the clip goes all the way to the scalp, snap it shut.
-
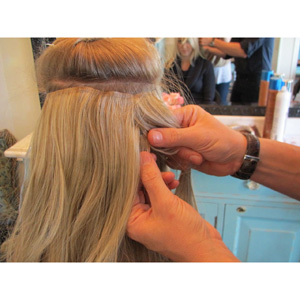
 9
9The bottom clips are next. Located on the lowest weft, the bottom clips should be placed. Gently pulling down on the piece, place the center bottom clip first. Make sure the clip goes all the way to the scalp, gently pulling it taut so that no gaps occur between the top and bottom of the piece.
-
 10
10Now that the lower middle clip is securely closed, the two bottom clips are next. As in the previous step, attach both remaining bottom clips making sure they go all the way to the scalp.
-
 11
11Release all the hair that was clipped out of the way in Step 2, blend in with the clip-in extension system, and finish the style as desired.
REMOVING THE WEFTS
To remove the piece, snap open all the clips and gently lift up and away from the hair. Never try to remove a weft without first opening all the clips. Pulling or tugging to remove a weft can result in damage to the client’s hair.
YOU MIGHT LIKE THIS
-
Hair
Ken Paves for Hairdo: The Big Bang
-
Hair
Ken Paves for Hairdo: Wrap-Around Ponytail
-
Hair
Urban Chic by Ken Paves for Hairdo
-
Hair
Undone Perfection by Ken Paves for Hairdo
-
Hair
Elegant Updo by Ken Paves for Hairdo
TRENDING NOW!
-
BTC Hair Trend Report
The Biggest Haircut Trends of 2024
-
Copper
What Is The "Cowboy Copper" Hair Trend? Here's What It Really Means...
-
Business
3 Reasons Why Today's Highlights Are So Expensive
-
Uncategorized
TikTok's Viral "Scandinavian Hairline" Is Actually Not New...
-
BTC Hair Trend Report
Quiet Luxury Blonde: The "Old Money" Trend Explained
-
Blonde
Toning: 5 Fast Purple Shampoo Ideas For Blondes, Silver & Gray
-
Blonde
3 Purple Toning Tips For Clear, Bright Blondes
-
Bobs
How to Avoid a Bulky Bob: 4 Techniques To Try

