Short Take, Shine Line


- Formula A
Schwarzkopf Igora Vario Blond Cream Lightener + 3% (10-volume) Schwarzkopf Igora Royal Oil Developer


Create a horseshoe section. Note that the shorter area underneath will not connect to the longer top area. Create a slight diagonal section at the front hairline and cut to desired length. The hair will be slightly longer through the temple area and shorter in the hairline area.

- Formula A
Schwarzkopf Igora Vario Blond Cream Lightener + 3% (10-volume) Schwarzkopf Igora Royal Oil Developer


Work to the center back in this manner, working with static, vertical sections. Repeat on the opposite side.

- Formula A
Schwarzkopf Igora Vario Blond Cream Lightener + 3% (10-volume) Schwarzkopf Igora Royal Oil Developer


Use a scissor-over-comb technique throughout the hairline and perimeter to refine the hairline and create a close-fitted head shape. Always work with the natural hairline growth pattern.

- Formula A
Schwarzkopf Igora Vario Blond Cream Lightener + 3% (10-volume) Schwarzkopf Igora Royal Oil Developer


Proceed to the side and back overhang. Create horizontal sections, and cut to desired length. Point-cut for softness, and cut through the comb for control. These sections will not connect to the underneath area.

- Formula A
Schwarzkopf Igora Vario Blond Cream Lightener + 3% (10-volume) Schwarzkopf Igora Royal Oil Developer
Advertisement


Work up to the top of the head in this manner. Repeat the process on the opposite side. Elevate each parting slightly to soften the line.

- Formula A
Schwarzkopf Igora Vario Blond Cream Lightener + 3% (10-volume) Schwarzkopf Igora Royal Oil Developer


Create a section from the crown to the front hairline and point-cut to create softness and texture. Continue working in parallel sections in this manner.

- Formula A
Schwarzkopf Igora Vario Blond Cream Lightener + 3% (10-volume) Schwarzkopf Igora Royal Oil Developer


Cross-check and refine the top section.

- Formula A
Schwarzkopf Igora Vario Blond Cream Lightener + 3% (10-volume) Schwarzkopf Igora Royal Oil Developer


Continue cross-checking and point-cutting the top section, then blow-dry with a flat wrap method.

- Formula A
Schwarzkopf Igora Vario Blond Cream Lightener + 3% (10-volume) Schwarzkopf Igora Royal Oil Developer
Advertisement


Comb the hair to natural fall, and create the desired fringe length. Elevate and point-cut to create a soft line.

- Formula A
Schwarzkopf Igora Vario Blond Cream Lightener + 3% (10-volume) Schwarzkopf Igora Royal Oil Developer


Create a straight parting at the top of the crown and form a half circle to the apex.

- Formula A
Schwarzkopf Igora Vario Blond Cream Lightener + 3% (10-volume) Schwarzkopf Igora Royal Oil Developer


Place the lightener 2 inches below the parietal ridge in a 2-inch section over the left ear.

- Formula A
Schwarzkopf Igora Vario Blond Cream Lightener + 3% (10-volume) Schwarzkopf Igora Royal Oil Developer


Move toward the center, continuing the 2-inch application technique.

- Formula A
Schwarzkopf Igora Vario Blond Cream Lightener + 3% (10-volume) Schwarzkopf Igora Royal Oil Developer
Advertisement


Continue working to the right side above the ear, connecting the 2-inch application. Do not go beyond the right ear.

- Formula A
Schwarzkopf Igora Vario Blond Cream Lightener + 3% (10-volume) Schwarzkopf Igora Royal Oil Developer


Drop a veil section over the previous application. The amount of hair will be based on how bright you want the finished shine line to be.

- Formula A
Schwarzkopf Igora Vario Blond Cream Lightener + 3% (10-volume) Schwarzkopf Igora Royal Oil Developer


Repeat steps 2 through 4.

- Formula A
Schwarzkopf Igora Vario Blond Cream Lightener + 3% (10-volume) Schwarzkopf Igora Royal Oil Developer


Process until the desired level of lift is achieved.

- Formula A
Schwarzkopf Igora Vario Blond Cream Lightener + 3% (10-volume) Schwarzkopf Igora Royal Oil Developer
Advertisement


Rinse, shampoo and condition with BC Color Freeze Shampoo and Conditioner. Blow-dry the hair, smooth the lengths with a flat iron and work in Osis+ Dust It for lift and separation.

- Formula A
Schwarzkopf Igora Vario Blond Cream Lightener + 3% (10-volume) Schwarzkopf Igora Royal Oil Developer


Finished Look

- Formula A
Schwarzkopf Igora Vario Blond Cream Lightener + 3% (10-volume) Schwarzkopf Igora Royal Oil Developer

Short Take, Shine Line
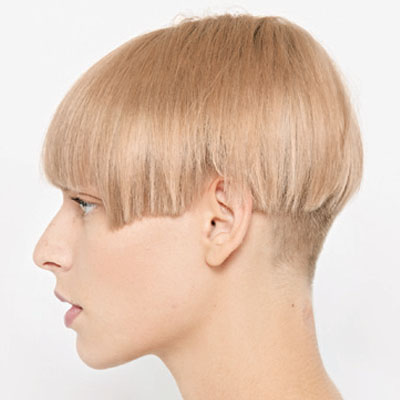
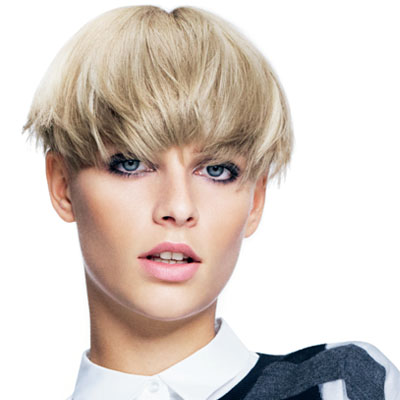
This disconnected undercut with a heavy top portion gets special treatment with a shine line that highlights its curves. The look is one of the standouts in Schwarzkopf Professional’s latest Essential Looks Collection. “When creating a disconnected undercut with a heavy overhanging top shape, always check the balance throughout the haircut,” advises Schwarzkopf’s Richard Ashforth. And here’s a color tip from Julie Alvarez: “When creating a shine line with color, always look at and follow the haircut shape even if you have to realign your sections.
COLOR FORMULAS 
- Formula A
Schwarzkopf Igora Vario Blond Cream Lightener + 3% (10-volume) Schwarzkopf Igora Royal Oil Developer
HOW-TO STEPS 
-

- Formula A
Schwarzkopf Igora Vario Blond Cream Lightener + 3% (10-volume) Schwarzkopf Igora Royal Oil Developer
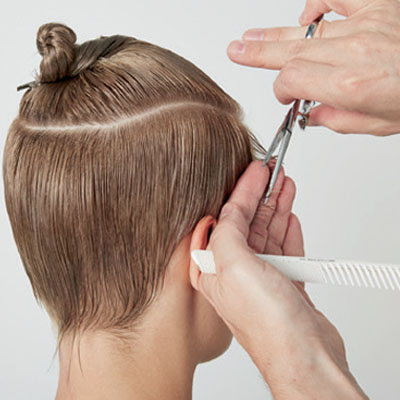
1Create a horseshoe section. Note that the shorter area underneath will not connect to the longer top area. Create a slight diagonal section at the front hairline and cut to desired length. The hair will be slightly longer through the temple area and shorter in the hairline area.
- Formula A
-

- Formula A
Schwarzkopf Igora Vario Blond Cream Lightener + 3% (10-volume) Schwarzkopf Igora Royal Oil Developer
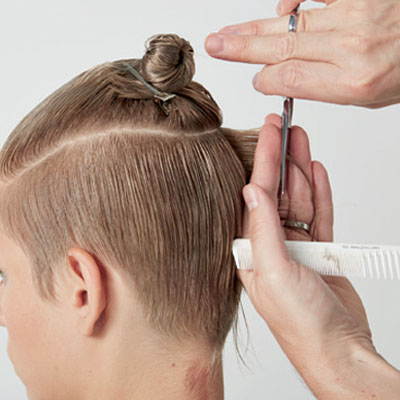
2Work to the center back in this manner, working with static, vertical sections. Repeat on the opposite side.
- Formula A
-

- Formula A
Schwarzkopf Igora Vario Blond Cream Lightener + 3% (10-volume) Schwarzkopf Igora Royal Oil Developer
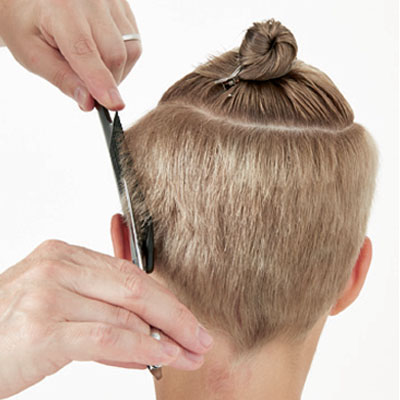
3Use a scissor-over-comb technique throughout the hairline and perimeter to refine the hairline and create a close-fitted head shape. Always work with the natural hairline growth pattern.
- Formula A
-

- Formula A
Schwarzkopf Igora Vario Blond Cream Lightener + 3% (10-volume) Schwarzkopf Igora Royal Oil Developer
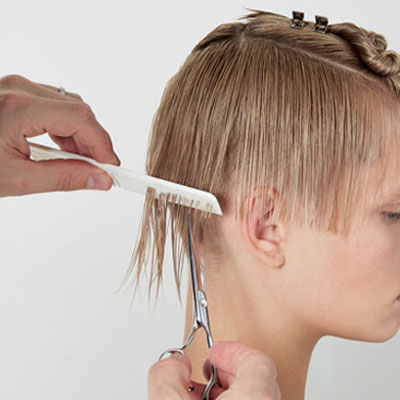
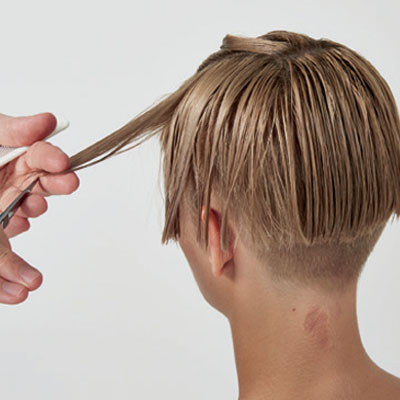
4Proceed to the side and back overhang. Create horizontal sections, and cut to desired length. Point-cut for softness, and cut through the comb for control. These sections will not connect to the underneath area.
- Formula A
-

- Formula A
Schwarzkopf Igora Vario Blond Cream Lightener + 3% (10-volume) Schwarzkopf Igora Royal Oil Developer
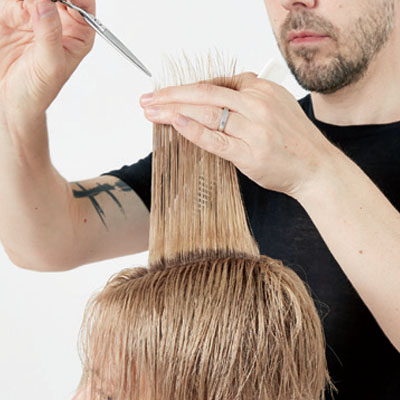
5Work up to the top of the head in this manner. Repeat the process on the opposite side. Elevate each parting slightly to soften the line.
- Formula A
-

- Formula A
Schwarzkopf Igora Vario Blond Cream Lightener + 3% (10-volume) Schwarzkopf Igora Royal Oil Developer
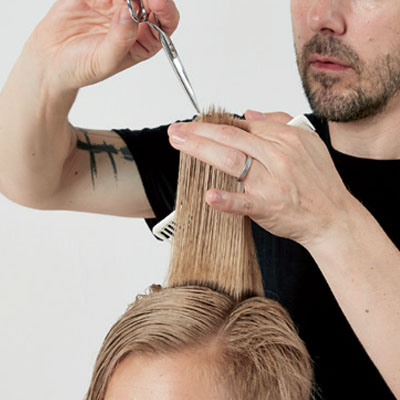
6Create a section from the crown to the front hairline and point-cut to create softness and texture. Continue working in parallel sections in this manner.
- Formula A
-

- Formula A
Schwarzkopf Igora Vario Blond Cream Lightener + 3% (10-volume) Schwarzkopf Igora Royal Oil Developer
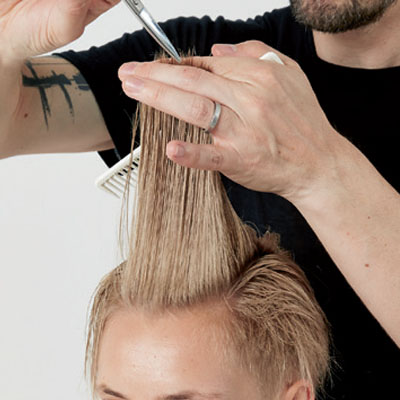
7Cross-check and refine the top section.
- Formula A
-

- Formula A
Schwarzkopf Igora Vario Blond Cream Lightener + 3% (10-volume) Schwarzkopf Igora Royal Oil Developer
8Continue cross-checking and point-cutting the top section, then blow-dry with a flat wrap method.
- Formula A
-

- Formula A
Schwarzkopf Igora Vario Blond Cream Lightener + 3% (10-volume) Schwarzkopf Igora Royal Oil Developer
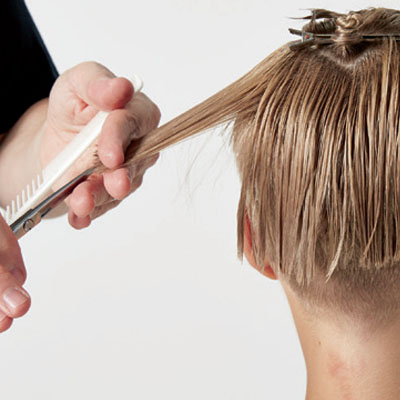
9Comb the hair to natural fall, and create the desired fringe length. Elevate and point-cut to create a soft line.
- Formula A
-

- Formula A
Schwarzkopf Igora Vario Blond Cream Lightener + 3% (10-volume) Schwarzkopf Igora Royal Oil Developer
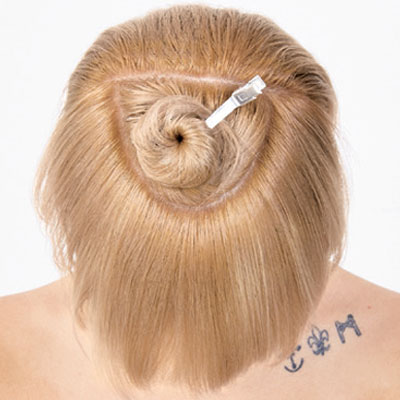
10Create a straight parting at the top of the crown and form a half circle to the apex.
- Formula A
-

- Formula A
Schwarzkopf Igora Vario Blond Cream Lightener + 3% (10-volume) Schwarzkopf Igora Royal Oil Developer
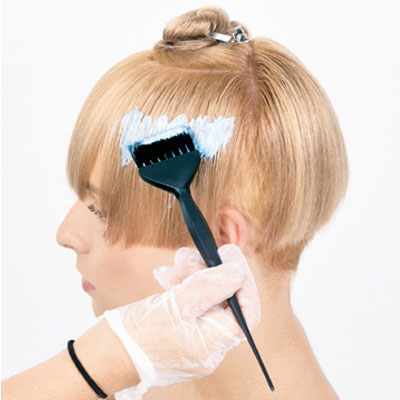
11Place the lightener 2 inches below the parietal ridge in a 2-inch section over the left ear.
- Formula A
-

- Formula A
Schwarzkopf Igora Vario Blond Cream Lightener + 3% (10-volume) Schwarzkopf Igora Royal Oil Developer
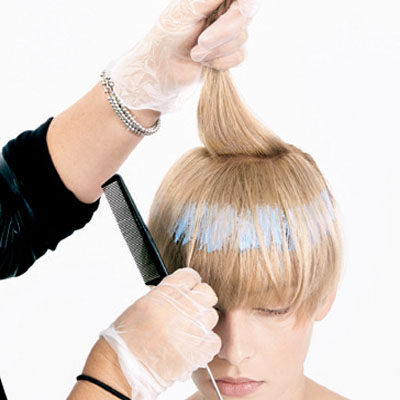
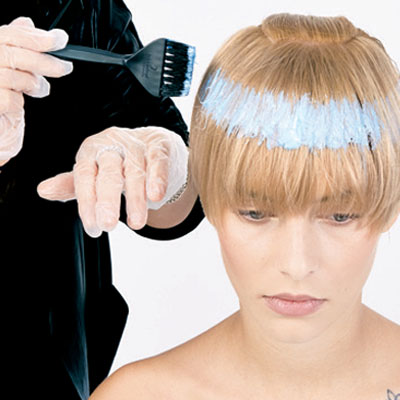
12Move toward the center, continuing the 2-inch application technique.
- Formula A
-

- Formula A
Schwarzkopf Igora Vario Blond Cream Lightener + 3% (10-volume) Schwarzkopf Igora Royal Oil Developer
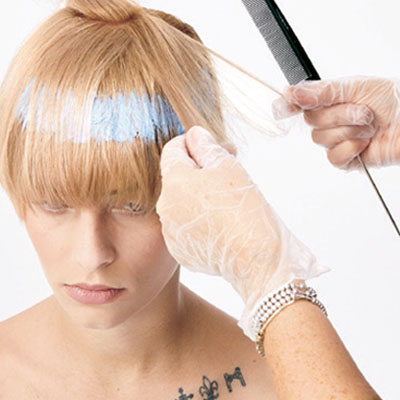
13Continue working to the right side above the ear, connecting the 2-inch application. Do not go beyond the right ear.
- Formula A
-

- Formula A
Schwarzkopf Igora Vario Blond Cream Lightener + 3% (10-volume) Schwarzkopf Igora Royal Oil Developer
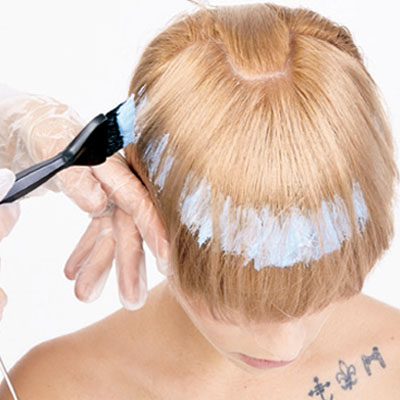
14Drop a veil section over the previous application. The amount of hair will be based on how bright you want the finished shine line to be.
- Formula A
-

- Formula A
Schwarzkopf Igora Vario Blond Cream Lightener + 3% (10-volume) Schwarzkopf Igora Royal Oil Developer
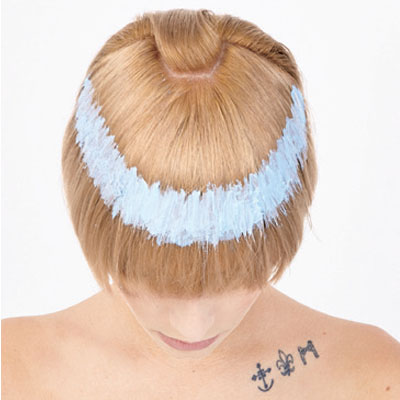
15Repeat steps 2 through 4.
- Formula A
-

- Formula A
Schwarzkopf Igora Vario Blond Cream Lightener + 3% (10-volume) Schwarzkopf Igora Royal Oil Developer
16Process until the desired level of lift is achieved.
- Formula A
-

- Formula A
Schwarzkopf Igora Vario Blond Cream Lightener + 3% (10-volume) Schwarzkopf Igora Royal Oil Developer
17Rinse, shampoo and condition with BC Color Freeze Shampoo and Conditioner. Blow-dry the hair, smooth the lengths with a flat iron and work in Osis+ Dust It for lift and separation.
- Formula A
-

- Formula A
Schwarzkopf Igora Vario Blond Cream Lightener + 3% (10-volume) Schwarzkopf Igora Royal Oil Developer
18Finished Look
- Formula A
More from
Richard Ashforth
YOU MIGHT LIKE THIS
-
Barbering
Men’s Disconnected Tapered Cut
-
Haircuts
Men’s Prohibition Undercut from Australian BTC Member Rob Mason
-
Hair
Men’s Disconnected, Asymmetric Undercut from Zak Mascolo
-
Haircuts
Men’s Disconnected Undercut
-
Barbering
The Beard Trim from WAHL Professional


TRENDING NOW!
-
Copper
What Is The "Cowboy Copper" Hair Trend? Here's What It Really Means...
-
BTC Hair Trend Report
The Biggest Haircut Trends of 2024
-
Uncategorized
TikTok's Viral "Scandinavian Hairline" Is Actually Not New...
-
BTC Hair Trend Report
Quiet Luxury Blonde: The "Old Money" Trend Explained
-
Business
3 Reasons Why Today's Highlights Are So Expensive
-
Blonde
3 Purple Toning Tips For Clear, Bright Blondes
-
Bobs
How to Avoid a Bulky Bob: 4 Techniques To Try
-
Curly
Long Layers: 10 Pro Tips + Common Cutting Mistakes


