Aveda Prism Collection “Liz” Step-by-Step


Advertisement


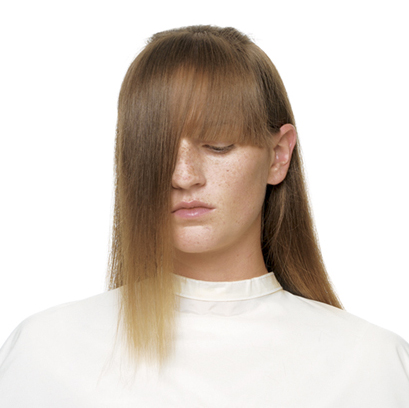
Establish a fringe appropriate for guest. Here, the line sits at the model's eye level.


Advertisement


Advertisement


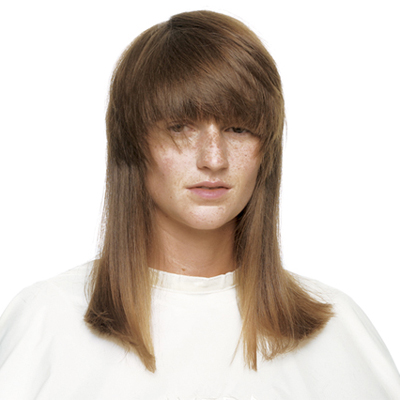
Completed cut. Ready for color.
Natural Starting Level: 6
Color Formulas:
Teak
Full Spectrum™ Protective Permanent Creme Hair Color 40g 6N Dark Blonde + 2g Dark Yellow/Orange Pure Tone + 2g Dark Red/Violet Pure Tone + 40ml 20-Volume Color Catalyst™ Creme Developer
Rosewood
Full Spectrum™ Protective Permanent Creme Hair Color 40g 7N Medium Blonde + 2g Dark Red/Violet Pure Tone + 40ml 30-Volume Color Catalyst™ Creme Developer
Beechwood
Shades of Enlightenment™ Advanced Lifting Creme Hair Color 20g Dusk Extra Light Ash Blonde + 20g Sunrise Extra Light Beige Blonde + 40ml 40-Volume Color Catalyst™ Creme Developer


Advertisement


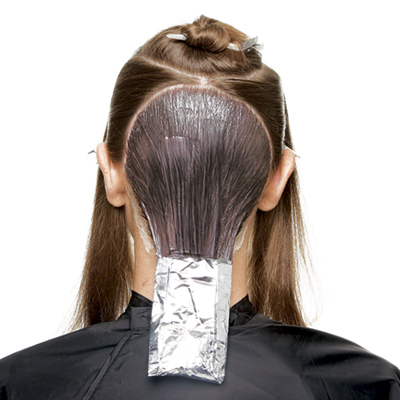
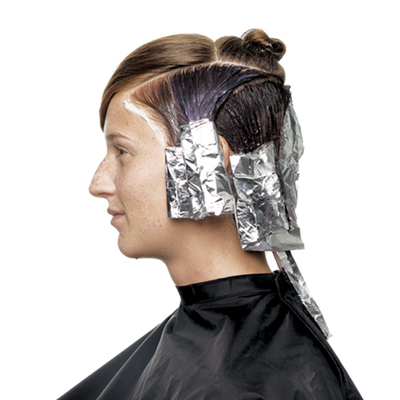
After apply Teak to the entire back panel, isolate entire section with foil.

Advertisement


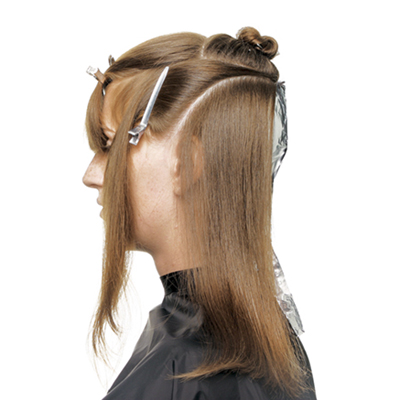
Create a crescent section mirroring the side of the horseshoe section from the point of distribution to the top of the ear. Repeat on the other side.


Advertisement


Advertisement


Aveda Prism Collection “Liz” Step-by-Step
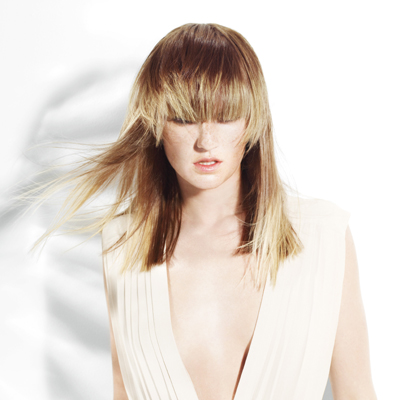
This look from Aveda’s “Prism” Collection is the perfect style to transition your client from summer into fall. A deep fringe and graduated, horizontal layers that frame the face, complemented with an all-over, layered color technique creates a look that’s full of dimension and surprise. Here’s the full cut and color how-to from Aveda’s Ricardo Dinis and Michael Black.
To learn more, go to www.aveda.com
Subscribe to behindthechair.com “On Paper” Magazine–4 Issues Only $29.95!
Next Issue: COLOR with Beth Minardi!
On Paper Keyword: celebrityaveda coloraveda
HOW-TO STEPS 
-
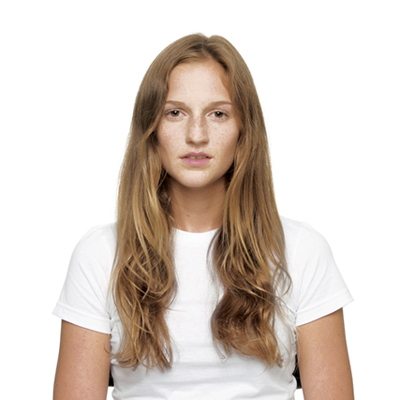
 1
1 -

 2
2Create a center part from crown to nape and sub-divide from ear to ear. Cut a blunt perimeter line.
-
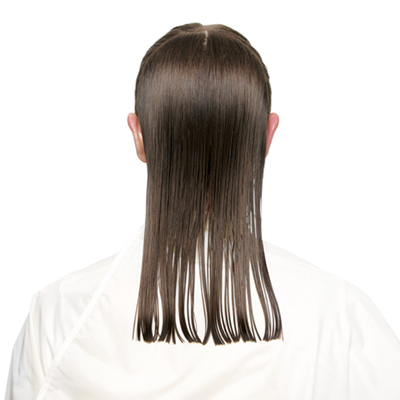
 3
3Drop successive subsections and use guide to complete perimeter shape.
-
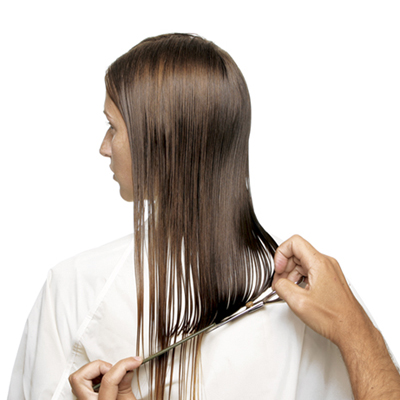
 4
4Release front left panel and connect to the back with model’s head turned. Angle cut slightly downward to ensure longer length. Repeat on front right panel.
-
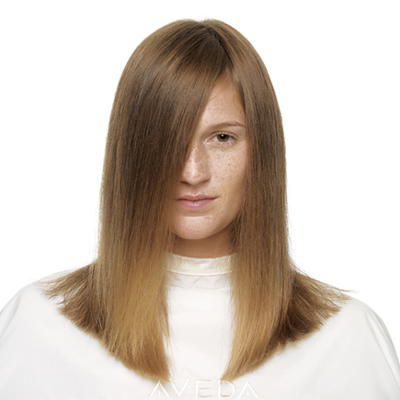
 5
5Finished perimeter shape. Blow dry using a flat wrap method.
-
 6
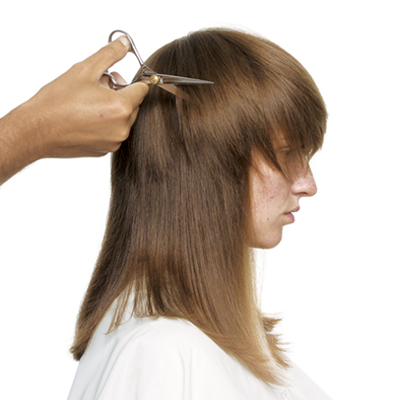
6Establish a fringe appropriate for guest. Here, the line sits at the model’s eye level.
-
 7
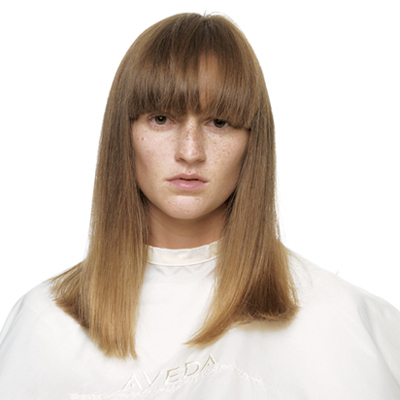
7Completed fringe.
-
 8
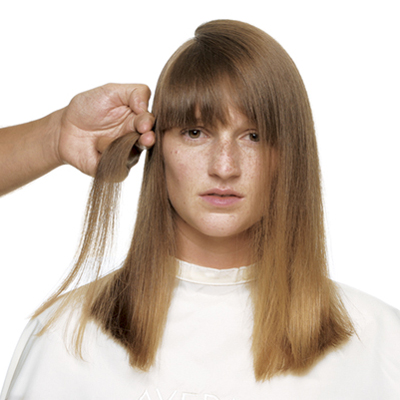
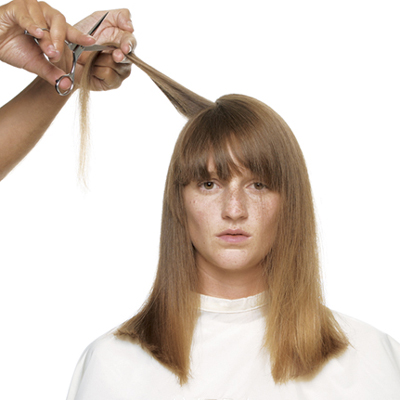
8Begin to create short, disconnected layers through the top of the head. Start guideline just below the fringe.
-
 9
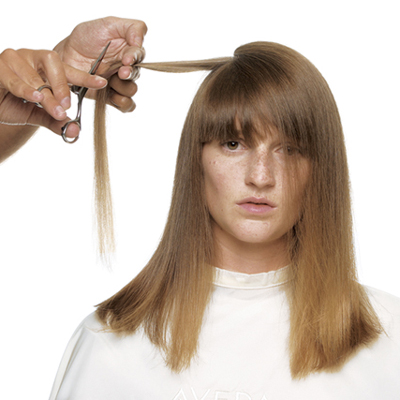
9Elevate section and point-cut.
-
 10
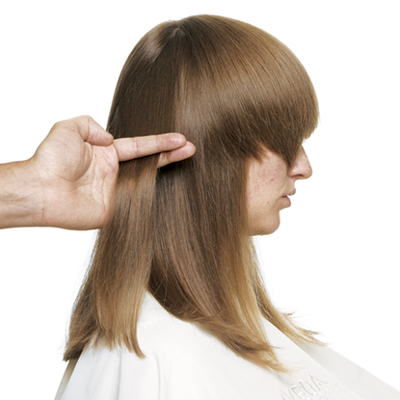
10Increase elevation with each subsection.
-
 11
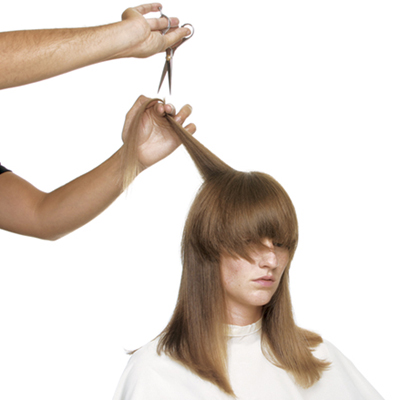
11Continue layering into the back panel of the hair cut.
-
 12
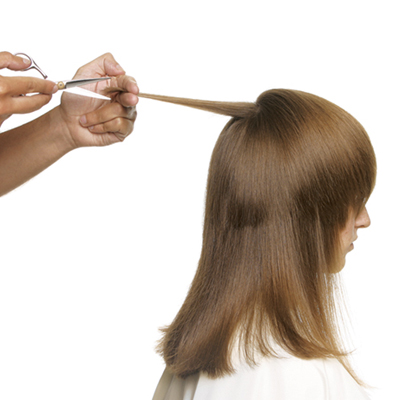
12Continue this technique through the back panel of hair. Take diagonal sections that follow the natural curvature of the head. Repeat on the other side.
-
 13
13Connect both sides through the top by point-cutting the point that is created.
-
 14
14Slice and point-cut to personalize the shape.
-
 15
15Completed cut. Ready for color.
Natural Starting Level: 6
Color Formulas:
Teak
Full Spectrum™ Protective Permanent Creme Hair Color 40g 6N Dark Blonde + 2g Dark Yellow/Orange Pure Tone + 2g Dark Red/Violet Pure Tone + 40ml 20-Volume Color Catalyst™ Creme DeveloperRosewood
Full Spectrum™ Protective Permanent Creme Hair Color 40g 7N Medium Blonde + 2g Dark Red/Violet Pure Tone + 40ml 30-Volume Color Catalyst™ Creme DeveloperBeechwood
Shades of Enlightenment™ Advanced Lifting Creme Hair Color 20g Dusk Extra Light Ash Blonde + 20g Sunrise Extra Light Beige Blonde + 40ml 40-Volume Color Catalyst™ Creme Developer -
 16
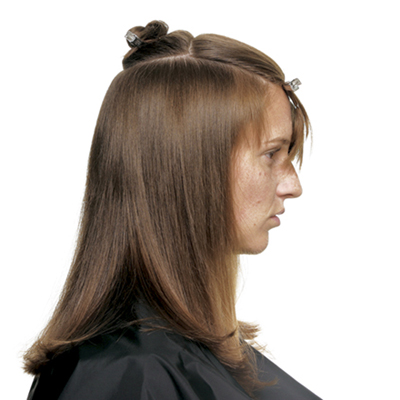
16Take a horseshoe section separating the layered top of the hair cut and clip hair away. (Photo shows section divided for control.)
-
 17
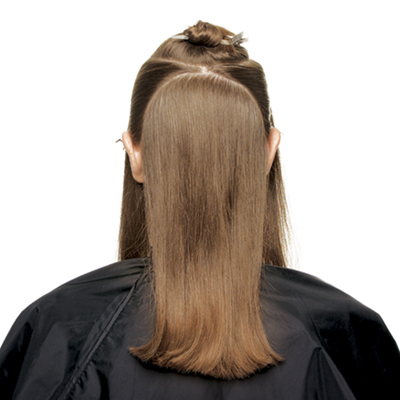
17Take another inverted horseshoe section from behind each ear and include the point of distribution.
-
 18
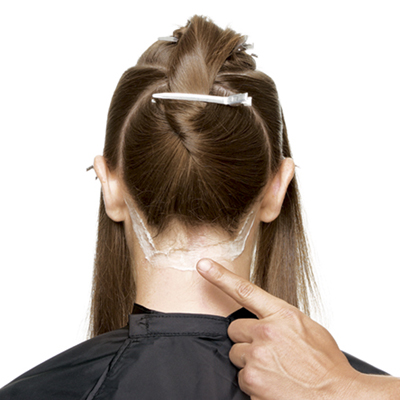
18Apply barrier cream to protect client’s skin from color.
-
 19
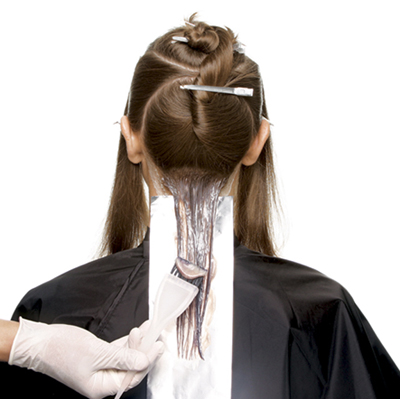
19Apply Teak to entire back panel.
-
 20
20After apply Teak to the entire back panel, isolate entire section with foil.
-
 21
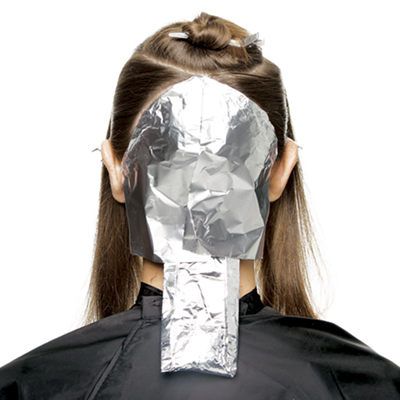
21Completed back panel.
-
 22
22Create a crescent section mirroring the side of the horseshoe section from the point of distribution to the top of the ear. Repeat on the other side.
-
 23
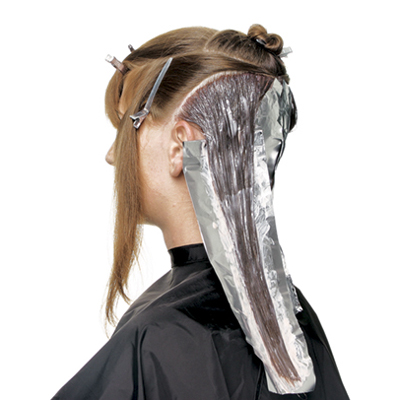
23Apply Rosewood to these panels.
-
 24
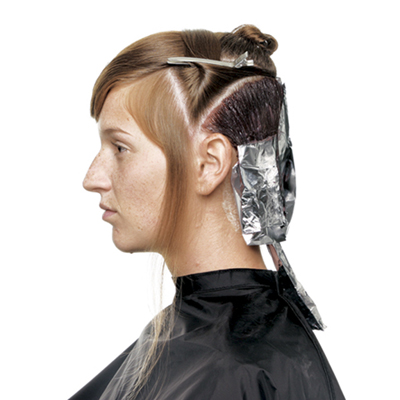
24Create a parting that parallels the front hairline from the top of the ear to the top section. Create an offset triangular-shaped section. Repeat on the oposite side of of the head.
-
 25
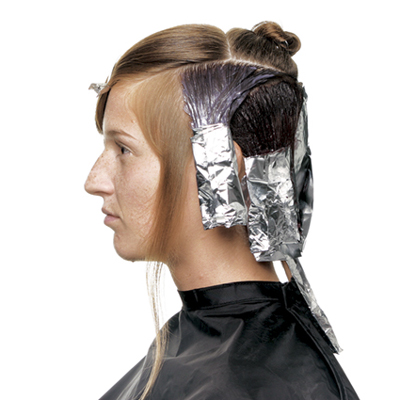
25Apply Beachwood to these panels. Isolate with foil.
-
 26
26Apply Teak to the remaining front hairline panels. Isolate with foiil.
-
 27
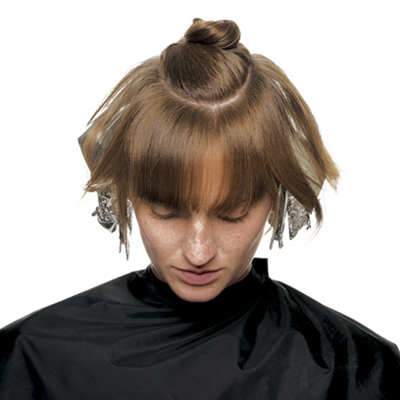
27Re-section the top panel, taking out a U-shaped fringe of hair.
-
 28
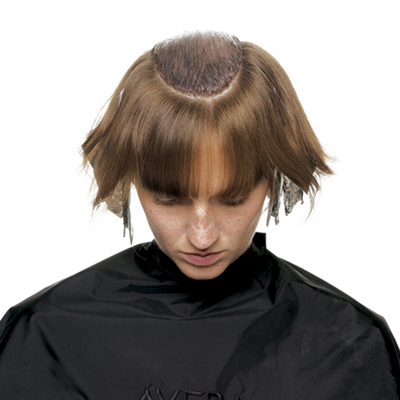
28Apply Teak to the entire panel.
-

 29
29Apply Rosewood to the remaining U-shaped subsection. Isolate with foil. Process according to directions. Shampoo and condition with Color Conserve products.
-
 30
30
YOU MIGHT LIKE THIS
-
Hair
On Paper Exclusive: Aveda’s Kiss From A Rose
-
Hair
Game Time Grooming
-
Hair
Progressive Layered Cut from Aveda
-
Hair Color
Violette from Aveda
-
Hair
Perky, Versatile Pixie


TRENDING NOW!
-
Copper
What Is The "Cowboy Copper" Hair Trend? Here's What It Really Means...
-
BTC Hair Trend Report
The Biggest Haircut Trends of 2024
-
Uncategorized
TikTok's Viral "Scandinavian Hairline" Is Actually Not New...
-
BTC Hair Trend Report
Quiet Luxury Blonde: The "Old Money" Trend Explained
-
Business
3 Reasons Why Today's Highlights Are So Expensive
-
Blonde
3 Purple Toning Tips For Clear, Bright Blondes
-
Bobs
How to Avoid a Bulky Bob: 4 Techniques To Try
-
Curly
Long Layers: 10 Pro Tips + Common Cutting Mistakes


