
GL Apps by Great Lengths Tape Method

Advertisement
Advertisement
GL Apps by Great Lengths Tape Method
HOW-TO STEPS 
-
 1
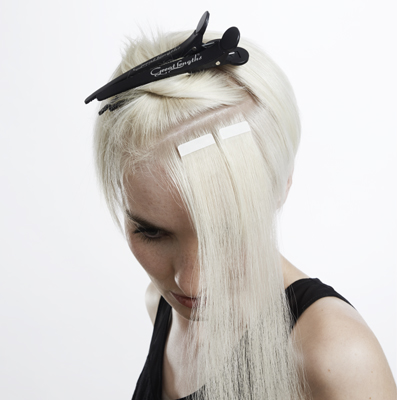
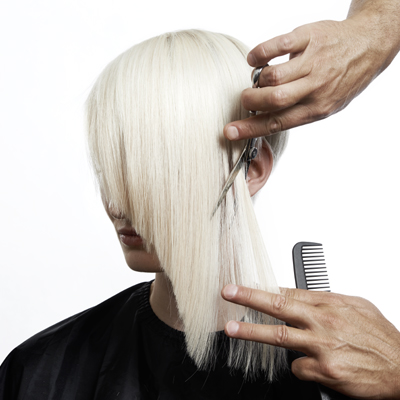
1Before
-
 2
2For the first subsection, take a diagonal part at the same angle that the GL Apps are going to be applied. This will determine how the hair will fall. Staying ¼-inch away from the scalp, place the GL Apps in the subsection by removing the protective film from the back of the GL App and firmly pressing onto the hair.
-
 3
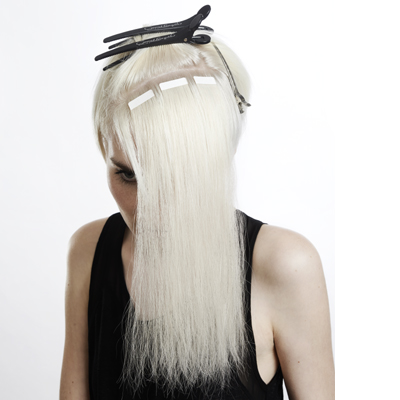
3When all GL Apps are applied in the subsection, use tweezers or the end of a metal tail comb to remove the protective film from the top of the GL App. Make sure not to touch the GL App adhesive.
-
 4
4Take a veil of hair above the GL App, making sure the veil is parallel to the part and that the hair is evenly spread over the GL App. Press firmly. The width of the veil of hair will be determined by the density of the client’s hair; there needs to be enough hair to cover the adhesive.
-
 5
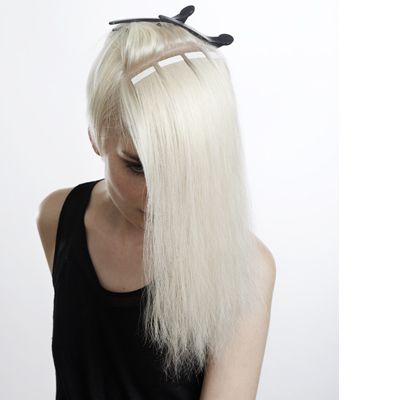
5Continue working in this manner up to the top of the fringe area.
-
 6
6As you work up the head, more GL Apps may be used to achieve the length and density desired. Keep in mind to always leave enough hair around perimeter and part line to cover the GL Apps. Once the GL Apps are applied, a Safety Band is placed on the back side of the GL App and then secured with the Connection Tool.
-
 7
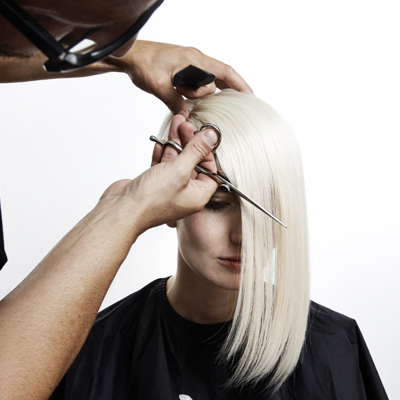
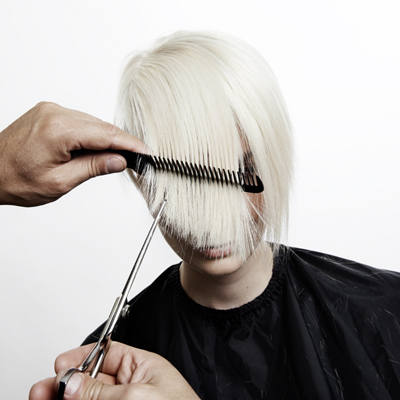
7To begin the haircut, smooth out hair and comb in the direction you want it to fall. Starting at the shortest part of the fringe, cut a slight curve continuing to the longest part of the fringe.
-
 8
8Next, starting at the top of the ear, cut at an angle to determine the finished desired length.
-
 9
9Elevate the fringe with your comb and point in with your shears to create softness. This model’s own hair is long enough that it did not need to be blended with the GL Apps applied in the interior.
-
 10
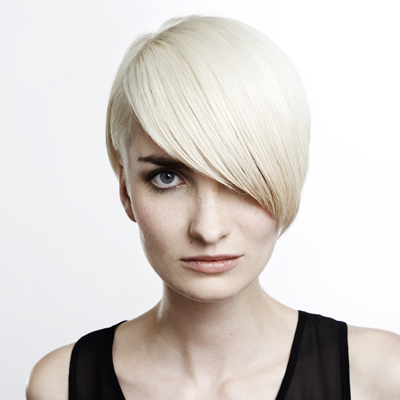
10Full asymmetrical fringe.
-
 11
11Learn how you and your salon can increase service volume by $20,000 – $50,000 in one year! Get Great Lengths certified!
YOU MIGHT LIKE THIS
-
GL Apps Extensions from Great Lengths
-
Orchid Ombré by Great Lengths
-
Asymmetrical-Twisted Updo
-
How-To: Fierce, Flowy Ombré
-
Blonde Dimension Extension Application
TRENDING NOW!
-
BTC Hair Trend Report
The Biggest Haircut Trends of 2024
-
Hair Color
Dark Brown To Smoked Pearl Blonde Transformation
-
Blonde
The Biggest Hair Color Trends of 2024
-
Copper
What Is The "Cowboy Copper" Hair Trend? Here's What It Really Means...
-
WHAT’S THE DEAL WITH POWDER SHAMPOOS? WHAT TO KNOW ABOUT WATERLESS CLEANSERS
-
Blonde
Guide To Gray: 5 Tips To Blend or Cover Stubborn Grays
-
Dry-Cutting
Bang Breakdown: How To Cut 2024's Top Fringe Trends
-
BTC Hair Trend Report
8 Hair Launches to Heat up Summer
