Struggling With Regrowth? Try This Beige Color Melt
3 Tips For Creating A Perfectly Blended Beige Color Melt
If your blonde client walks in with major Level 6 regrowth, don’t sweat it! While getting that perfect blend between dark roots and freshly bleached ends can be intimidating, all it takes is a smooth application technique to get the same seamless results again and again.
Here’s how London-based blonding specialist Suzi Angelina (@hair.by.suzi) creates trendy, perfectly blended beige color melts—no harsh lines included!
Click here to watch Suzi’s full color melt technique, complete with pro formulas and application tips!
1. This formulation strategy blends dark roots with ZERO banding.
Suzi’s root melt is all about creating a seamless transition between her client’s Level 6 roots and blonde ends. While a Level 6 really isn’t super dark, it can look very deep next to fresh blonde, which is why a smooth blend between the two shades is key.
Suzi achieved her color melt using a root color that was as close as possible to her client’s natural base—in this case, 6N—and a global ash gold toner to neutralize orange tones while maintaining desired brightness and warmth.
Here are Suzi’s post-lightener color melt formulas:
- Formula A (roots): Moroccanoil® Color Calypso Demi-Permanent Cream Color 6N + 5-volume Moroccanoil® Oxidative Cream Developer (1:2)
- Formula B (toner): Moroccanoil® Color Calypso Demi-Permanent Cream Color 9.13/9BG Very Light Ash Gold + Moroccanoil® Oxidative Cream Developer (1:2)
Pro tip: It’s tempting to worry about your Level 9 highlights turning too dark after your root application, but trust the process! Rinsing your root formula too soon will result in an orange band.
Swipe to see Suzi’s blended beige transformation:

Seamless color for blondes, brondes and brunettes—Click here to browse Moroccanoil®’s NEW ash gold shades!
2. Control color placement using this application technique.
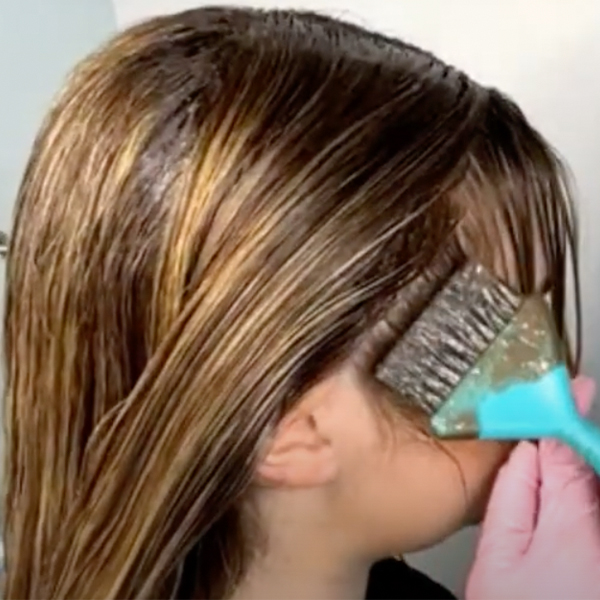
Starting at the crown in the back of the hair, apply the root formula by gently tapping at the very top of each section. Why? It’s essential not to drag the root color too far down the section by accident. Doing so will erase the all the brightening and blonding work you did previously, elongating your light-to-dark gradient.
(Psst…Starting in the back of the hair also helps prevent your brighter hairline pieces from turning muddy as you work through other sections!)
Pro tip: As you apply the root color, make sure the hair is staying damp by applying water to subsequent sections throughout the service. If the hair is dry or drying, you’ll have a more difficult time blending the Level 6 roots with the blonde ends when toning.
Suzi’s controlled root color application:

3. PSA: Stop applying toner at the shampoo bowl.
Sure, it’s easy to globally apply your toner at the shampoo bowl, but Suzi recommends staying at your station and applying it section by section instead. Sectioning at the chair allows you to pay closer attention to the fine details and see exactly where the toner is being applied. This is especially critical when working with darker root formulas, where applying the toner all at once can risk transferring them to lighter areas.
Want to try Suzi’s signature blending technique? Click here for the perfect balance of ash and gold tones to recreate her trendy, seamless beige color!
More from
Moroccanoil®
-
Demi-Permanent Color
Color Calypso Demi-Permanent Cream Color
-
Haircare
Moroccanoil® Treatment Purple
-
Gray
Brassy Grown-Out Beige To Natural Gray
-
Brunette
Backlit Golden Brunette
-
Blonde
Sandy Biscoff Blonde
-
Blowouts
Bob Styling Guide: 5 Ways To Style Short Hair
-
Haircare
Moisture Repair Shampoo
-
Blonde
Old Money Blonde Bob
-
Blonde
The Biggest Hair Color Trends of 2024
-
BTC Hair Trend Report
The Biggest Haircut Trends of 2024
-
Conditioners
Frizz Control Shampoo & Conditioner
-
Brunette
8 Brunette Formulas To Screenshot Now
-
Hair Color
Moroccanoil® Chocolates
-
Balayage
5 Tips For A Soft, “Expensive” Face-Frame
-
Celebrity Color
Meghann Fahy’s Strawberry Blonde
-
Awards Shows
The Best Celebrity Hair Colors & Formulas From The 2024 Golden Globes
-
Balayage
How To Turn A Brassy Lift Into A Brunette Balayage
-
BTC Hair Trend Report
Quiet Luxury Blonde: The “Old Money” Trend Explained
-
BTC Hair Trend Report
The Biggest Haircut Trends of Fall & Winter 2023
-
BTC Hair Trend Report
Your Guide To Fall & Winter 2023’s Hair Color Trends
-
Blonde
When To Formulate With Ash Gold Toners
-
Business
Dear Stylists, Why Continued Education Is Your Most Important Investment
-
Bobs
The ’90s Bob: How To Cut & Style This Trending Haircut
-
Business
Instagram for Hairdressers: 8 Ways To Grow Your Business


