
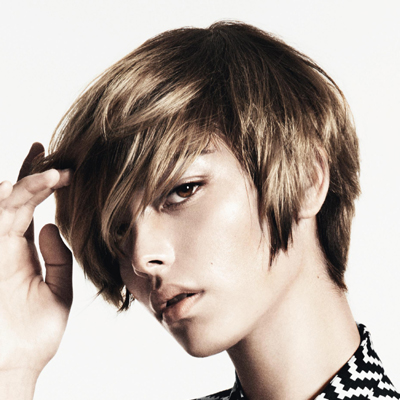
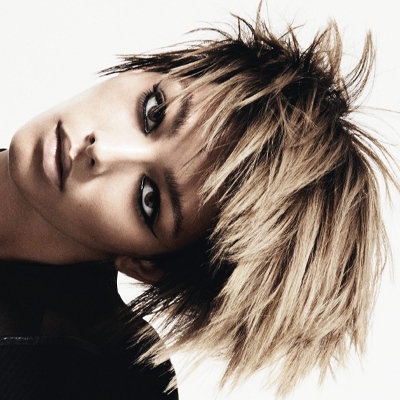
Sleek Swan Cut and Color from Davines

Advertisement
Advertisement
Advertisement
Sleek Swan Cut and Color from Davines
HOW-TO STEPS 
-
 1
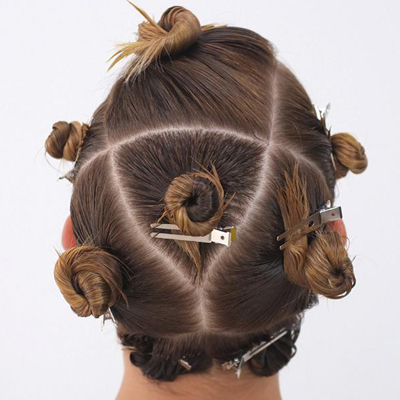
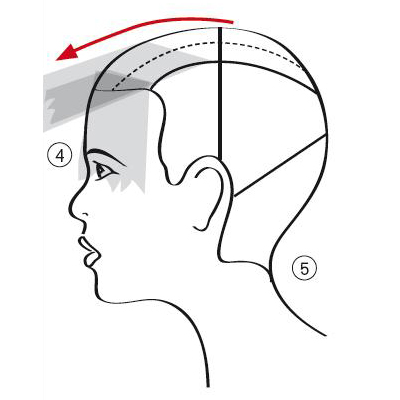
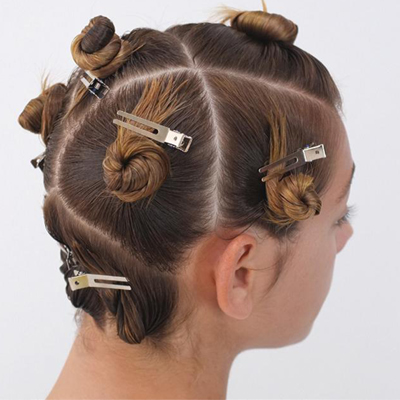
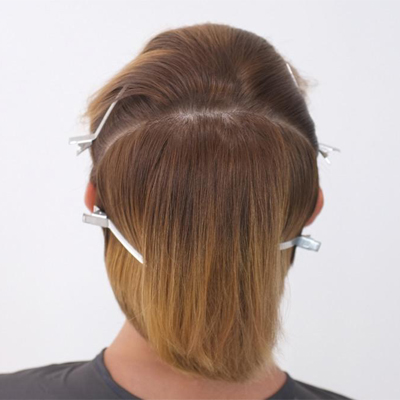
1Sectioning: Divide the head from ear to ear, then create a deep side part. Create another parting on the other side, resulting in a rectangular section extending along the top area. Next, create a triangular section that covers the crown area, with the vertex extending to the occipital and the top connecting with the rectangle in front. From the vertex, divide the triangle vertically to the nape. From the occipital bone to the high point of the ears, create two diagonal forward, 45-degree sections. Mist each section with Davines Dede Leave-In Mist, twist lightly and pin.
-
 2
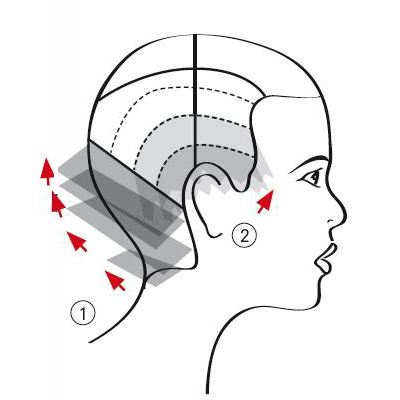
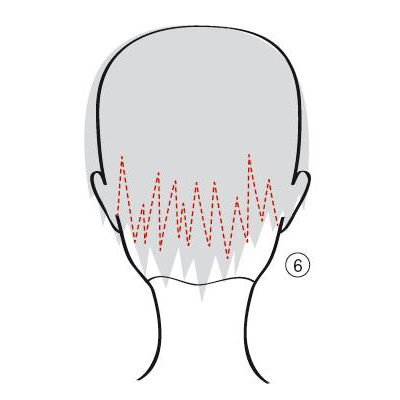
2Begin cutting in the nape area. Create a diagonal section, lift it straight out, keeping fingers at the roots and parallel to the section. Cut blunt—the section should be close and tight. Create another diagonal section and cut tight, with fingers close to the scalp. Continue working in this manner until one diagonal subsection remains. Elevate this last section at a lower angle to establish a soft weight line. Repeat on the other side.
-
 3
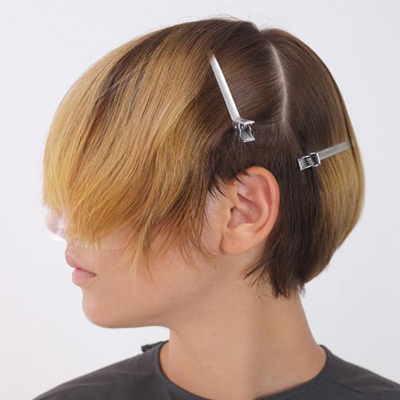
3Move to the side. Create a slightly rounded, diagonal forward section. Continue working back around the ear in a circular shape. In the sideburn area, create a small, diagonal back section. Lift to 90 degrees; hold the fingers diagonally at the scalp and blunt cut to finger length. Elevate the rest of the section over the ears horizontally, follow the guideline from the sideburn and cut the hair blunt. Follow and angle the fingers around the ear and cut, connecting it to the nape length. Create another section parallel to the previous one, hold it with fingers parallel to the section and cut blunt, following the guideline underneath. Continue around the ear, connecting it to the nape length. Repeat on the opposite side of the head. You have now created a short undercut.
-
 4
4Move to the third section on the side, and let the hair fall naturally. Establish a new length that is about 1¼ inches longer than the undercut. Cut this hair with the razor moving forward from the side. The length will increase slightly toward the front. Connect this with the back section area, and razor-cut toward the nape in the same circular shape as before. Allow the hair to fall naturally, but keep your fingers angled when razor-cutting. You will ultimately be increase the length in the back. Create another horizontal section on the side. Hold it at a little less than 90 degrees. Following the guideline underneath, continue cutting in the same manner as before, following the shape in the back. Do not overdirect the hair to the sides when elevating, just angle the fingers around as you follow the guideline. Repeat the procedure on the opposite side.
-
 5
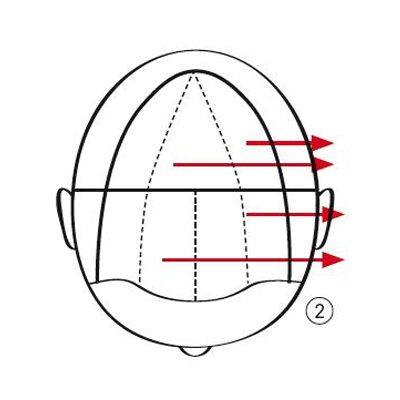
5In the top area, establish the parting. Create a triangle section over the crown and divide it vertically in the middle. Split the two crown sections into two additional diagonal sections and connect them with horizontal sections by elevating the hair out to the level of the guide underneath. On the right side, cut the crown section with the same method.
-
 6
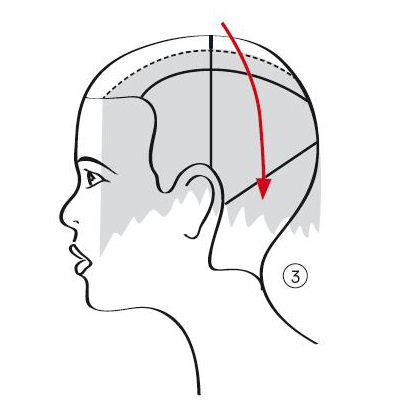
6Create a slightly curved, horizontal section in the front. Comb the hair forward. With low elevation, razor-cut the desired length in a concave shape that’s parallel to the section. Elevate the next parallel section slightly higher and razor-cut. Continue working back toward the crown until you run out of hair. Finish the top area by flipping all of the hair from right to left across the parting and razoring off the corners.
-
 7
7Return to the nape. Begin in the center and razor vertical subsections to reduce the points and form a squarer shape. Retain the corners on the sides. Retain the corners on the sides.
-
 8
8Natural base: 7, 1
Cosmetic base: roots 8,33, ends 9,3, + lots of yellow parts from previous bleachColor Formula
30 g A New Colour 6,11 + 30 g A New Colour 4,0 + 60 g A New Colour
Cream Base + 120 g A New Colour Activator 20 vol.
Mixing ratio: 1:1:2
Developing time: 35 min.Toning formula
10 g A New Colour 10,11 + 40 g A New Colour Cream Base + 80 g A
New Colour Activator 10 vol.
Mixing ratio: *creative mixing ratio
Developing time: from 1 to 5 min depending from hair porosity – check visually.
To remove the toning formula: use Naturaltech Nourishing Shampoo and Naturaltech Nourishing
Vegetarian Miracle Conditioner.
To remove the color formula, use Essential Nounou Shampoo. -
 9
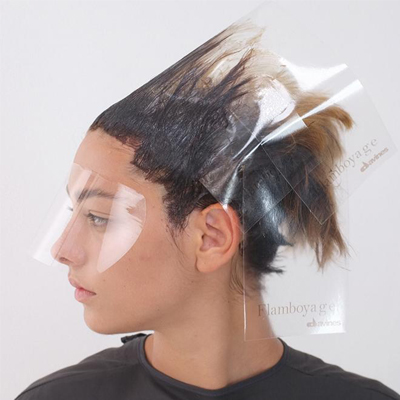
9Place a Flamboyage Meche from ear to ear over the front section, parallel to the parting. At the top of the head, create a horizontal section and apply Formula A from the root out to about 1½ to 2 inches. Place the section over the Flamboyage Meche and continue working back in this manner. Use the faded root method to blend the color carefully between the formula and the natural ends. At the nape, apply the color roots to ends. When the back is complete, push the hair back with a tail comb, and remove the Flamboyage Meche.
-
 10
10Apply a Flamboyage Meche ear to ear across the hair that has been colored. At the parting, apply the color, this time working forward towards the front bringing each section back to the Flamboyage Meche.
-
 11
11Isolate a 1/2- to 3/4-inch hairline section. Place a Flamboyage Meche over the colored hair and another on top. Apply Formula A to the hairline from roots to ends and separate with a Flamboyage Meche. This application will create a subtle shadow and the appearance of depth. Process for 35 minutes and shampoo with Davines Essential Nounou Shampoo. Tone all strands with Formula B. Process for 1 to 5 minutes, depending on hair porosity, and shampoo with Davines Naturaltech Nourishing Shampoo and Naturaltech Nourishing Vegetarian Miracle Conditioner.
-
 12
12 -
YOU MIGHT LIKE THIS
-
Balayage
A New Way to Balayage, by Angelo Seminara for Davines
-
Balayage
Clean, White Blonde by Angelo Seminara for Davines
-
Hair
Modern Pixie from Angelo Seminara
-
Balayage
Copper Lights from Davines A New Colour
-
Blonde
Warm Blonde Textured Bob from Angelo Seminara
TRENDING NOW!
-
BTC Hair Trend Report
The Biggest Haircut Trends of 2024
-
Copper
What Is The "Cowboy Copper" Hair Trend? Here's What It Really Means...
-
Uncategorized
TikTok's Viral "Scandinavian Hairline" Is Actually Not New...
-
Business
3 Reasons Why Today's Highlights Are So Expensive
-
BTC Hair Trend Report
Quiet Luxury Blonde: The "Old Money" Trend Explained
-
Blonde
3 Purple Toning Tips For Clear, Bright Blondes
-
Blonde
Toning: 5 Fast Purple Shampoo Ideas For Blondes, Silver & Gray
-
Bobs
How to Avoid a Bulky Bob: 4 Techniques To Try

