
Blonde Lowlights: 4 Tips For Adding Internal Depth

4 Placement Tips For Lowlighting Lived-In Blondes
Is your high-maintenance blonde ready to transition to a low-maintenance look? Keep reading! To help you prepare for this HUGE client request in 2023, we’ve gathered three lowlight placement tips to help you create dimensional, lived-in blondes with rich, internal depth—plus, all the formulas you need.
1. Use this smart foil placement to create depth at the crown:
Reverse balayage is the perfect way to introduce depth into blondes who are ready to dip into something a little more lived-in. Keep scrolling to learn BTC Team Member Sarah Cabral (@sarahzstylz)’s signature foil placement to add depth into blondes (PS: Keep scrolling to get her formulas!)
Check out the before and after below:
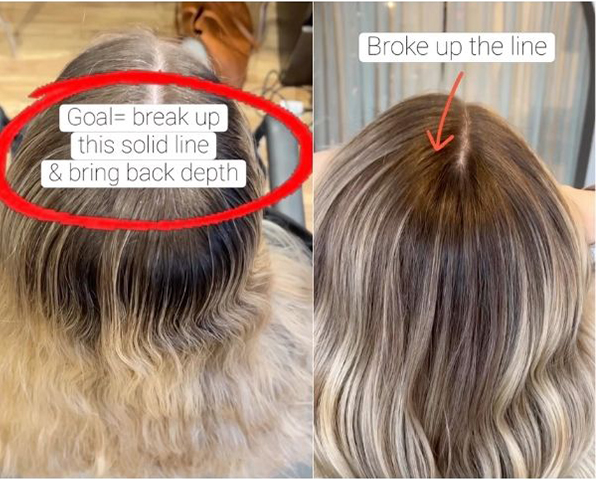
Sarah’s Lowlighting Cheat Sheet: Screenshot This For Later!
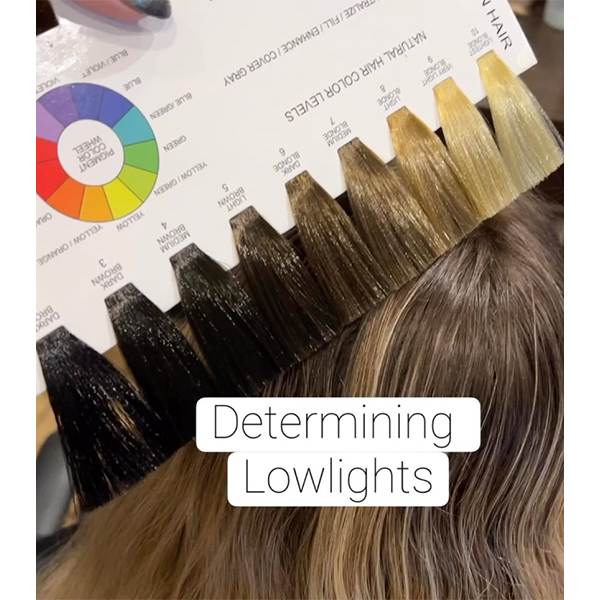
- Formulate lowlights one level lighter than the client’s natural level.
- NEVER formulate darker than the natural level.
- For blondes, don’t pull the lowlights all the way through the ends.
- Use a demi-permanent color to lowlight (unless it’s a color correction—then, try a permanent color.)
- “Depending on how much warmth (underlying pigment) they have in their hair, this will determine if I fill (add warmth) to the formula,” says Sarah. “It will also be determined by the color line that I am using. [For] example, if the line goes more toward warm neutrals, I usually don’t fill.”
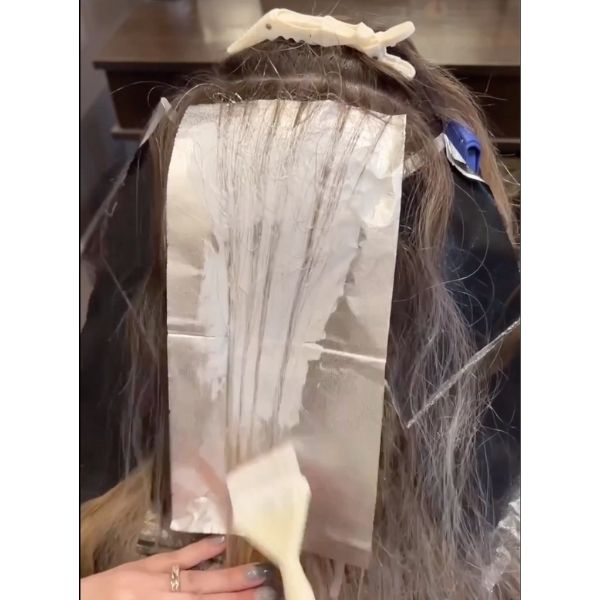
Step 1: Use a chunky weave and apply Formula A throughout the head.
Pro Tip: Sarah likes to formulate a shade lighter than the client’s natural color for lowlights.

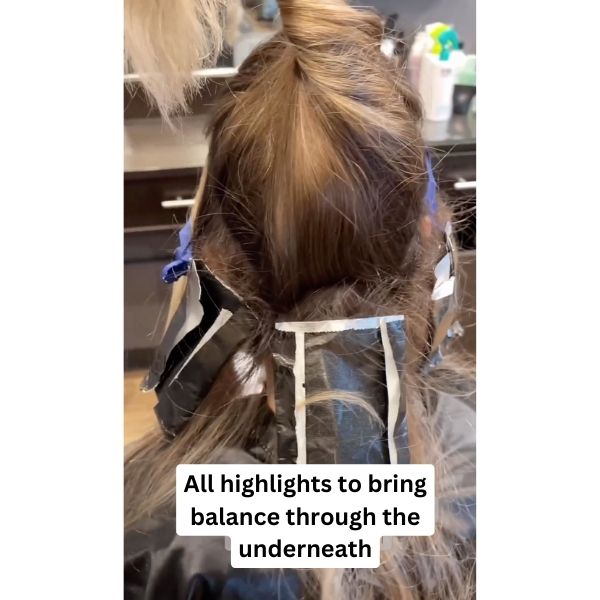
Step 2: Highlight throughout the head where brightness is needed with Formula B. This will bring balance through the interior underneath.
Step 3: With Formula B, highlight using a fine weave near the hairline and place it on top of a chunky lowlight (Formula A) to create maximum depth. Rinse and wash.
Step 4: Apply Formula C to Zone 1 and Formula D to Zones 2 and 3. Blend the root melt into the mids.
Click the beaker to get Sarah’s formulas!
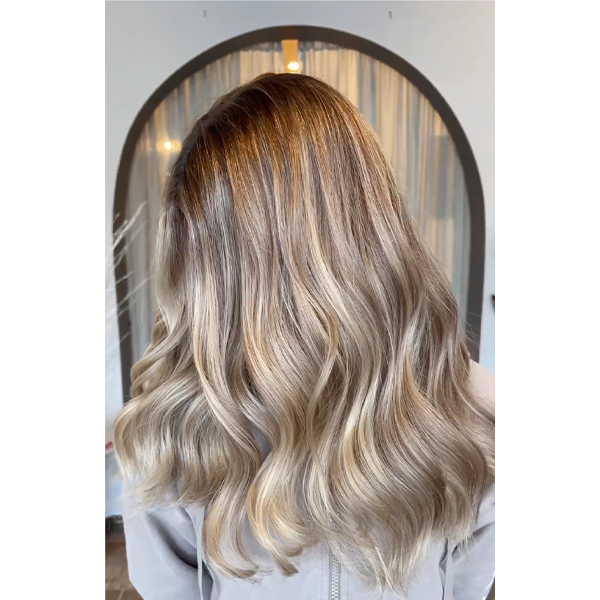
Photo Credit: Instagram via @sarahzstylz
Earn 50% commission on retail—click here!
2. Don’t skip this step: Fill the hair with warmth.
San Diego-based blonding specialist Summer Labayen (@manely.summer) also took her client to the dark(er) sidewith a reverse balayage technique—get her formulas below!
Step 1. Use a 13-foil placement for a bold money piece and a few balayage slices. Summer mixes Jack Winn Pro Brilliant Lightener and Brilliant Diamond together (Formula A) for a clean lift without swelling.
Step 2. Add depth with 15 lowlights in a herringbone pattern throughout the head. Remember: “Less is more with lowlights,” Summer says.
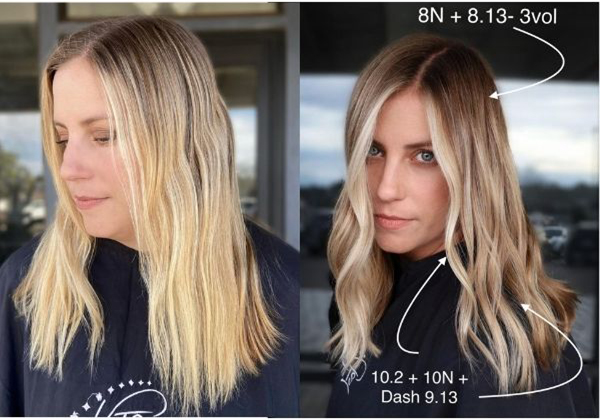
Photo Credit: Instagram via @manely.summer
3. Try this genius trick to ensure blend!
When creating lived-in looks, oftentimes you don’t want to paint all the way up to the scalp. For dimensional foils, Summer overdirects the back foils toward the face for extra blend insurance (creating a diagonal back.)
Pro Tip: Feather or tease your sections for the most-blended look.
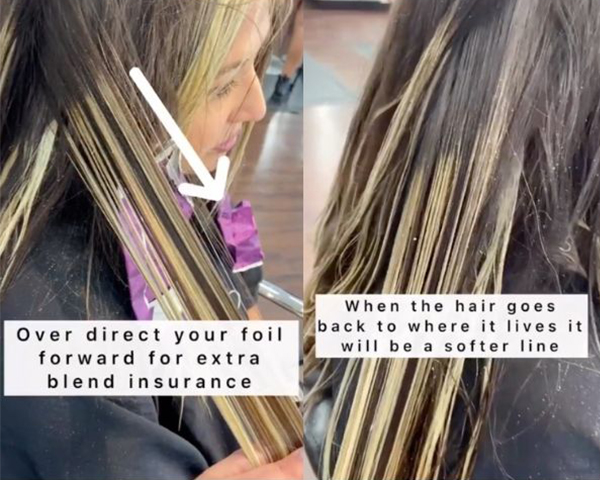
Photo Credit: Instagram via @manely.summer
4. Here’s a quick way to add depth:
A root melt—especially when paired when lowlights—will add even more contrast to your look than lowlighting alone. Try them both for maximum internal depth.
Pro Tip: For clients that like a bright face frame, try applying toner in the last five minutes of processing.
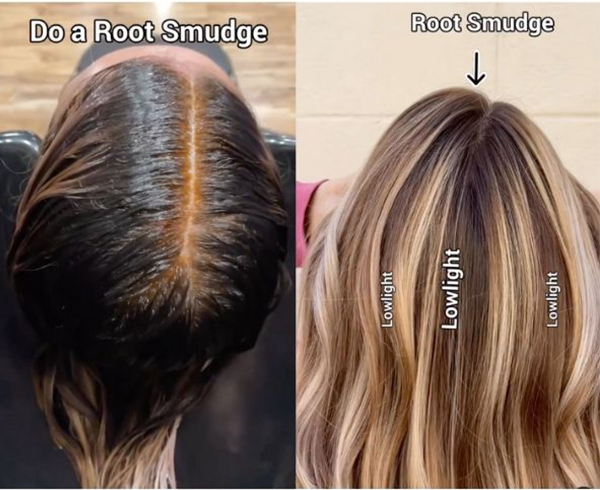
Photo Credit: Instagram via @sarahzstylz
Get cash back for stocking your salon—here’s how!
Products Used
This content is sponsored.
More from
Jack Winn Pro
-
News
Jack Winn Pro Supports Equity, Inclusion & LGBTQ+ Rights
-
Demi-Permanent Color
Restore
-
Permanent Color
Envelop
-
#ONESHOT HAIR AWARDS
The BTC Show 2022: 10 Things We Saw
-
The BTC Show
#THEBTCSHOW 2022
-
4 Things Stylists Must Do To Prepare For Inflation
-
Barbering
5 Genius Blonding, Color + Cutting Cheats To Try Now
-
BTC Events
#thebtcshow 2021
-
The BTC Show 2021
Balayage & Blonding Co-Lab #2 at #thebtcshow 2021
-
BTC Events
Connection Center at #thebtcshow 2021
-
Business
5 Tips To Generate Income Without Physically Working Behind The Chair
-
Business
How To Stay Profitable In Quarantine + When You’re Back In The Salon
-
Coronavirus
Earn 50% Commission With Jack Winn Pro
-
BTC Events
BTC “On Tour” Dallas Show—Here’s Everything That Happened!
-
BTC Events
Everything That Went Down At BTC “ON TOUR” Chicago
-
Balayage
Hair Painting Tips for Brighter Blondes
-
Balayage
Balayage: 3 Tips For Formulating & Controlling Brightness
-
BTC Events
BTC’s “On Tour” Show Is Coming To Chicago—Here’s The Artist Lineup!
-
#THEBTCSHOW 2018
2 Balayage Tips For Achieving A Soft & Diffused Money Piece
-
Balayage
Dimensional Ribbons Off A Level 3 Base
-
Blonde
Erin Andrews’ Dimensional Blonde & Gray Coverage Color Formulas
-
Balayage
Rooty Blonde Melt
-
Balayage
Blonde & Blended Top Knot

