
Balayage: 3 Tips For Formulating & Controlling Brightness

3 Balayage Tips For Formulating And Manipulating Brightness
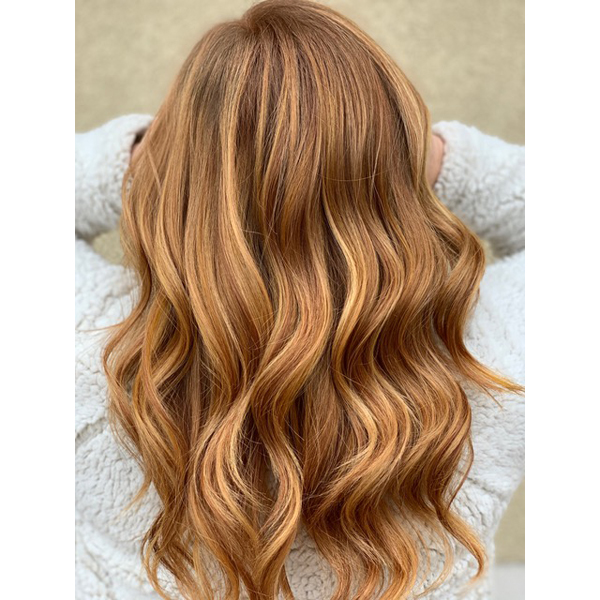
You know your balayage is borderline perfection if everything is seamlessly blended with just the right amount of dimension and brightness. So below, we’re sharing three tips from Jack Winn (@jackwinnpro) that’ll help you achieve that every time. From how to formulate if you’re hand painting vs. using a balayage board to how to control where the most brightness lays, keep scrolling to learn more!
Products Used
1. Formulating The Lightener
Think of sour cream at room temp—not because we want to gross you out but because that’s what the consistency of the lightening formula should be. Just mix 1 part Jack Winn Color Brilliant Paint Lightener to 2 parts activator and whisk. It’ll look thin and runny at first but should start to thicken up after about 30 seconds of whisking. “When you first mix it, don’t add more lightener because you think it’ll be too runny,” advises Jack. “If you mix to consistency without knowing that…you’ll have mud.”
2. Prefer To Paint With A Balayage Board?
If yes, then skip the whisking part when formulating the lightener and, instead, gently fold the mix using a brush and let it be clumpy. Why? It’ll give more lift. Think of it this way: Because it’s not perfectly mixed, those clumps still have a small amount of powder in them. When scooping them out and smoothing them onto the paddle, you’ll break those down and really activate the lightener right when it touches the hair.
Balayage isn’t reserved for natural colors only! Click through the slideshow for examples of sun-kissed blends and dimensional fashion colors.
3. The Best Place To Start
It all comes down to preference but for Jack, there are two reasons why he starts his full balayage in the front: He likes his clients the most at the beginning of the appointment (so relatable 😂) and he also wants the face-framing area to have more brightness than the back so it needs the extra time to process. Of course, we can’t talk about the face-frame and not talk about the money piece. The trick is to create brightness that is also soft and diffused. Scratching your head? Click here to learn Jack’s technique!
Pro Tip: Always keep a dry brush nearby on your tray for times when you apply too much lightener or just need to smooth out a transition area.
More from
Jack Winn Pro
-
News
Jack Winn Pro Supports Equity, Inclusion & LGBTQ+ Rights
-
Balayage
Blonde Lowlights: 4 Tips For Adding Internal Depth
-
Demi-Permanent Color
Restore
-
Permanent Color
Envelop
-
#ONESHOT HAIR AWARDS
The BTC Show 2022: 10 Things We Saw
-
The BTC Show
#THEBTCSHOW 2022
-
4 Things Stylists Must Do To Prepare For Inflation
-
Barbering
5 Genius Blonding, Color + Cutting Cheats To Try Now
-
BTC Events
#thebtcshow 2021
-
The BTC Show 2021
Balayage & Blonding Co-Lab #2 at #thebtcshow 2021
-
BTC Events
Connection Center at #thebtcshow 2021
-
Business
5 Tips To Generate Income Without Physically Working Behind The Chair
-
Business
How To Stay Profitable In Quarantine + When You’re Back In The Salon
-
Coronavirus
Earn 50% Commission With Jack Winn Pro
-
BTC Events
BTC “On Tour” Dallas Show—Here’s Everything That Happened!
-
BTC Events
Everything That Went Down At BTC “ON TOUR” Chicago
-
Balayage
Hair Painting Tips for Brighter Blondes
-
BTC Events
BTC’s “On Tour” Show Is Coming To Chicago—Here’s The Artist Lineup!
-
#THEBTCSHOW 2018
2 Balayage Tips For Achieving A Soft & Diffused Money Piece
-
Balayage
Dimensional Ribbons Off A Level 3 Base
-
Blonde
Erin Andrews’ Dimensional Blonde & Gray Coverage Color Formulas
-
Balayage
Rooty Blonde Melt
-
Balayage
Blonde & Blended Top Knot
