Hair Painting Tips for Brighter Blondes
Hair Painting Tips for Brighter Blondes
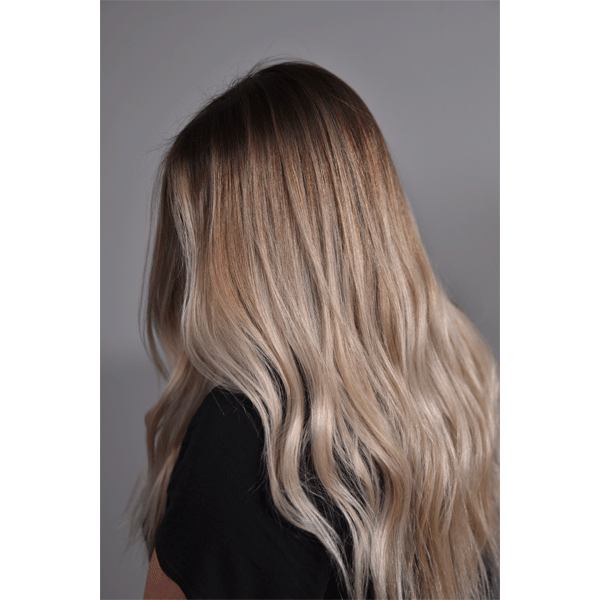
Clients are ready for summer! Know what that means? BRIGHT BLONDES! Want to know how to bring blonde clients brighter than the sun? We had BTC Team Member Mallery Share (@hellobalayage) bring her blending expertise to The BTC House in Los Angeles to teach her balayage technique and share her hair painting tips for lifting clients’ hair to a beach bright hue. Scroll down for all of Mallery’s tips and click here to purchase her balayage class on BTC University.

Proper Consistency
For this technique, Mallery used Jack Winn Color Brilliant Paint Lightener with Virtue® ColorKick™ for additional lift. Mallery prefers the Brilliant Paint Lightener because it only hardens slightly on the surface, but keeps its moisture when painted underneath. The mixed formula should have the consistency of yogurt (slides just a little bit when the bowl is tilted) for normal hair, mixing a thinner formula for clients with textured hair and a thicker batch for clients on the finer side.
Products Used
Section for Perfection
Want to avoid splotches and uneven lifting? Peep these tips:
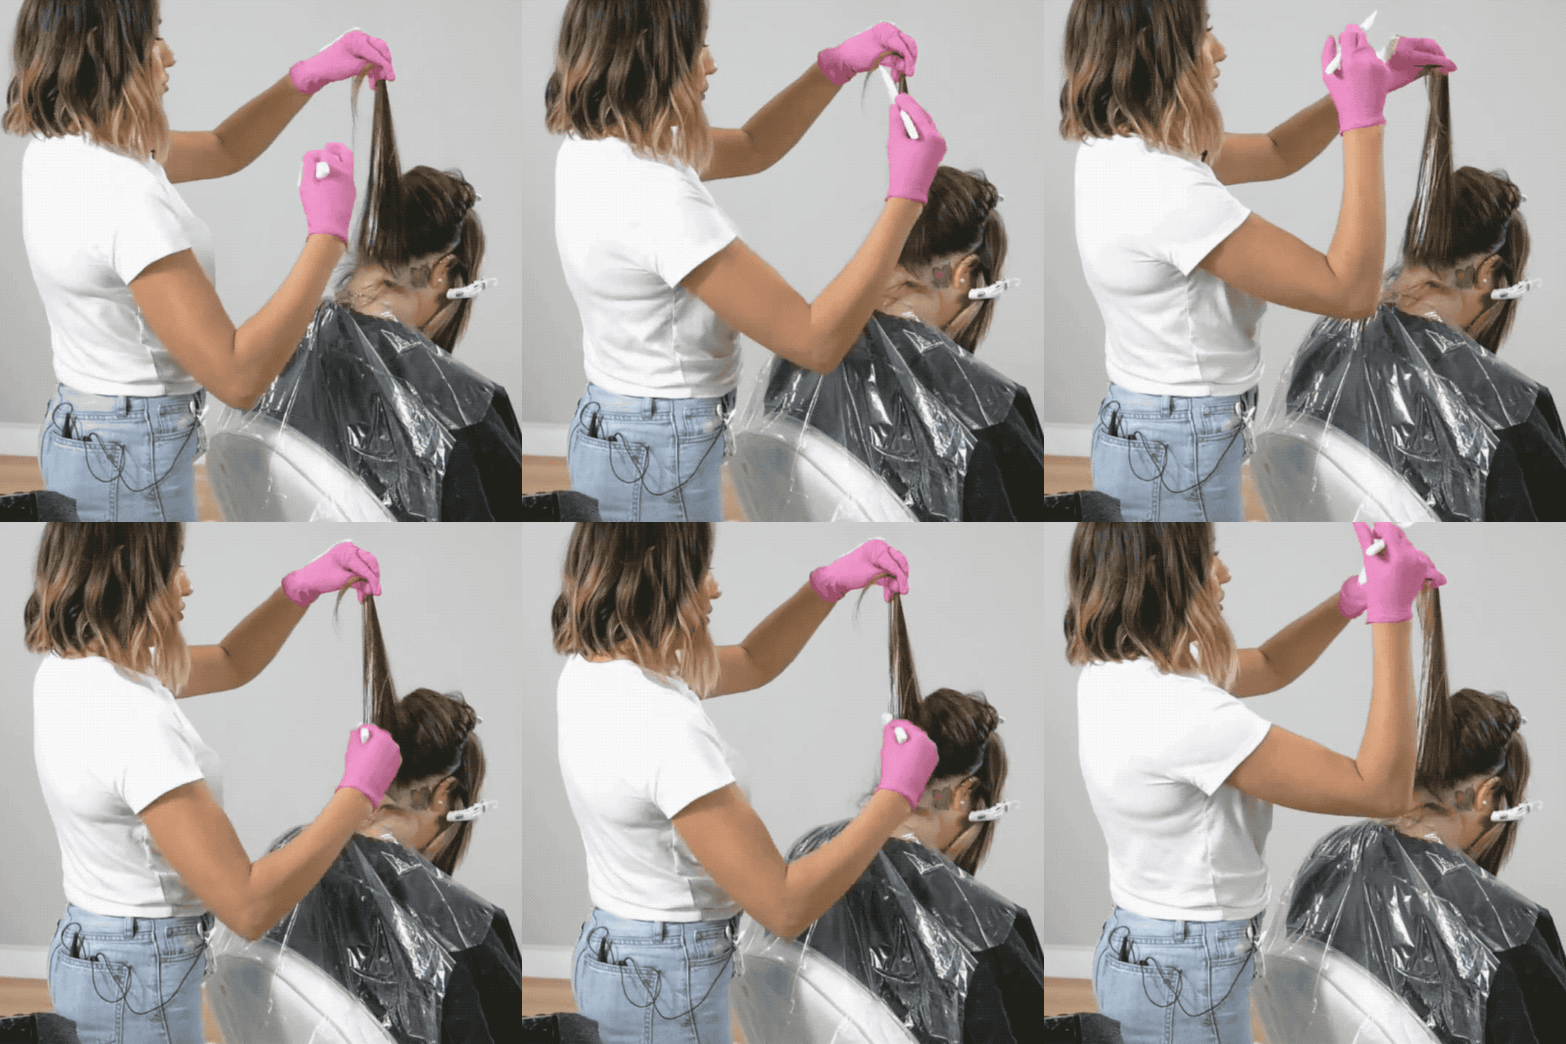
- Keep the tension on the section really tight throughout the application. It may be uncomfortable for the client, but they’ll thank you when they see their after photos.
- Keep sections flat and as wide as possible. Try to avoid any hairs overlapping or being scrunched together.
- When painting the underneath, hold the section tight and straight up to help the paint glide. When painting the surface, hold the section tight and low.
Painting with Purpose
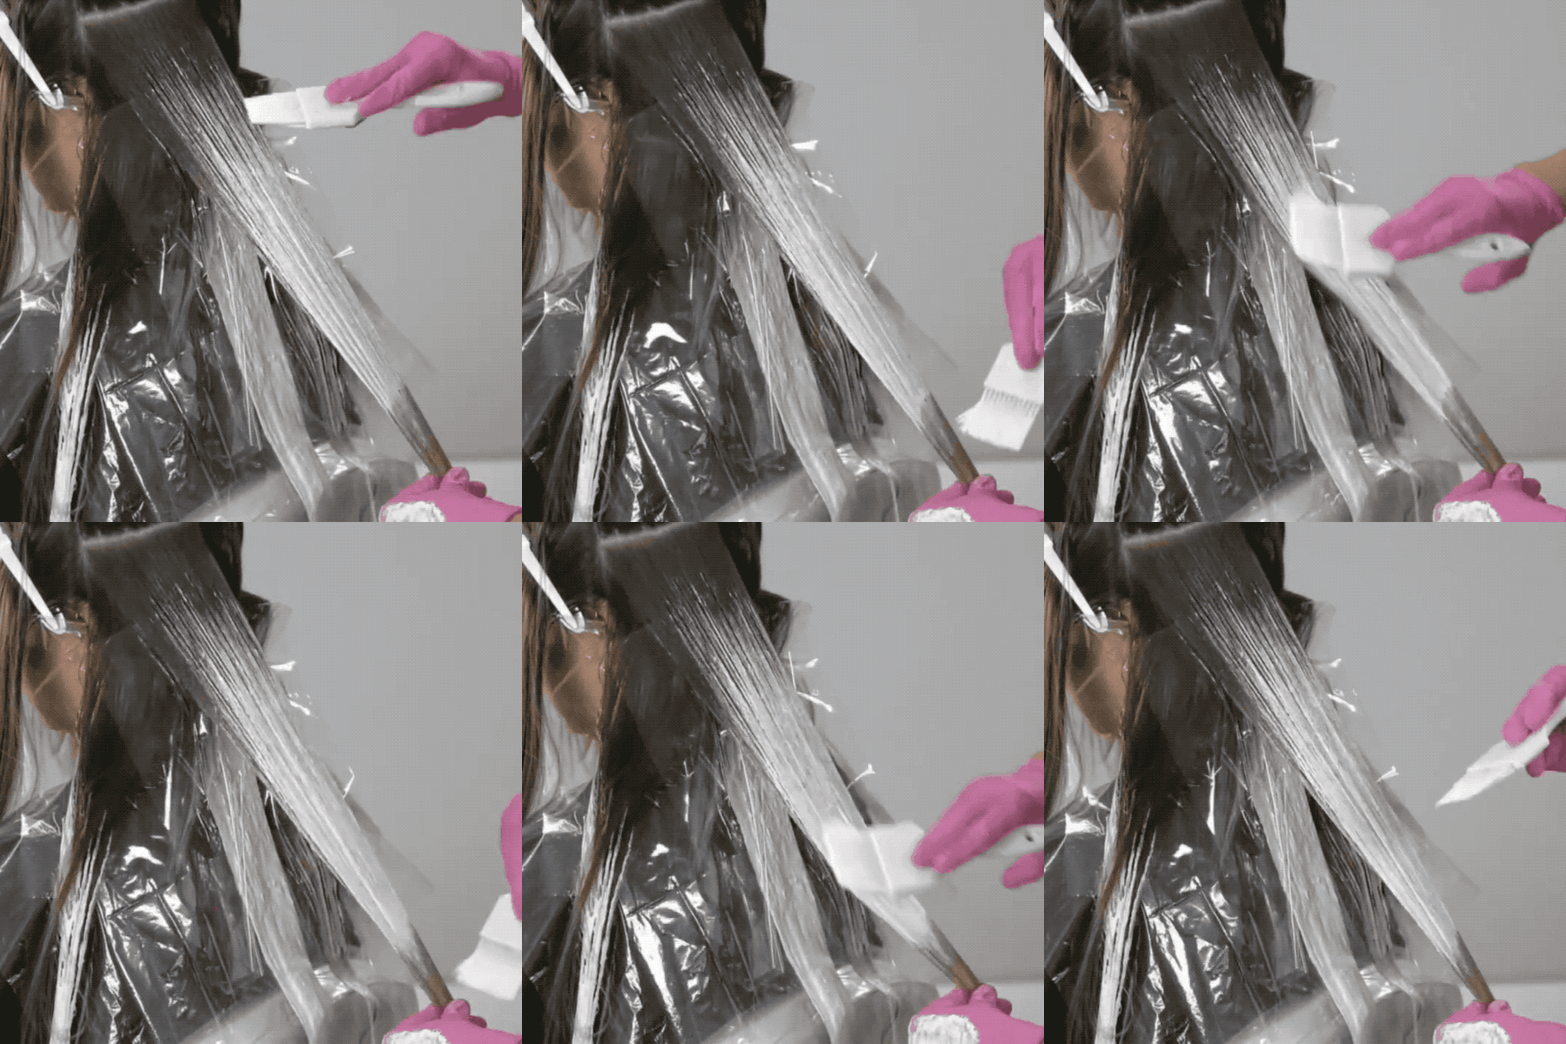
For a balayage that has dimension at the top with full brightness at the ends, it’s all about pressure.
- When painting the fade, use a light-handed bouncing motion to apply the product. Don’t add pressure until you reach the mid section.
- Completely saturate the mids and ends, pushing the product through so it can be seen from the other side.
- Once the product has been pushed through to the underneath, lift the section and paint more product to blend. Paint lightly and against the grain to accentuate the blend that was created when pushing the product through.
Pro Tip: Always, ALWAYS check the underneath part of the section. Add more product if needed, but make sure the product is smooth and fully saturated.
Click though to see more of Mallery’s BTC University Class and click here to purchase and have lifetime access!
More from
Mallery Share
-
Best Of 2021
The Top 10 Instagram Videos We Couldn’t Get Enough Of In 2021
-
Balayage
Neutral Balayage: 6 Tips To Add Depth To Blondes
-
Balayage
5 Mistakes To Avoid When Foiling The Hairline At The Nape
-
Balayage
10 Of The Best Foiling Tricks We Shared In 2019
-
Balayage
Well, This Looks Interesting: 6 Techniques That Went Viral In 2019
-
Blonde
4 Tips for a Blended, Blonder Foilayage
-
Balayage
3 Tips For Painting The Hairline Near The Nape
-
Color Protecting
Well This Looks Interesting: Human Keratin In Color Formulas?
-
Balayage
5 Tips For Brass-Free, Bright Blonde Hair
-
Balayage
Brunette Balayage With A Pearl Blonde Money Piece
-
Balayage
Video How-To: Face-Framing Sandy Blonde Balayage
-
Balayage
Dimensional Ribbons Off A Level 3 Base
-
Balayage
Hand-Painted Blonde Blend
-
Business
Trust The Process: How To Tell Your Clients It’s Worth The Wait
-
Balayage
Blonde & Blended Top Knot
-
Balayage
8 Blondes You’re Going To Love
-
Balayage
Journey To Dimensional Blonde


