
4 Tips To Hide & Fix Uneven Blondes

4 Blonding Tips To Cover Dark Spots, Avoid Breakage & Tone Quickly
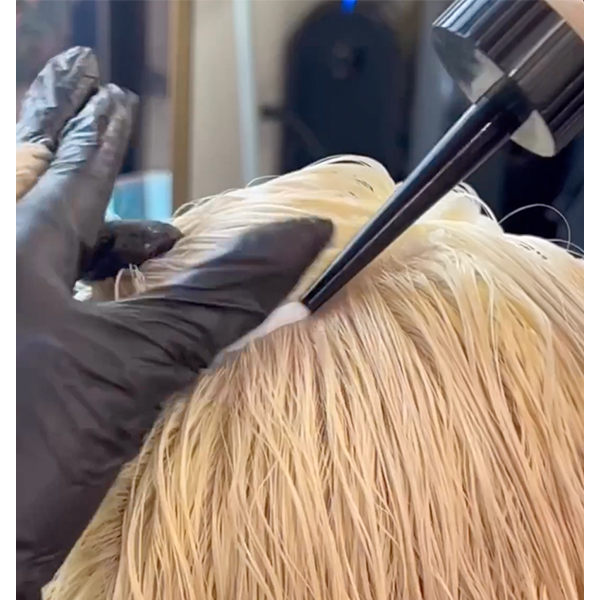
1. Fast Toning Hack At Your Station—Skip The Bowl & Brush
Ultra-blondies have long enough appointments, don’t waste time applying the final toning step. Extension specialist Krista Storm (@kristakstorm) demos her quick hack to apply toner from a bottle with a flick of her thumb.
Try Krista’s application method:
- Use the nozzle of your color bottle to part each section of the hair with your dominant hand.
- Using the other hand, have your thumb follow the stream of color as you’re applying it.
- Press the toner into the hair, evenly covering each section.
- Here’s the shade Krista used: Schwarzkopf Professional™️ IGORA Vibrance® Level 10 Toner 10-1, let process for about 15 minutes before rinsing.
Pro Tip: “I love Schwarzkopf Professional™️ Level 10s because you actually have time to apply them (without a panic attack!) before they process.”
View this post on Instagram
Level 10 toners are hard to find, view Schwarzkopf Professional™️’s swatch book of NEW ready-to-use shades that the pros are talking about!
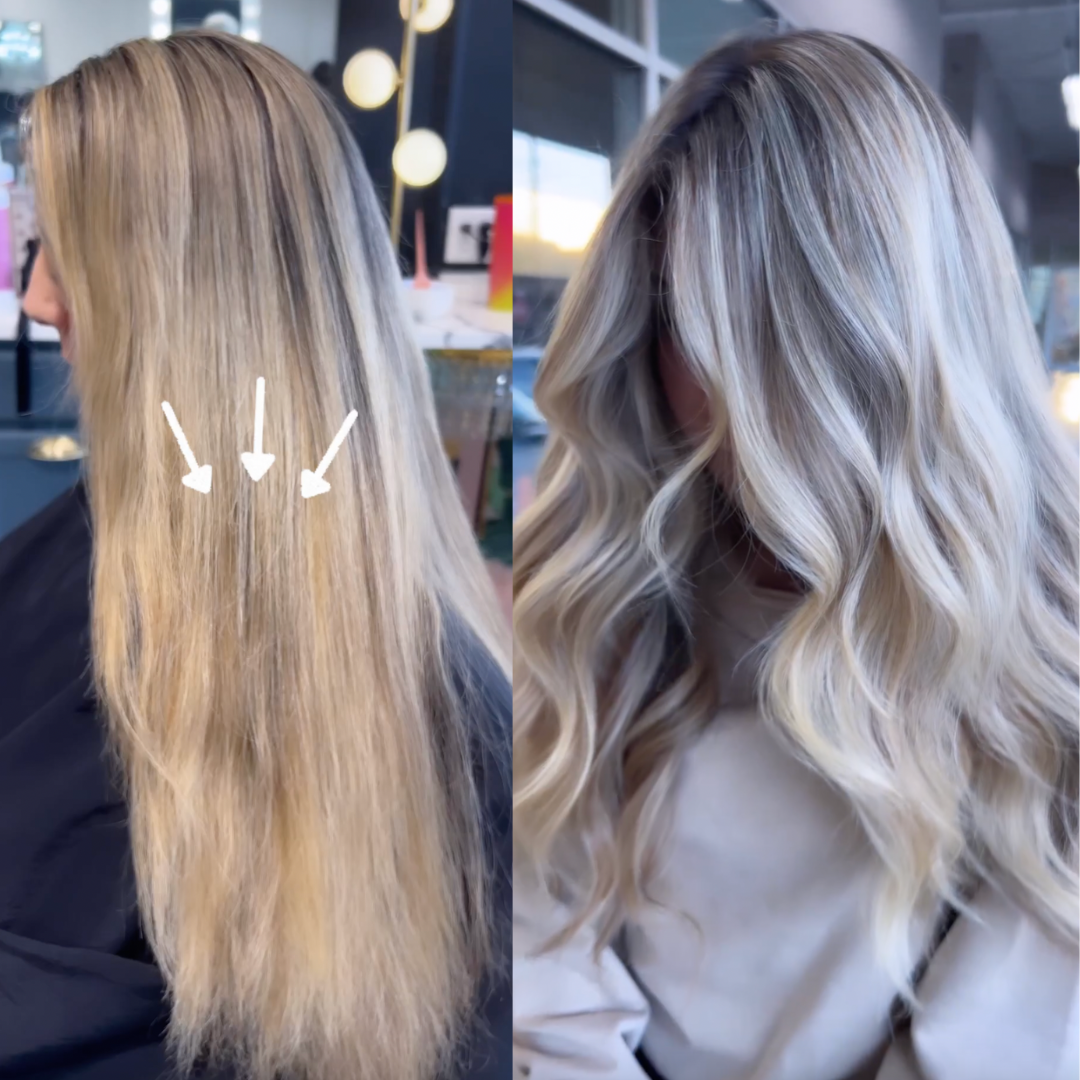
2. Fix Splotchy Blondes In Two Appointments
Blondes with naturally dark hair inevitably process patchy from time to time. It’s easy to miss these dark spots when the hair is curled, so here’s how color specialist Carlos Rojas (@colorbycarlos) turned his client’s problem areas into a seamless golden blonde.
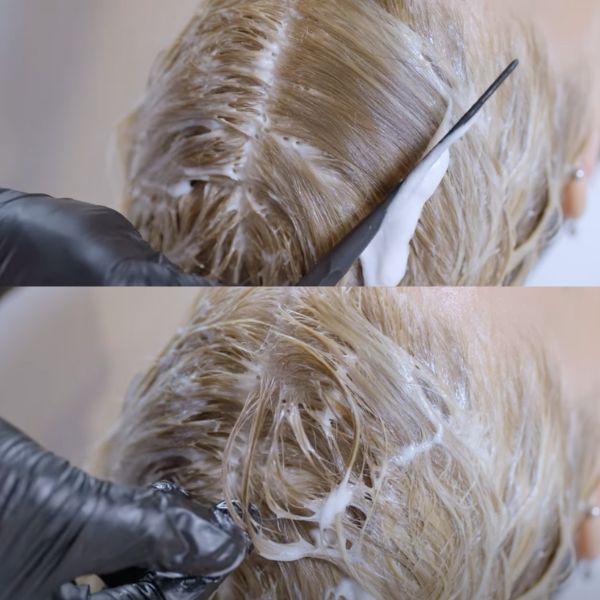
Here’s Carlos’ formula and application:
- Skip the thin, fine-weaved foils and panel paint the entire head. This balayage technique focuses lightener heavily toward the root and feathers down through the ends in a V-section.
- Focus on keeping natural depth at the root and nape area. The V-shaped lightener application will leave blended pockets of depth around the rest of the head.
- Gloss the entire head using IGORA Vibrance® Level 10 Toner 10-1 + 10-5 + Clear + IGORA Vibrance® Activator Lotion.
How to schedule this appointment:
- “We scheduled two color appointments within a month of each other,” Carlos explains.
- The first appointment allows for time to lay the groundwork—a full foil highlight.
- Then, the next appointment is dedicated to the detail work of panel painting.
Go “Back to the Future” at The BTC Show! Tickets are going FAST—Click here to view packages, artist line-ups, classes and more!
3. Bold & Blended Face-Frame Blueprint
The blonding space is moving into more diffused looks, especially when it comes to money pieces. Blonde educator Lisa Mathews (@hairbylisamathews) shares her go-to foil technique to blend a heavy face frame into the sides of her client’s hair for a seamless gradient with a bright pop.
Try Lisa’s foiling technique & reference her chart below:
- Starting by the ear, create three teased weaves in diagonal sections back-to-back.
- Then, alternate between teased weaves and slices working toward the Mohawk section.
- Once you begin to move up the head, pivot the direction of your foils as seen below.
- DON’T FORGET to foil above the ear! This is the pocket that will connect the money piece to the rest of the hair.
- Money piece: Use three teased slices to create a bold money piece, increasing the amount of tease in each section working back.
Lisa’s toning formula: IGORA Vibrance® Level 10 Toner 10-12 + 10-19 + Igora Vibrance Activator Lotion
4. For Lived-In Blondes, Leave Out The Nape Section
Lived-in looks are big requests this year and creating the perfectly “undone” color takes some finessing. Krista (@kristakstorm) explains how leaving your client’s nape area untouched will help the overall lived-in look.
“The overall goal is lighter ends, not a lighter root so don’t bother with the nape,” Krista explains. “It’s fragile hair and adds depth when left alone.”
Pro Tip: Use this tip for ANY blonding service! A deeper nape adds natural-looking depth and saves your client’s fragile hairline from breaking off. (Necklaces, ponytails and collared shirts are inevitable and break our client’s nape section. So, try this hack and see if you see any growth improvement for your client!)
View this post on Instagram
7-Minute Base Break; Read How It Works
This content is sponsored.
More from
Schwarzkopf Professional®
-
Shampoos
Purple vs. Blue Shampoo: It’s More Than Color Theory, Here’s Why
-
Copper
Muted Bronze
-
Monthly Product Launch List
The Best Hair Launches Of March 2024
-
Hair Color
IGORA ZERO AMM Permanent Color
-
Celebrity
The Best Beauty Looks At The 2024 Oscars
-
Blonde
Sydney Sweeney’s Dark Suede Blonde
-
Celebrity
Schwarzkopf Professional® Launches Campaign Spearheaded By Chris Appleton & Sofia Vergara
-
Styling
OSiS® Upload
-
Celebrity
Sofia Vergara’s Red Carpet Glam Waves
-
BTC Hair Trend Report
Schwarzkopf Professional® Announces Chris Appleton As New Global Color Ambassador
-
Blonde
Virgin To Dimensional Blonde Blend
-
Monthly Product Launch List
11 New Game-Changing Hair Launches To Add To Your Arsenal
-
Blonde
The Biggest Hair Color Trends of 2024
-
BTC Hair Trend Report
The Biggest Haircut Trends of 2024
-
Brunette
Rich Beige Brunette
-
Celebrity
Paris Hilton’s Classic Blonde
-
Blonde
Dove Cameron’s Brunette-To-Blonde Color Correction
-
Celebrity
Sofia Vergara’s ’80s-Inspired Red Carpet Waves
-
Industry News
Sofia Vergara is Schwarzkopf Professional®’s New Global Brand Ambassador
-
Styling
OSiS+® Grip Mousse
-
Hairsprays
OSiS+® Freeze
-
Styling
OSiS+® Dust It
-
Brunette
Caramel Chocolate Brunette With Gray Coverage
-
Awards Shows
The Best Celebrity Hair Colors & Formulas From The 2024 Golden Globes

