How-To: Retro Wave and Textured Bob
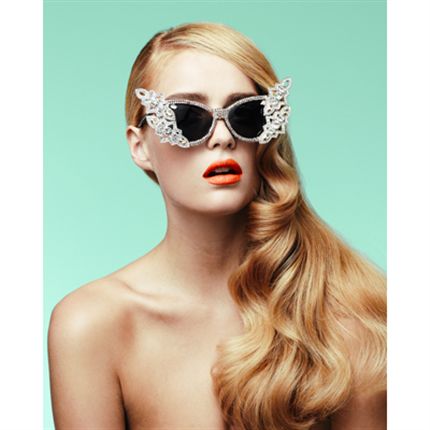
We love a signature styling how-to by Richard Mannah. He always seems to create the perfect blend of casual and cool—you know those looks were talking about, the ones that make your clients look trendy without the effort. Lucky for you, we have two how-tos from the label.m International Artistic Director. He styled a textured bob and created a cool retro wave, and now you can, too. Here’s his inspiration for the looks.
“I wanted to show a variation of looks for multiple occasions by incorporating unique techniques and great products. You can create many different looks for any occasion on the same head of hair by being creative,” says Richard. Here’s how he made both happen.
Retro Wave How-To

1. Wash and condition the hair with Diamond Dust Shampoo and Conditioner for soft, healthy and voluminous hair with extreme shine.
2. Prep the hair with Volume Mousse from roots to ends, comb through and dry smooth.
3. Starting from the lower back and using small to medium sections of dry hair, begin curling each section with a large-barrel curling iron. Work all the way up the head until you reach the front.
Pro Tip: Spray the Organic Orange Blossom setting Hairspray on each section before using the curling iron to set, protect and seal the curl/wave. Using a setting spray will add shine, flexibility and lock the style in. (Be mindful of which direction you want the hair to wave as this will determine which direction to curl the hair.)
4. After every section is curled, lightly brush with the label.m Grooming Anti-Static Brush and finish with Shine Mist.
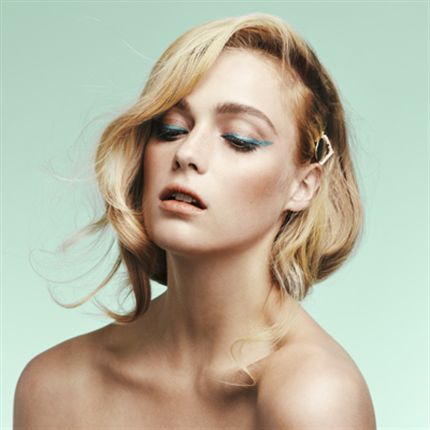
Texture Bob How-To

1. Wash and condition the hair with Diamond Dust Shampoo and Conditioner for soft, healthy and voluminous hair with extreme shine. Then prep the hair with Volume Mousse from roots to ends, comb through and dry smooth.
2. Using large- and medium-barrel curling irons, wave the hair for movement and texture.
3. Lightly brush the waves out and add a small amount of Resurrection Style Dust on the roots to create volume and hold.
4. Take a section of hair at the occipital bone and work into a low ponytail. Then backcomb the ponytail and roll it in toward the nape area to create a base. Work the remaining hair back and loosely pin the necessary pieces for a loose, textured bob finish.
5. Finish the look with some Texturising Volume Spray and shape the hair around the face for a romantic, flattering finish.
More from
Richard Mannah
-
Curls
5 Visual Dry-Cutting Tips For Textured Hair
-
BTC Hair Trend Report
2023’s Biggest Haircut Trends
-
BTC University
Short Layers: How To Build Weight With Sectioning
-
Coronavirus
Henkel Is Hosting Hairdressers United, A 24-Hour Hair Broadcast For Salon Pros
-
BTC Events
BTC “On Tour” Nashville—Here’s How We Closed Out Our 2019 Tour
-
BTC Events
BTC “On Tour” Nashville
-
#thebtcshow 2019
#THEBTCSHOW 2019: Day 1
-
#ONESHOT Hair Awards 2019
Joico At #THEBTCSHOW 2019
-
BTC Events
BTC “ON TOUR” CHICAGO
-
BTC Events
BTC’s “On Tour” Show Is Coming To Chicago—Here’s The Artist Lineup!
-
Best of 2018
7 Articles That Prove You Should Be Dry-Cutting
-
Dry-Cutting
Half Upstyle: Sleek Top Knot + Waves
-
Dry-Cutting
3 Fringe-Cutting Techniques On Dry Hair
-
Manufacturer
Joico Announces Richard Mannah As NEW International Guest Artistic Director
-
Dry-Cutting
Try This Cut: Modern “Mullet”
-
#thebtcshow Austin 2017
The Behind The Chair Show 2017: Day 3
-
#thebtcshow Austin 2017
TRUMATCH by Daniel Alain at #thebtcshow
-
BTC COLOR, Cut & Style Show
COLOR, Cut & Style 2016
-
Braids
5-Strand and Knotted Rope Braid How-To
-
Braids
How-To: 5-Strand Braid, The F8 Braid and Applying Noncommittal Color
-
Hair
label.m Holiday Collection by Richard Mannah
-
Beachwaves
Your Guide to Holiday Hair: 5 Winter Wedding Styles
-
BTC "On Tour"
7 Editorial Styling Tips From Fashion Week To Your Salon
-
News
BREAKING NEWS: 16th Annual Stylist Choice Award WINNERS ANNOUNCED


