5 Visual Dry-Cutting Tips For Textured Hair
Balance & Shape Textured Hair With This Visual Dry-Cutting Technique
One of the best ways to improve your craft is to keep learning about and understanding every hair type so you can better service clients—cutting all curl and texture types with confidence. Learning how to properly care for textured hair will bring more clients to your chair, and most importantly, have them loving their new look.
Joico Global Artistic Director Richard Mannah (@richardmannah) shared his visual dry-cutting technique for textured hair with shape and a beautifully balanced finish. Keep scrolling to read how it’s done!
Swipe to see the before and after of Richard’s curly cut:

Want more of Joico x BTC? Click here for more education.
1. Prepare to mix up your usual service routine.
Your routine with straight or wavy hair looks something like this: Shampoo, cut then style. With textured hair, however, Richard recommends shampooing, styling and then cutting the hair. By cutting the hair dry when you can see its natural fall, there will be no surprises at the end of the service.
Here’s Richard’s approach:
- After washing, apply a cocktail of Joico JoiGel Medium Hold Styling Gel and Joico Curl Confidence Defining Creme to towel-dried strands.
- Diffuse to prepare for cutting.
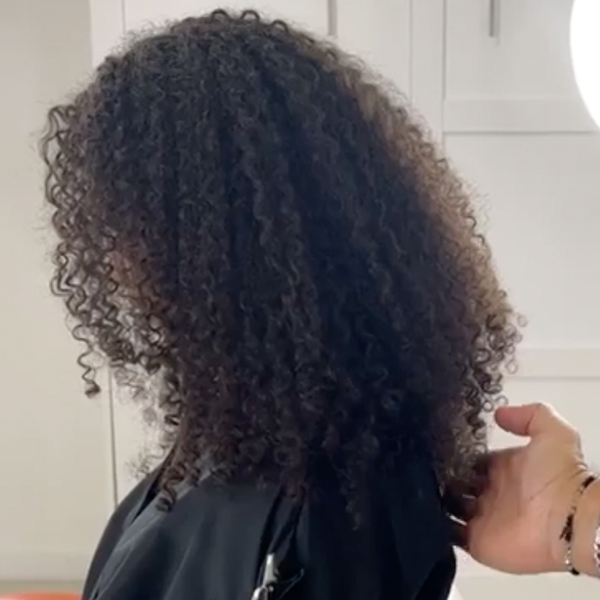
Prior to Richard’s dry-cutting service, his client had a triangular shape to her hair:

Loving the look? Click here to shop Richard’s go-to products for textured cuts!
2. Dry cut the hair section by section.
Richard’s goal with his cut is to create shape, volume and bounce—and to avoid a flat, triangular shape through layering. Remember, you are cutting visually! Here’s how it’s done:
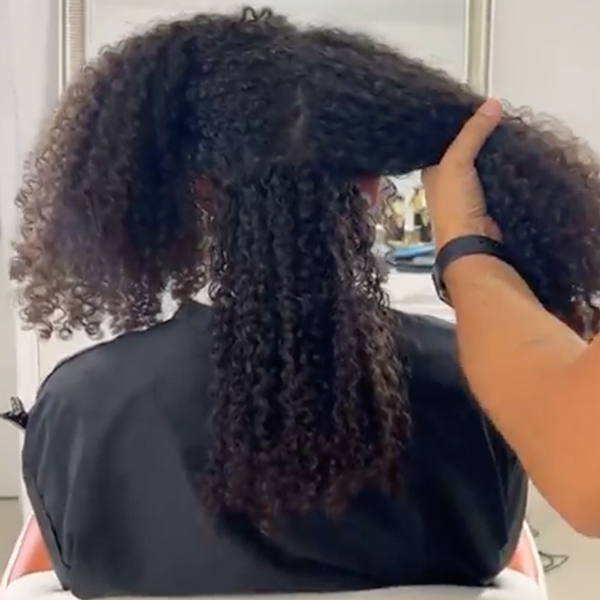
- Start by sectioning the hair into three parts: Both sides and the nape. Gently twist the hair away from the face and clip.
- When you begin cutting the nape section, don’t cut straight across; this will create blunt edges. Instead, angle your scissors and gradually cut through section by section for a more natural result.
- Once the nape section has been cut, subsequently pull down 1.5″ sections from both sides and continue cutting with gradual elevation.
Pro tip: Use your fingers to section the hair instead of a comb to avoid separating the curls. A comb is only really needed to use or see a guideline, but since you’re cutting visually there is no need for one.
Richard’s sectioning strategy:

3. As the cut progresses, add elevation to create volume.
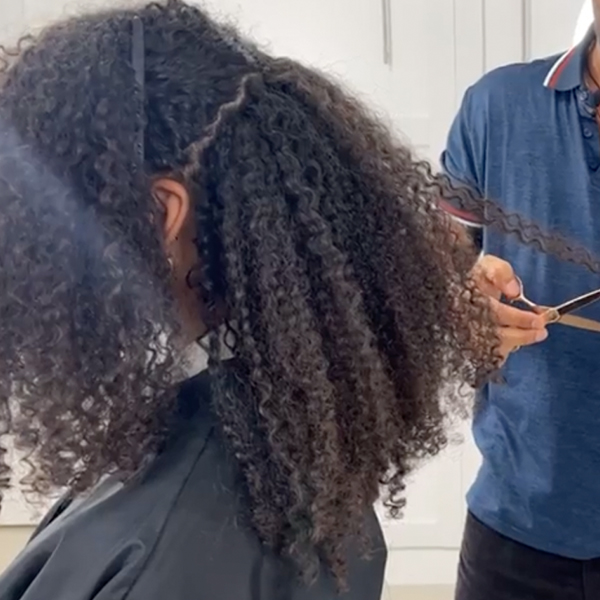
Richard’s secret to rounding out a triangular silhouette is elevation. With each section of hair, take your cut a little bit higher. For example, Richard graduated from one length to 45 degrees to a little bit higher than 45 degrees over the course of his cut.
Here’s Richard’s elevation checklist:
- Visually blend each elevated section.
- Make sure to cut with no or very gentle tension when elevating. Tension forces the hair to do something it doesn’t want to do; the trick is to work with the hair, not against it.
- Once each section is complete, make sure the hair is sitting correctly and each layer is even. You can pull each section up to compare, as well as have the client push their hair all the way forward to view the ends.
Pro tip: Richard’s cut may look easy and, with practice, can make your curly cuts look more balanced and natural. Elevation, body position and balance can be a lot to focus on, but investing time into learning this technique is essential to recreate this look.
Richard gradually elevates the hair with each section:

Watch Richard’s entire dry-cutting technique for textured hair with pro tips, product recommendations and more on BTCTV!
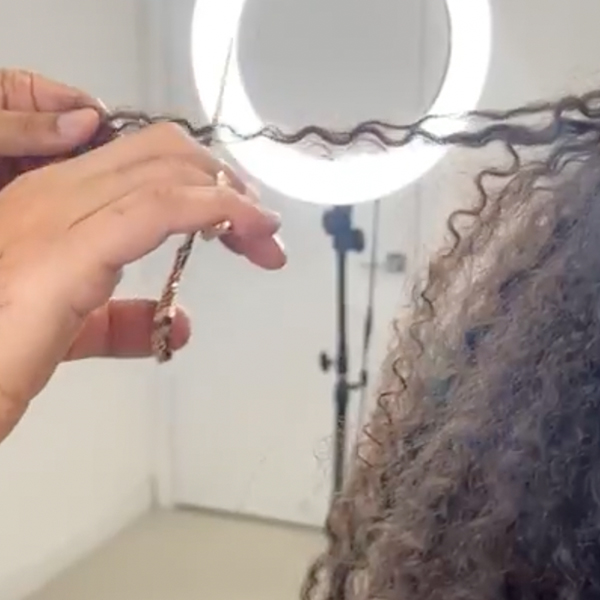
4. Twist cut the outer layer of hair to soften.
Touch up your textured cut with gentle, random twist cutting to soften the silhouette of the hair, then scrunch in three pumps of Joico K-PAK Color Therapy Luster Lock Glossing Oil. Finish with Joico Defy Damage Invincible Frizz Fighting Bond Protection for shine, minimal hold and separation.
Pro tip: Keep in mind that your client should be able to recreate their salon look at home! Remember to offer them care tips and retail options to prolong their cut.

This content is sponsored.
Products Used
More from
Joico
-
Balayage
One Step, Three-Layer Multidimensional Balayage
-
Balayage
Sunset Copper Balayage
-
Monthly Product Launch List
The Best Hair Launches Of March 2024
-
Hair Color
Blonde Life® SilverLight™ Lightening Powder
-
Bond Building
Defy Damage® IN A FLASH™
-
Da’Vine Joy Randolph’s Glamour Waves
-
Celebrity
Zendaya’s Classic Volume Bob
-
Celebrity
The Best Beauty Looks At The 2024 Oscars
-
Blonde
Building The Perfect “Summer Blonde”
-
Gray
Make Gray Hair Look & Feel Younger: 3 Tips Every Stylist Should Try
-
Haircare
KBOND20 Defy Damage Power Masque
-
BTC Events
BTC “On Tour” Nashville Recap: Everything You Missed
-
Monthly Product Launch List
The Best Hair & Beauty Launches Of November 2023
-
Haircare
Inner Joi™ Strengthen Shampoo
-
Conditioners
Inner Joi™ Strengthen Conditioner
-
Haircare
Inner Joi™ Strengthen Masque
-
Haircare
Joico Launches Vegan, Naturally-Derived Haircare Line, Inner Joi™
-
Blonde
How To Create A Natural Shadow Root Through Teasing
-
Blonde
“Fake” A Full Foil In 3 Steps: Here’s How
-
BTC Hair Trend Report
Your Guide To Fall & Winter 2023’s Hair Color Trends
-
Blonde
Honey Blonde Curls: 3 Strategic Placement Tips To Create Brightness
-
Hair Color
Bold Color Trends You Need To Know For 2024
-
BTC Events
AI, Mental Health & Social Media: 7 Business Tips You Can’t Live Without
-
Manufacturer
Joico Announces Jeannetta Walker-Rodgers as Global Technical Director


