
5 Before-And-After Extensions Transformations You Have To See

5 Before-And-After Transformations
Talk about satisfying! We rounded up five fantastic before-and-after photos that show the power of tape-in extensions. Keep scrolling for the goodies, plus get some of our favorite tape-in extensions tips!
Products Used
How much do hair extensions cost? And how much should you charge? Click here!
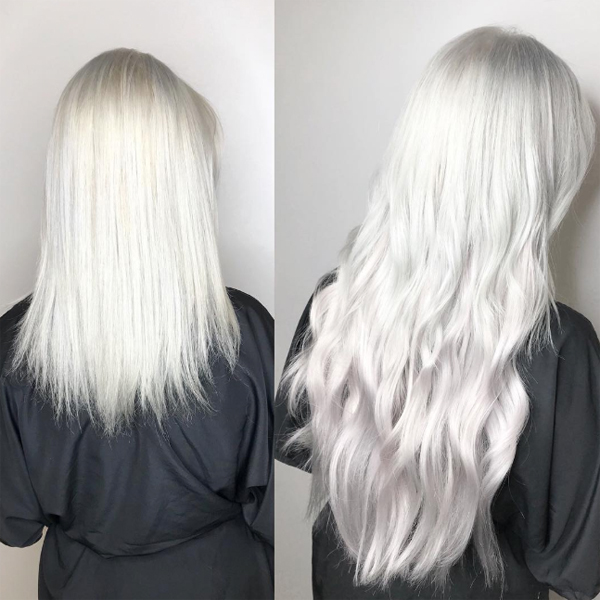
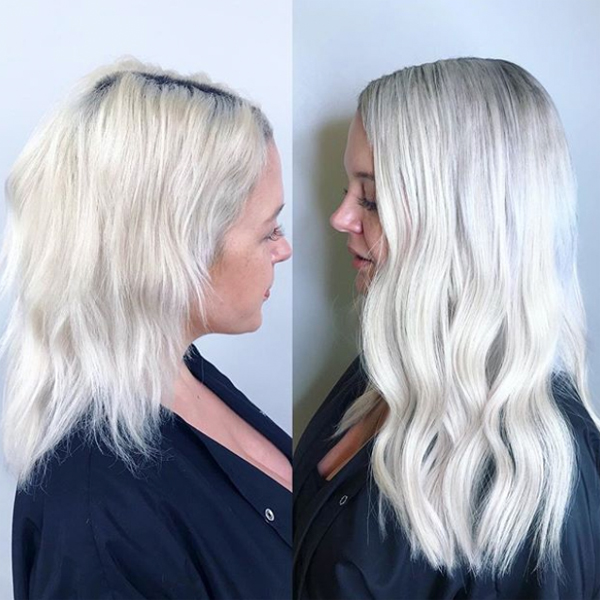
Add Fullness To Fine Hair
Extensions aren’t just for length—clients with fine hair on the sides of their head can benefit from a few tape-in extensions. “Rather than sandwiching two pieces of hair together, you can apply one ultra-fine Great Lengths GL Tapes to the hair by attaching a single backing to it, making it invisible and lightweight for all your fine-hair girls,” said @lo_wheelerdavis.

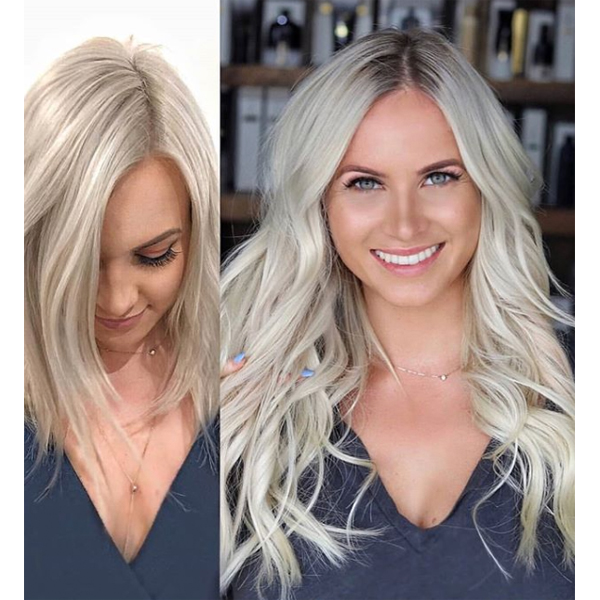
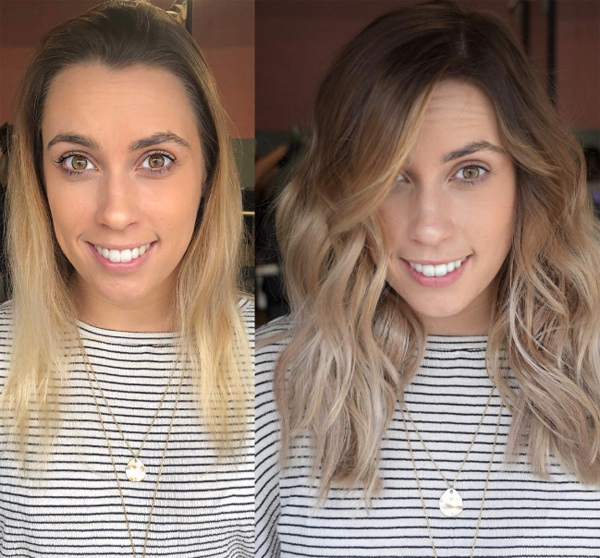
Create Dimension Without Chemicals
A major rule of extensions: use multiple colors! Monotone shades can look artificial, but sandwiching two colors creates dimension. For clients who don’t want chemical services, this can be an option—plus, you can easily color GL Tapes to match your client’s look.
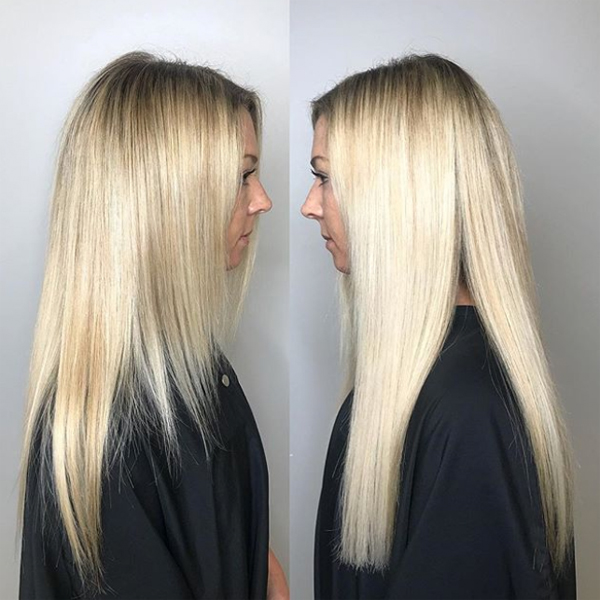
Select Extensions With A Seamless Finish
Choose a tape-in extension that gives the most seamless finish. GL Tapes have a narrow profile to reduce bulk on the head, and GL Tapes Plus have tapelines that are totally covered in hair, making them even more undetectable. Great Lengths Ambassador Lyndsay Maderis says she uses GL Tapes Plus at the underside of the perimeter and the top sandwich of the highest row for a seamless look—check them out in the video below.
View this post on Instagram
Apply Extensions Like This
Start application in the back of the head. Leave a perimeter of natural hair to cover the tapes when your client pulls her hair back. Apply in a bricklay pattern to ensure the hair moves naturally.
Don’t Be Afraid To Blend With Scissors Or A Razor
“I think stylists get scared to cut extensions after all the investment, but cutting is critical to creating a natural blend,” says Lyndsay. Use a razor or texturizing scissors to cut and blend, or if you feel comfortable, use scissors to create a more delicate cut or to point-cut the perimeter.
More from
Great Lengths
-
Hair Extensions
6 Tips For The Flat Iron Waves Clients Want
-
BTC Hair Trend Report
VANESSA HUDGENS’ BRAIDED SPIKY BUN AT THE 2023 MET GALA
-
BTC Hair Trend Report
ASHLEY GRAHAM’S FLIPPED-OUT BOB AT THE 2023 MET GALA
-
BTC Hair Trend Report
Lily James’ Met Gala Twisted Bun + Piecey Fringe
-
Hair Color
Chemical-Free Money Piece? Here’s How!
-
Extension Application
3 Secrets For Invisible Extensions (Even On Ponytails!)
-
New Appointments
Great Lengths USA Appoints Justine Marjan As Brand Ambassador
-
Celebrity
Met Gala 2021: See The Best Celebrity Hair & Beauty Looks!
-
Celebrity
Jennifer Lopez’s Western-Inspired Ponytail
-
Blonde
Hilary Duff’s Creamy Blonde
-
Facebook Lives
Make More Money With This Extension Tip!
-
Hair Extensions
GL Pre-Bonded
-
Hair Extensions
GL TAPES+
-
News
Nine Zero One Salon Celebrates 10-Year Anniversary
-
Hair Extensions
4 Tape-In Extension Styling Must-Dos
-
Hair Extensions
6 Tape-In Extension Mistakes And How To Fix Them
-
Hair Color
Watch: Tape-In Extension Application For Chemical-Free Color
-
Best of 2018
The Extension Education You Need Before 2018 Ends
-
Hair Extensions
Asymmetrical-Twisted Updo
-
Braids
Video How-To: Tape-In Extension Application, Blending & Romantic Braid Styling
-
Hair Color
Coloring Tape-In Extensions: 3 Questions And Answers
-
Hair Extensions
Tape-In Extensions: 5 Things You Can’t Forget
-
#THEBTCSHOW 2018
Co-Lab Styling at #thebtcshow 2018
-
Hair Extensions
Tape-In Extensions: 4 Tips For The Most Undetectable Finish

