Last updated: May 31, 2017
Modern Disconnection from the KMS California Gallery 360° Collection
GET THE HOW-TO


Show Steps
1
Section the head as shown.


Show Steps
2
Section the head as shown.


Show Steps
3
Section the head as shown.


Show Steps
4
Distribute and elevate 90-degrees and cut round following the head shape, decreasing in length under the occipital bone. Utilize a traveling guide, pivoting partings and continue through the back sections.

Advertisement


Show Steps
5
Release the left side. Take a diagonal forward parting at the ear. Distribute hair back to the previous section, elevate 90-degrees and cut parallel to the part.


Show Steps
6
Continue utilizing diagonal forward parting working toward the face on the left side. Distribute hair back to the previous section, elevate 90-degrees and cut parallel to the part.


Show Steps
7
Create a horizontal guide on the sides by taking a horizontal parting at the top of both side sections. Distribute and elevate the hair 90-degrees from the top of the section and cut square to create a stationary guide. Distribute all the hair below the section to the stationary guide and cut square.


Show Steps
8
Release the triangle section. The previously cut hair at the crown will become the stationary. Take a horizontal section, distribute the hair back to the crown and elevate 90-degrees. Cut square to the head.

Advertisement


Show Steps
9
Continue the rest of the section in the same manner. Distribute hair back, elevate 90-degrees and cut square to the head.


Show Steps
10
Release the front triangle section and blow-dry. Then customize the sides with texturizing scissors.


Show Steps
11
Create an asymmetric fringe by using the left edge of the two triangles as the side parting. From the side parting distribute the hair ‘T’ to the part and cut parallel to the part.


Show Steps
12
Distribute the top to natural fall and take a central vertical section from the crown to the front hairline. Distribute and elevate the section 90-degrees and cut increasing in length at the front using a slide cutting technique. Continue working through the top of the head until the front is complete.

Advertisement


Show Steps
13
Customize the top using deep point cutting to reduce weight, but not length.


Show Steps
14
Use surface slicing to soften the look. To strengthen the fringe, square off the right corner. Distribute the fringe onto the right side, elevate one finger’s depth and cut square in the comb. Continue to hold the hair in the comb and connect the rest of the fringe into this shape.


Modern Disconnection from the KMS California Gallery 360° Collection
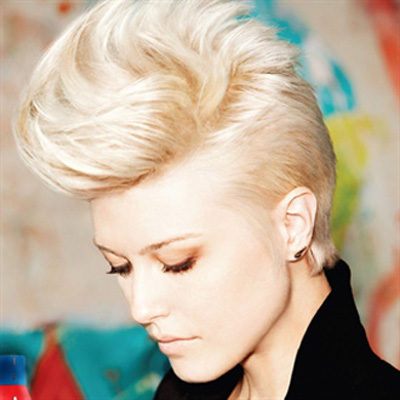
A strong, disconnected fringe and undercut layers give this look from the KMS California Gallery 360° collection a funky, modern edge. The customizable shape is created with point- and slide-cutting for maximum versatility with tons of finishing options.
Subscribe to behindthechair.com On Paper Magazine!
SUBSCRIBE NOW!
HOW-TO STEPS 
-
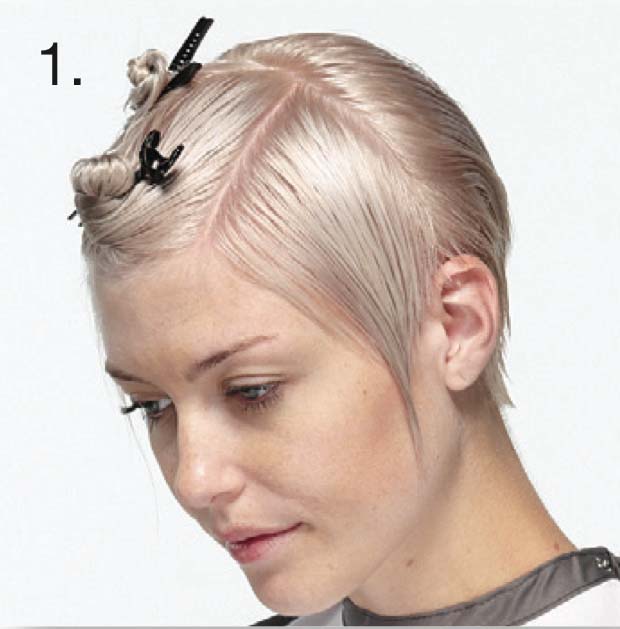
 1
1Section the head as shown.
-
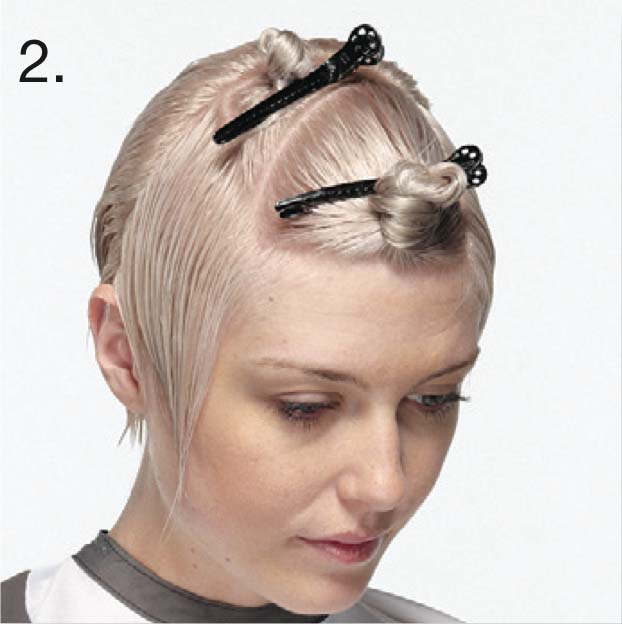
 2 Section the head as shown.
 -
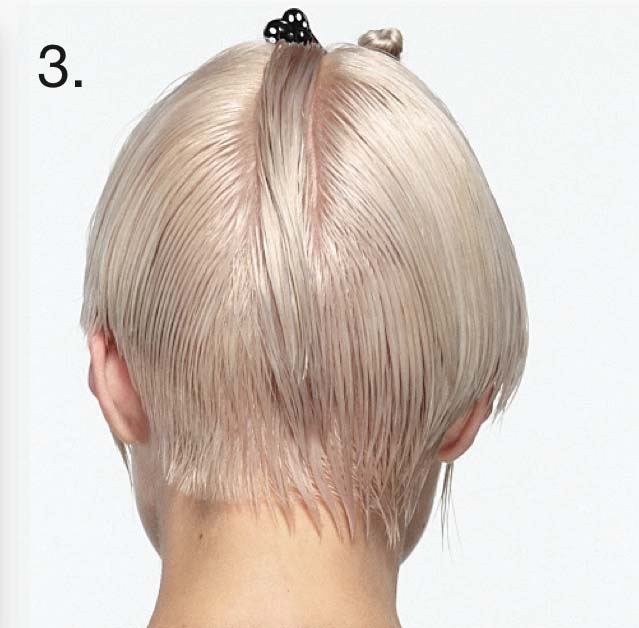
 3 Section the head as shown.
 -
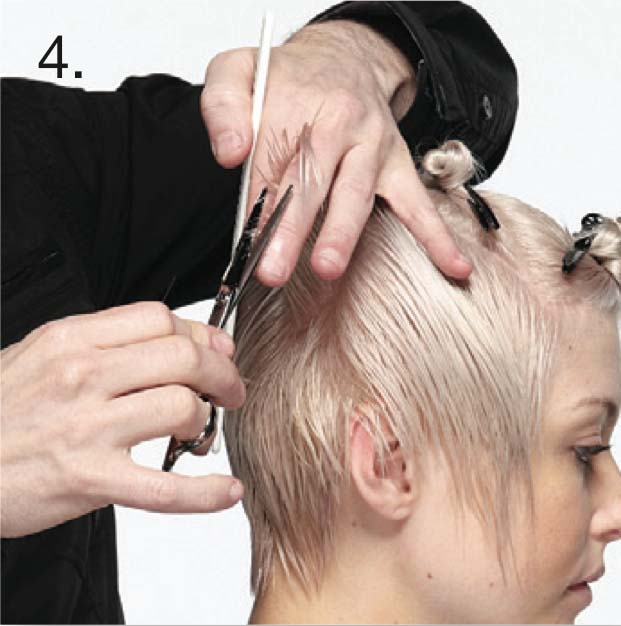
 4 Distribute and elevate 90-degrees and cut round following the head shape, decreasing in length under the occipital bone. Utilize a traveling guide, pivoting partings and continue through the back sections.
 -
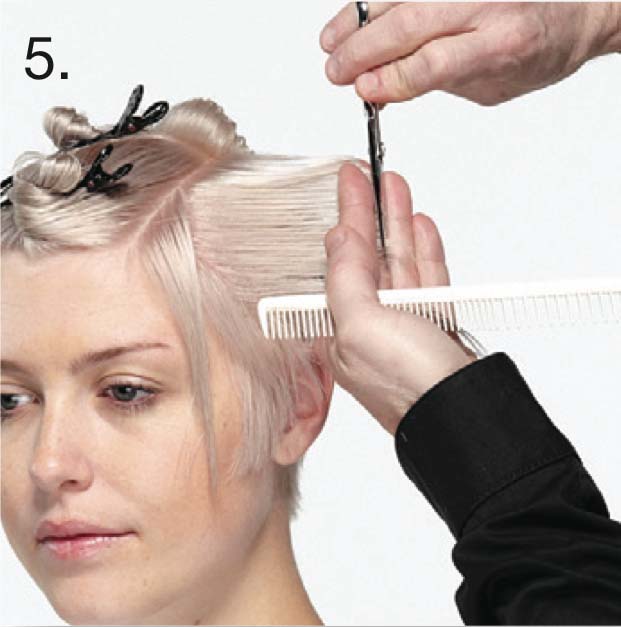
 5 Release the left side. Take a diagonal forward parting at the ear. Distribute hair back to the previous section, elevate 90-degrees and cut parallel to the part.
 -
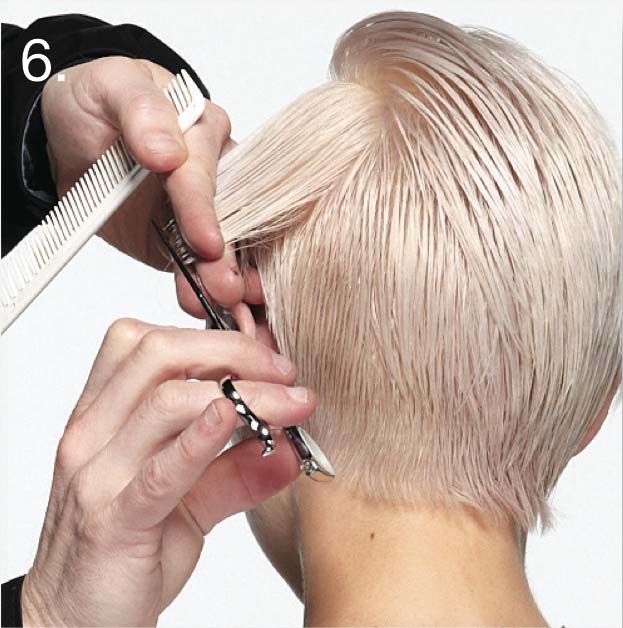
 6 Continue utilizing diagonal forward parting working toward the face on the left side. Distribute hair back to the previous section, elevate 90-degrees and cut parallel to the part.
 -
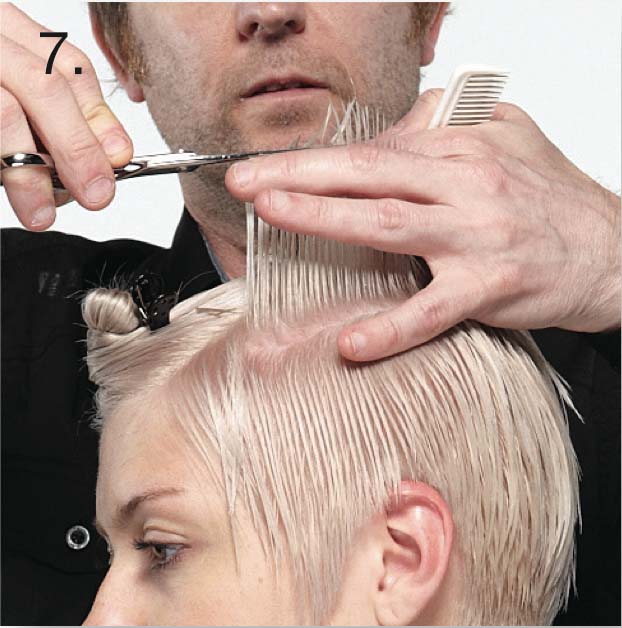
 7 Create a horizontal guide on the sides by taking a horizontal parting at the top of both side sections. Distribute and elevate the hair 90-degrees from the top of the section and cut square to create a stationary guide. Distribute all the hair below the section to the stationary guide and cut square.
 -
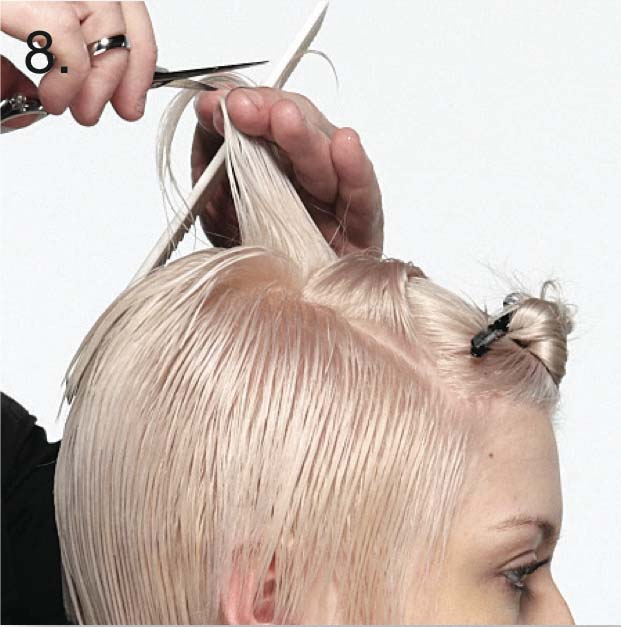
 8 Release the triangle section. The previously cut hair at the crown will become the stationary. Take a horizontal section, distribute the hair back to the crown and elevate 90-degrees. Cut square to the head.
 -
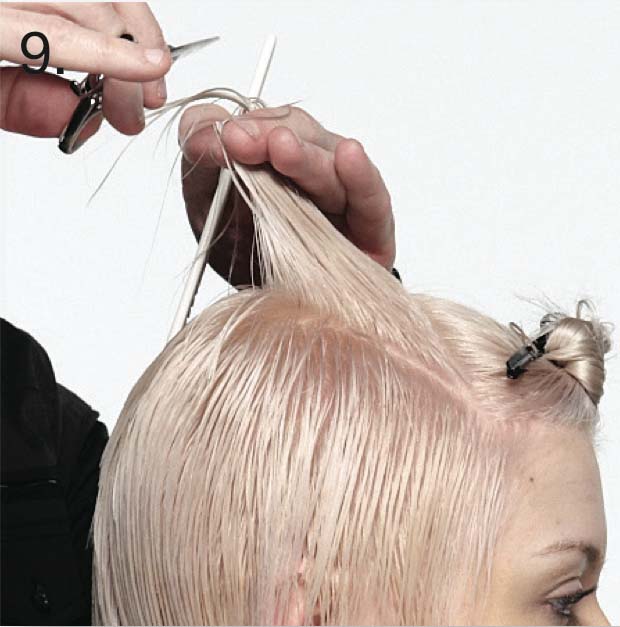
 9 Continue the rest of the section in the same manner. Distribute hair back, elevate 90-degrees and cut square to the head.
 -
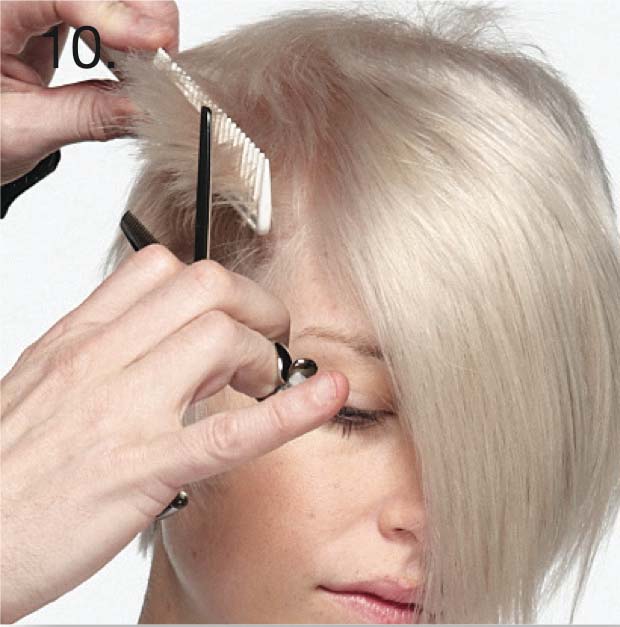
 10 Release the front triangle section and blow-dry. Then customize the sides with texturizing scissors.
 -
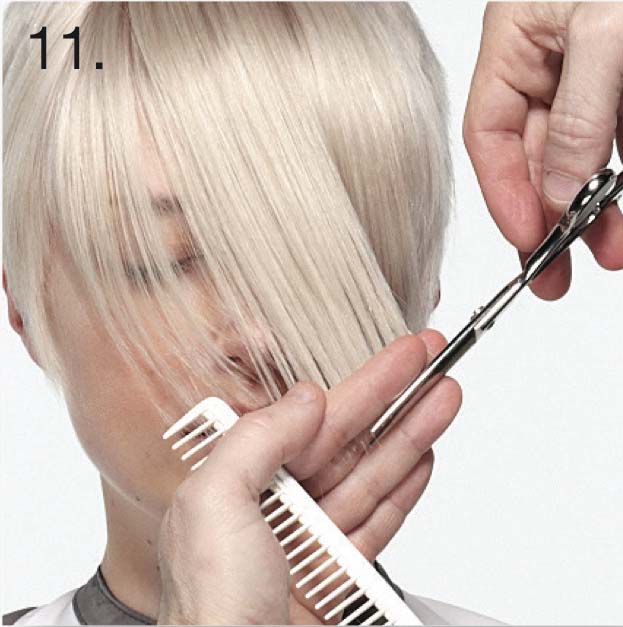
 11 Create an asymmetric fringe by using the left edge of the two triangles as the side parting. From the side parting distribute the hair ‘T’ to the part and cut parallel to the part.
 -
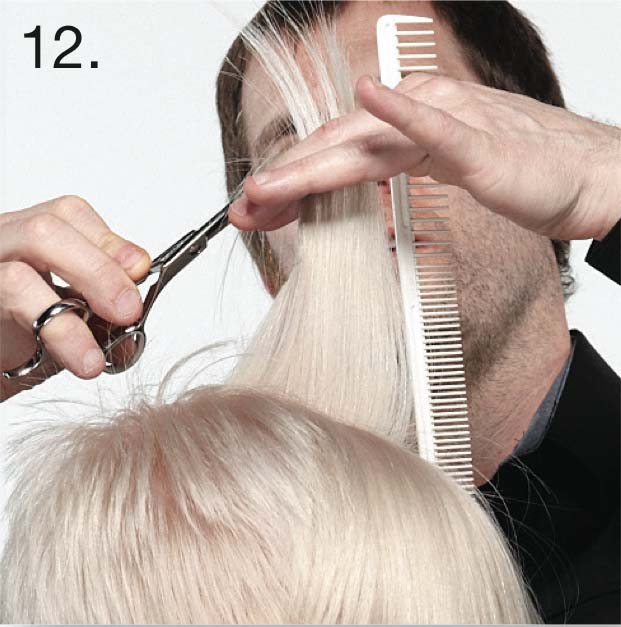
 12 Distribute the top to natural fall and take a central vertical section from the crown to the front hairline. Distribute and elevate the section 90-degrees and cut increasing in length at the front using a slide cutting technique. Continue working through the top of the head until the front is complete.
 -
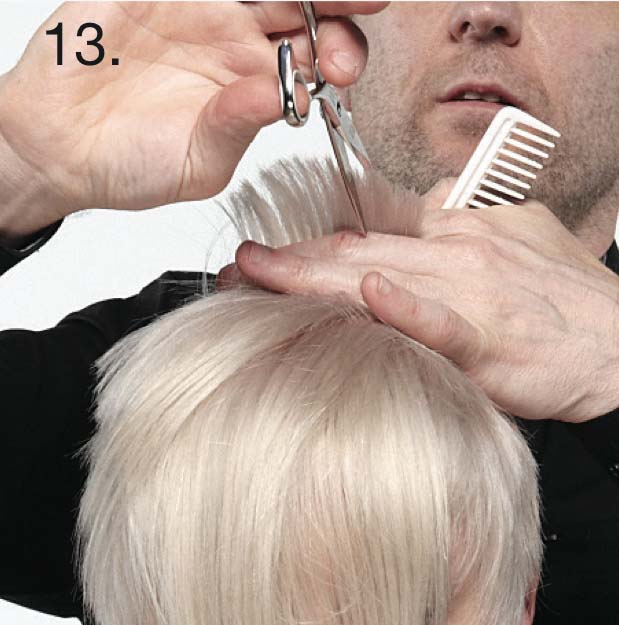
 13 Customize the top using deep point cutting to reduce weight, but not length.
 -
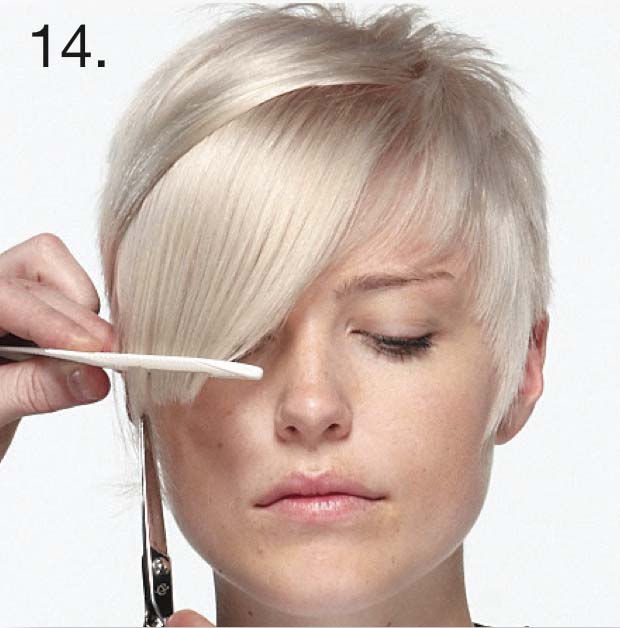
 14 Use surface slicing to soften the look. To strengthen the fringe, square off the right corner. Distribute the fringe onto the right side, elevate one finger’s depth and cut square in the comb. Continue to hold the hair in the comb and connect the rest of the fringe into this shape.
 -

TRENDING NOW!
-
BTC Hair Trend Report
The Biggest Haircut Trends of 2024
-
Copper
What Is The "Cowboy Copper" Hair Trend? Here's What It Really Means...
-
Curly
Long Layers: 10 Pro Tips + Common Cutting Mistakes
-
Barbering
Fall/Winter 2024 Mullet Trends: 2 Men's Haircuts To Know
-
Business
What Would You Do: Is The IRS Going To "Bust" My Salon?
-
Blonde
The Biggest Hair Color Trends of 2024
-
Business
What Would You Do (Client Edition): Can I Fire My Stylist For The Cut Only?
-
Haircuts
SHAG 101: The Dos And Don'ts


