The Bixie: 3 Cutting Techniques to Master the Look
Use These Cutting Techniques On Your Next Bixie Request
The bixie made a name for itself in 2022 and it’s not slowing down. This pixie/bob hybrid is the go-to haircut for clients that want a soft, yet edgy look and ARC™ Scissors Team Member Briana Cisneros (@brianacisneros) is sharing her go-to cutting techniques.
Keep reading to learn Briana’s sectioning strategies, the tools she ALWAYS uses and tips for connecting two very different haircuts.
Start by Sectioning for TWO Haircuts
Since the bixie is a hybrid of two haircuts (the bob and the pixie), Briana begins by dividing the head into two separate sections—one wet and one dry.
Using the parietal ridge as a guide, Briana creates a horseshoe parting around the head:
- Above the parietal ridge is left DRY. Briana then creates subsections throughout the top.
- Below the parietal ridge is WET. “[Everything that is cut] underneath, really sets the foundation for the haircut,” Briana explains.
- Then, Briana creates a triangle directly above the ear on either side, using the client’s recession as the top parting.
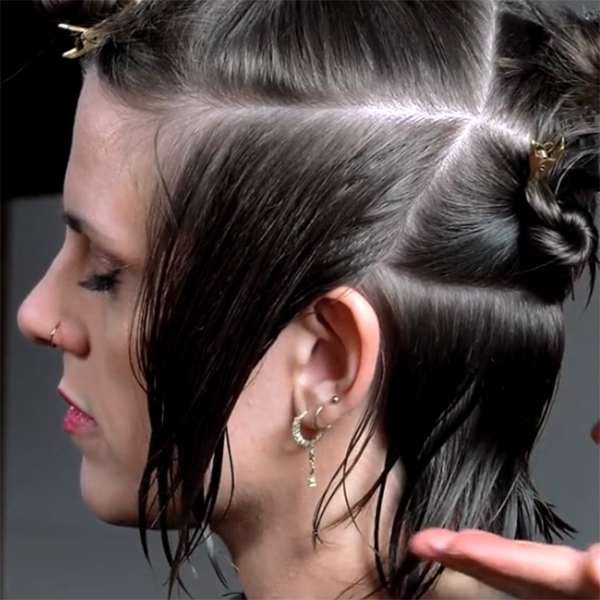
Pro Tip: Adjust triangular sectioning to your client’s hair density. For clients with thicker hair, the section should be larger. For finer-haired clients, make the section smaller. Why? The side sections will be the undercut, so it’s really important to have enough length in the top sections to create a bob-like finish.
Stay Organized with Versatile Tools
We might be talking about multiple techniques, but that doesn’t mean you need to use multiple tools. In fact, Briana only grabs two: A straight blade razor and her Paragon II from ARC™ Scissors. Why? The scissor is made for both wet and dry cutting, without compromising the integrity of the hair (or blade.) So, Briana is able to work through the haircut seamlessly and achieve a cohesive haircut.
Create A Foundation with a Slide Cutting Technique
“Most bobs we talk about are graduated or square, and they entail a lot of build up of weight,” explains Briana. “With the bixie, there is an intense amount of weight removal.”
To create a foundation that will establish the overall shape of her bixie, the perimeter will be piecey and the ends will flick out—creating the wispy shape the bixie is known for. Using her Paragon II scissors, Briana enters the section with her scissors open. Then in one long movement, she closes her shears while exiting the section. Not only does this create wispy ends, but allows Briana to remove large amounts of hair in one motion.
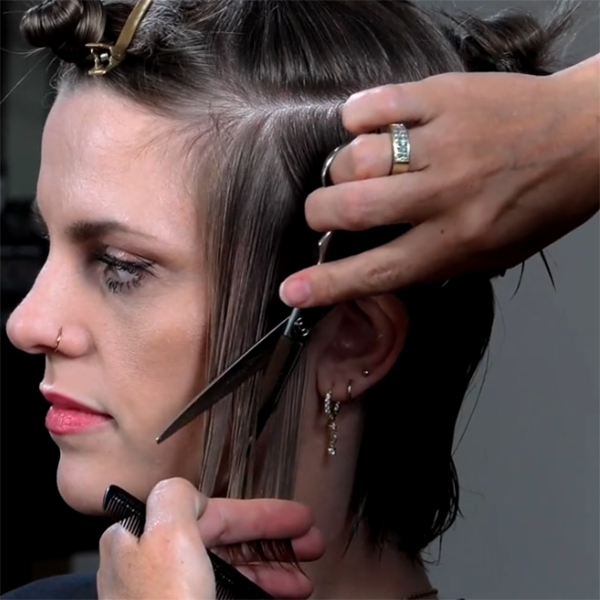
Hot Take(away): What’s the most stressful area when cutting a bob? Around the ear of course! With the bixie, this area is less stressful. “When cutting a bob, you’re always tapping and adjusting so you don’t jump or go too short around the ear,” explains Briana. “With a bixie we are TRYING to be short around the ear. Remember, this is our piecey undercut so don’t be afraid to go shorter in this area.”
Debulk with A Razor to Avoid A “Saggy” Undercut
One of the most important areas of a bixie is the nape area. Why? It tends to be where the most weight is, leaving the style looking bulky or “saggy.” For this area, Briana switches to a razor. Why?
“I can work quickly and remove weight but still maintain length. My razor gives me the dexterity to carve away—especially at the nape,” she explains. Here’s a quick rundown of Briana’s approach:
- Take a center part. Then, take two diagonal-forward partings to create a subsection covering the back hairline.
- Use a comb to create a center vertical subsection and hold the hair straight out from the head.
- Use the edge of the razor and a gentle motion to cut the hair from short to long, flattening the hair to the back of the neck while maintaining length at the ends.
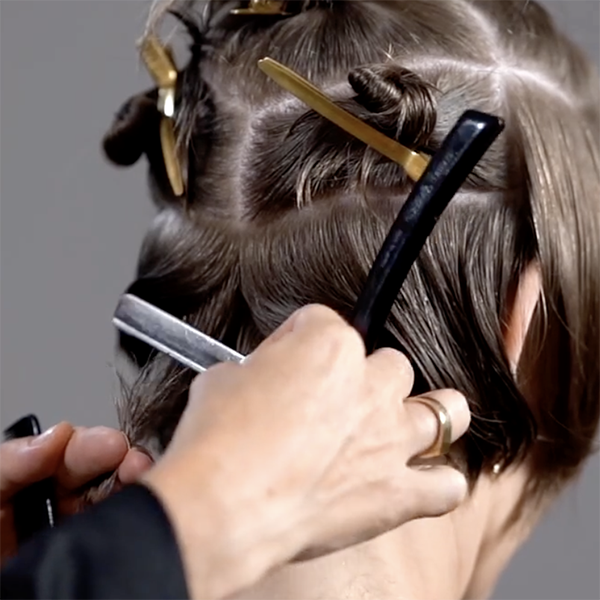
Pro Tip: No razor? No problem! Achieve the same effect with your scissors using a fast open-close technique to shatter the nape area. “These are concave layers so you want to make sure the hair is lifted straight up and out before cutting,” Briana explains.
Connect the Crown to the Undercut with a Traveling Guide
Remember when we said that the bixie is a hybrid of two haircuts? Wondering how to connect the two? Here’s a hint: It happens at the crown. Switching back to her Paragon II scissors, Briana takes a center section at the back of the crown and elevates the hair straight up. Then, she holds her scissors slightly open and uses a fast up-and-down motion to shatter the corner until it is completely removed.
“It doesn’t create a full layer here,” she explains. “It’s just a little pop [of texture] right there,” she adds. Using that initial section as a traveling guide, Briana continues this technique around the crown creating soft layers connecting the haircut.
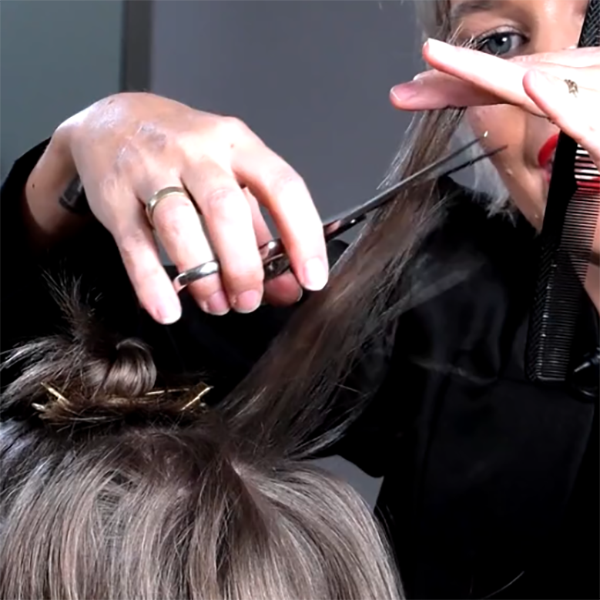
Slide to see the before & after!

Master the bixie: Watch the course NOW on BTC University!
More from
ARC™ Scissors
-
Blowouts
Bob Styling Guide: 5 Ways To Style Short Hair
-
BTC Hair Trend Report
The Biggest Haircut Trends of 2024
-
Dry-Cutting
Bang Breakdown: How To Cut 2024’s Top Fringe Trends
-
Dry-Cutting
2024 Fringe Guide: How To Consult, Cut & Style Trendy Bangs
-
BTC University
10 Gifts & Stocking Stuffers on Every Hairdresser’s List This Year
-
BTC Events
BTC “On Tour” Nashville Recap: Everything You Missed
-
BTC Hair Trend Report
The Biggest Haircut Trends of Fall & Winter 2023
-
BTC Hair Trend Report
Layering Guide: How To Cut & Style With Confidence
-
Bobs
The ’90s Bob: How To Cut & Style This Trending Haircut
-
Facebook Lives
Volume Guaranteed: Try This Layering Technique For Fine Hair
-
Barbering
How To Style The Biggest Men’s Summer Trends
-
Bobs
The Biggest Haircut Trends of Summer 2023
-
Bobs
The French Bob: How to Cut it
-
Brunette
Trend Breakdown: Hailey Bieber’s Glazed Brunette
-
Barbering
2023’s Top 9 Hair Trends For Men
-
BTC Hair Trend Report
2023 Fringe Guide: How To Cut This Year’s Biggest Trends
-
BTC Hair Trend Report
2023 Hairstyling: 11 Trends You Need To Know
-
BTC Hair Trend Report
Invisible Layers: What This Haircut Trend Really Means
-
BTC Hair Trend Report
2023’s Biggest Haircut Trends
-
Bobs
Hailey Bieber’s “Preppy, Contoured Bob” Trend: What You Should Know
-
BTC University
4 Styling Secrets For Butterfly Layers
-
This Year’s BIGGEST Products: 2022’s Most Talked About
-
Bobs
The Biggest Winter Haircut Trends To Kick Off 2023
-
Bobs
TREND ALERT: Wednesday Addams-Inspired Fringe


