
High Speed Balayage: 5 Tips To Help You Pick Up The Pace

5 Tips To Help You Master The High Speed Balayage Technique
Would you agree that balayage is one of your most-requested services right now? Then it’s time you start maximizing these appointments with timesaving cheats and quicker application methods. To help you pick up the pace, Lo Wheeler (@lo_wheelerdavis) stopped by The BTC House to share her high speed balayage technique.
But first, let’s talk about timing. This technique should only take about 2 to 2½ hours:
- Application—30 minutes
- Processing—40 to 50 minutes
- Finishing/Styling—30 minutes
- Greeting/Consultation/Photos—About 10 minutes
Got it? Good! Now keep scrolling to get five of the best tips Lo shared, then click here to subscribe to BTC-U to gain access to the full online class!
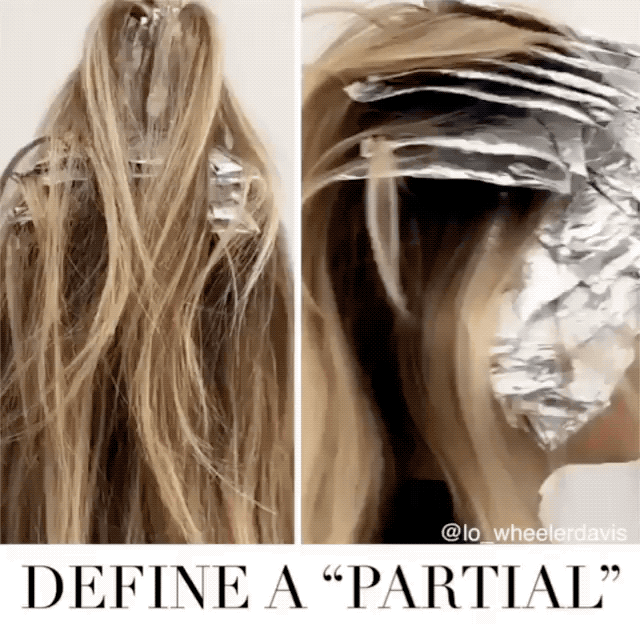
1. The Wreath Parting Is Where It’s At
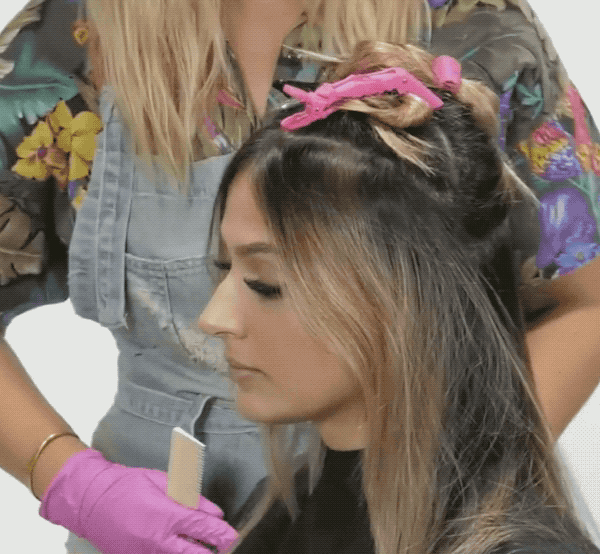
Lo says she loves to work with a wreath parting because it’s fast to paint and ensures the hairline is bright and bold. But what is it? It’s essentially a large halo section that mirrors the crown, which is where a wreath would sit on the head. Then, the hair left out is what Lo lightens first because it will naturally get the most lift and be the brightest.
2. Lo’s Secret For A Consistent Lift
By the time you reach the last few strands, is your lightener usually too thick and hard to work with? To avoid that AND to ensure a consistent lift throughout, Lo only works with one scoop of lightener at a time and remixes often. That way, her formula is always at its most powerful. As for the developer, you can bump it up as you work.
Note: When balayaging brunettes, Lo says she likes to mix Kenra Professional Simply Blonde Blue Powder Lightener with either 20- or 30-volume developer because she likes its consistency and texture.
Products Used
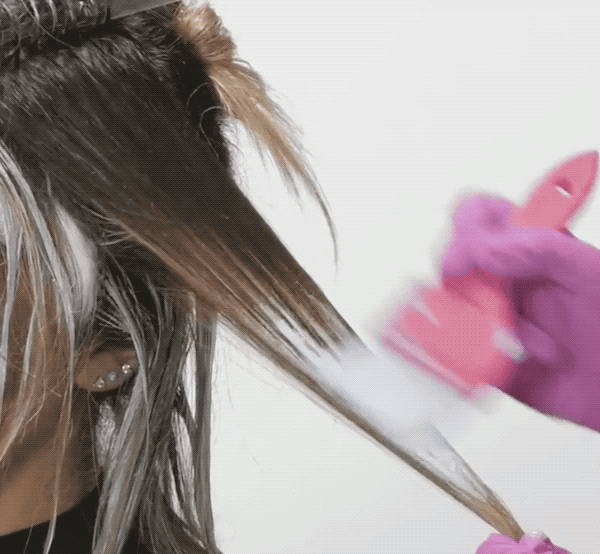
3. How To Avoid Splotchiness & Bleeding
If you’re worried about the root area looking splotchy, Lo says to squeegee the excess product using two fingers to help blur potential trouble spots. But if you’re worried about product bleeding through, simply use cotton as a barrier between sections.
4. What To Do About Gray Coverage
If a client wants balayage but also needs gray coverage, Lo has two ways you can handle the appointment:
- You could apply the global root touch-up application first, then balayage at the shampoo bowl to save time.
- Or you could tackle both at the same time by applying the gray coverage formula to the roots and then balayaging the midlengths and ends.
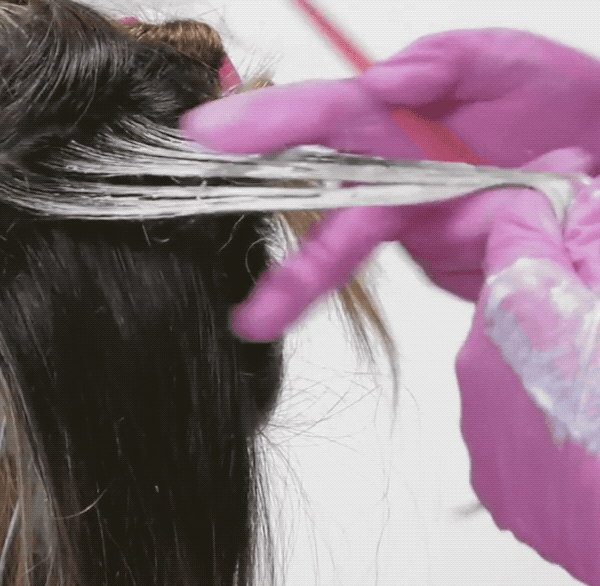
5. How Different Hair Types Affect The Technique
For curly/thicker hair types that are more forgiving with balayage, Lo will surface paint globally around the head. But for finer hair and brunettes, which aren’t as forgiving, she’ll paint the top and bottom of each section and then triple check everything is perfectly blended.
Check out the before and after below!
Want to watch the full technique from start to finish? Click here to subscribe to BTC-U!

More from
Kenra Professional
-
Dry-Cutting
Bang Breakdown: How To Cut 2024’s Top Fringe Trends
-
Dry-Cutting
2024 Fringe Guide: How To Consult, Cut & Style Trendy Bangs
-
Facebook Lives
Ponylights: How To Brighten The Hairline in Less Than 20 Foils
-
BTC Hair Trend Report
Quiet Luxury Blonde: The “Old Money” Trend Explained
-
Hair Color
Bold Color Trends You Need To Know For 2024
-
Balayage
3 Steps To Make A Bronde Hairline Pop
-
Blonde
6 Blonding Techniques To Save Your Client’s Hair
-
Blonde
HOW-TO: CUSTOM TEASYLIGHTS WITHOUT THE TEASE
-
BTC Hair Trend Report
Your Complete Guide To Color Blocking
-
Haircuts
How To Cut Layers WITHOUT Losing Length
-
Bobs
6 GENIUS CUTTING HACKS WE STOLE FROM INSTAGRAM
-
Frizz
Moisturizing Oil
-
Barbering
5 Genius Blonding, Color + Cutting Cheats To Try Now
-
Accessories
2022 Styling Trends To Know: Blowouts, Money Piece Braids + Hair Rollers
-
BTC Events
#thebtcshow 2021
-
BTC Events
Connection Center at #thebtcshow 2021
-
Beachwaves
Boho Bridal Crown Braid
-
Texture
Volumizing Spray Clay 15
-
Balayage
4 Tricks For Foilayage + Shadow Roots
-
Balayage
How To Cover Grays & Open Air Balayage At The Same Time
-
Blonde
Filling The Hair? Don’t Skip These 4 Steps!
-
Corrective Color
Curly Color Correction: Brassy Blorange To Smoky Silver
-
Balayage
Problems With Open Air Balayage? Read This!
-
Manufacturer
Henkel Launches Beauty Care United

