
How To Style A Pixie Cut


Learn How To Perfectly Style A Pixie Every Time
Every time we see Briana Cisneros (@brianacisneros) rocking her signature shaggy pixie, we consider calling our stylists on the spot. Finishing a cut can be just as important as the cut itself, especially if it is a major change for your client. Scroll through for all of her tips and tricks on styling a pixie for the next time your client requests a chop!
When styling a pixie there are few key things to take into consideration:
1. Foundation
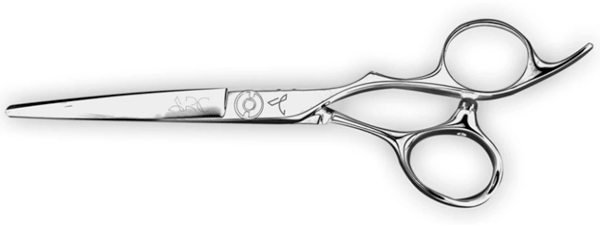
An easy at-home styling routine starts with a strong cut. Pixies are so personalized and can be so easy when the cut is done right. If texture and growth patterns are taken into consideration when cutting a pixie, the result is a cut that basically styles itself. Briana uses her ARC™ Scissors PARAGON II to texturize and remove weight where it is necessary with deep point cutting. Press play below to see her texturizing tricks in action!
Ready To Try Briana’s Deep Point Cutting Technique? Click Here To Purchase ARC™ Scissors Paragon II!
2. Prep
Styling is even easier when you prep the hair with the right product, so choose the prep product based on the hair texture. “If I am in need of straightening or smoothing the hair, I will choose something to aid me in that depending on the client’s hair. However, for my own hair, I prep my hair with Wella Professsionals EIMI Ocean Spritz and blow dry it in using ghd Air Elite. I use a flat brush to flat wrap the back and sides and then get some curl, flip, and volume in my bags. I mix together three parts Wella Professionals EIMI Perfect Me with one part Wella Professionals EIMI Rugged Texture and work it through, evenly distributing through the midlengths and ends first. Then I’ll flip, wave and add finishing touches with my ghd Platinum+ Styler,” says Briana. Watch the below video to see the process in action!
3. Natural Growth Pattern
“In my opinion, it is always best to work with the hair’s natural growth pattern and cowlicks rather than trying to fight them and force them into a position that they push back on. For instance, in the crown area, allowing the hair to flow and move with the natural growth pattern will give the hair a natural push forward towards the face on the top and also down towards the nape in the back in a way that almost styles its self,” explains Briana.
4. Fringe
“Another major area to pay close attention to is the fringe area. The fringe on a pixie is the part that I feel is really responsible for the personality of a haircut and also weighs in on the suitability for the client. It is one of the major areas that can change an entire face shape”, explains Briana. SOUND ON for how Briana styles her bangs!
Want More ARC™ Scissors Education? Click Here To Visit Our Education Page!

More from
ARC™ Scissors
-
Blowouts
Bob Styling Guide: 5 Ways To Style Short Hair
-
BTC Hair Trend Report
The Biggest Haircut Trends of 2024
-
Dry-Cutting
Bang Breakdown: How To Cut 2024’s Top Fringe Trends
-
Dry-Cutting
2024 Fringe Guide: How To Consult, Cut & Style Trendy Bangs
-
BTC University
10 Gifts & Stocking Stuffers on Every Hairdresser’s List This Year
-
BTC Events
BTC “On Tour” Nashville Recap: Everything You Missed
-
BTC Hair Trend Report
The Biggest Haircut Trends of Fall & Winter 2023
-
BTC Hair Trend Report
Layering Guide: How To Cut & Style With Confidence
-
Bobs
The ’90s Bob: How To Cut & Style This Trending Haircut
-
Facebook Lives
Volume Guaranteed: Try This Layering Technique For Fine Hair
-
Barbering
How To Style The Biggest Men’s Summer Trends
-
Bobs
The Biggest Haircut Trends of Summer 2023
-
Bobs
The French Bob: How to Cut it
-
Bobs
The Bixie: 3 Cutting Techniques to Master the Look
-
Brunette
Trend Breakdown: Hailey Bieber’s Glazed Brunette
-
Barbering
2023’s Top 9 Hair Trends For Men
-
BTC Hair Trend Report
2023 Fringe Guide: How To Cut This Year’s Biggest Trends
-
BTC Hair Trend Report
2023 Hairstyling: 11 Trends You Need To Know
-
BTC Hair Trend Report
Invisible Layers: What This Haircut Trend Really Means
-
BTC Hair Trend Report
2023’s Biggest Haircut Trends
-
Bobs
Hailey Bieber’s “Preppy, Contoured Bob” Trend: What You Should Know
-
BTC University
4 Styling Secrets For Butterfly Layers
-
This Year’s BIGGEST Products: 2022’s Most Talked About
-
Bobs
The Biggest Winter Haircut Trends To Kick Off 2023

