
Last updated: November 05, 2020
Your Complete Guide To Cutting & Styling Pixies

Master The Pixie Cut: Establish Shape & Enhance Texture
Short hair is seriously having a moment right now—so are you ready for those cool-girl clients requesting a variety of trendy, chopped pixie cuts? No worries! Here’s literally everything you want to know about cutting and styling pixies from short hair expert and BTC Team Member Emily Anderson (@emilyandersonstyling). Emily’s Instagram is an endless feed of textured and precise pixie education, so keep scrollin’ for her trusted tools, tips and the styling arsenal you need to slay this on-trend cut.
1. The Tools You Should Be Using
- Cutting: Learn how to utilize a razor. “Using a straight-edge razor is an amazing way to sculpt short hair,” recommends Emily. “It’s easier to cut with precision in your pixie work, but a feather razor is a good second option.”
- Styling: Get comfortable with smaller barrels and irons. “Using a small flat iron allows versatility for styling on short-haired clients,” shares Emily. “I can easily create bends and waves for the lived-in feel or a more structured wave, smooth or straight texture.”
2. Head Shape v. Face Shape
- Short haircuts expose a lot more of your client’s head than longer cuts, so the head shape has a bigger impact on movement—that’s why it’s important to map out what areas need more weight and weight removal to customize every cut.
- Don’t let clients stress about the question, “What’s the best cut for my face shape?” It’s more important to identify what features they want to highlight or may feel insecure about during the consultation. “Talking about lifestyle and daily routine is equally important,” shares Emily. “This will help determine what short haircut will suite them best.”
3. Dry-Cutting Is Where “The Magic” Happens
- How do you customize your client’s pixie? All the detail works—those finishing touches of customized texture and softening the ends—is what completes the haircut.
- Whether cutting wet or dry, keep consistent moisture. “The hair flicks and moves differently depending on moisture levels,” shares Emily. And if you’re cutting dry, then make sure the hair is 100 percent dry.
- Hair Cheat: Before blow-drying for a dry cut, Emily applies TIGI® Professional Bed Head After Party to damp hair (it’s typically applied to dry hair!) to smooth strands and control flyaways.
4. Work With Natural Partings
- When dry-cutting, identify natural partings and then check how the haircut looks from multiple partings. Short-haired clients want versatility, so styling and moving the hair in different directions will expose movement and reveal where to tweak imperfections.
- When blow-drying, utilize the natural parting in the crown and allow the hair to flow in the direction it wants to move naturally to enhance natural texture. Before the blowout, Emily preps with TIGI® Professional Bed Head Superstar Queen For A Day and Oh Bee Hive! to build volume and a strong styling foundation.
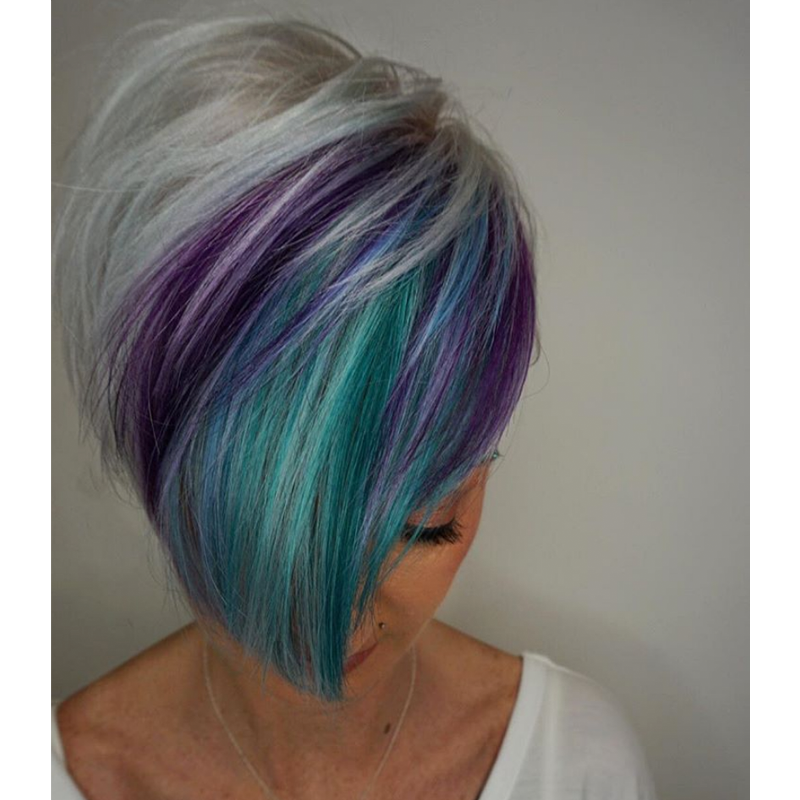
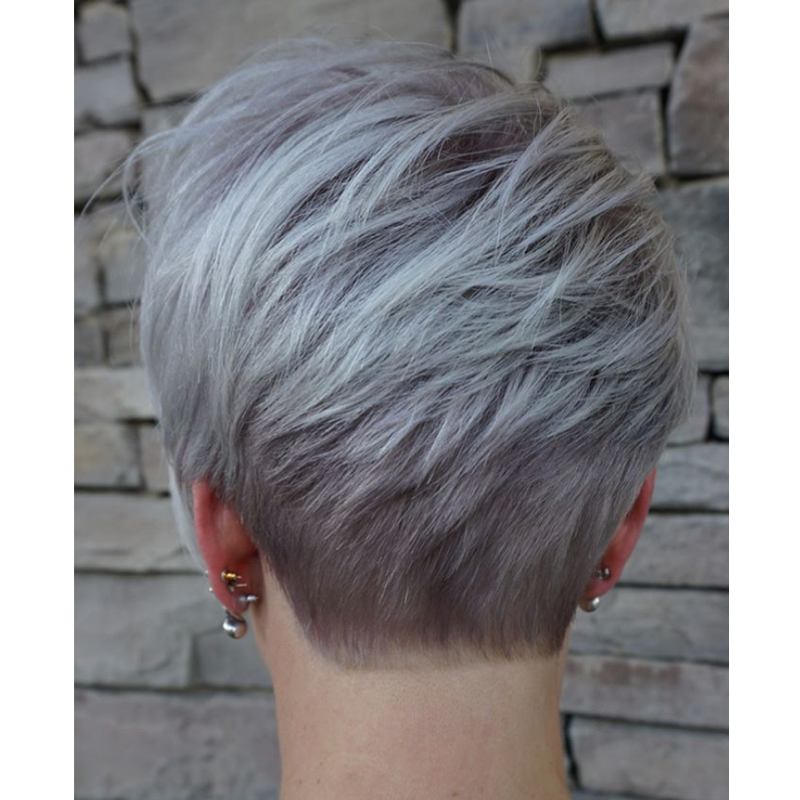
5. Click Through Emily’s Short-Haired Styling Arsenal
Products Used
Emily swears by TIGI Bed Head for pixie-approved styling products on every hair type:
- Curly Girls: Apply Foxy Curls™ Extreme Curl Mousse before diffusing natural curls.
- Piecey Texture & Definition: Apply Manipulator texture paste for piecing out pixies.
- Add Shine: Apply Headrush to add depth, high-gloss and a silky finish.
- Smooth Out & Add Thickness: Apply Small Talk to for volume, separation and control.
- Build Hold: For long-lasting hold, spray down styles with Masterpiece Hairspray.
Slide Through For Some #PixieInspo!
Instagram via @emilyandersonstyling
More from
TIGI® Professional
-
BTC Hair Trend Report
The Biggest Haircut Trends of Fall & Winter 2023
-
BTC Hair Trend Report
Your Complete Guide To Color Blocking
-
Bobs
Retouch Haircuts: 4 Ways To Touch-Up Your Client’s Cut
-
Conditioners
5 Tips For A Personalized, Lived-In Shag
-
Conditioners
Juxta-pose™ Dry Serum
-
Frizz
Contortionist™ Flexible Hairspray
-
Frizz
Wave Rider™ Versatile Styling Cream
-
Conditioners
Base Player™ Protein Spray
-
Beachwaves
3 Hair Cheats For Heatless Styling This Summer
-
Blow Dryers
The Secrets To Long-Lasting Supermodel Blowouts
-
Manufacturer
Anthony Mascolo Discusses Bed Head By TIGI’s 25th Anniversary + A New Pro Exclusive Line
-
Coronavirus
COVID-19: What The Current Closure Means For U.K. Salons
-
Haircare
Bed Head Ego Boost™
-
Styling
Salty Not Sorry™ Salt Spray
-
Haircare
Bed Head Gimme Grip™ Shampoo
-
Hair Color
Ruby Copper
-
Balayage
Want To Paint Faster Face-Framing Blends? Watch This!
-
Blonde
4 Color Placement Tips To Work Smarter, Not Harder
-
Balayage
WATCH: Avoid Splotchy Hand Painting With @wesdoeshair’s Secrets
-
Blonde
’90s Money Piece Bob
-
Haircare
Your Client’s Guide To Summer Hair Damage Repair
-
Facebook Lives
Watch: Men’s Clipper & Razor Cutting Tutorial
-
Coronavirus
Beauty Changes Lives Announces An Additional $70,000 In Grant Money Is Now Available
-
Business
3 TIGI Videos To Motivate You In Quarantine

