
Marilyn Brush Step-by-Step

Advertisement
Marilyn Brush Step-by-Step
HOW-TO STEPS 
-
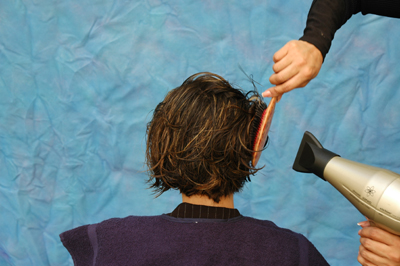 1
1Apply the finishing product to the wet hair and untangle the hair. Then, with the blow dryer and using The New Yorker Brush, work the hair in a circular motion to get rid of the excess water. You will find an equilibrium point once the hair is 70% dry.
This is a very important step because you will save time and avoid exposing the hair to unnecessary abuse. -
 2
2Section the hair leaving a perimeter of 2 inches all around the line of hair growth. Tie the hair up with a hair clip.
It is significantly important for the blow dryer to have a long cord to facilitate the work. It should also have at least 1,500 watts. The nozzle of the hair dryer should be parallel to the handle of the blow dryer. The blow dryer should be at maximum speed at all times. -
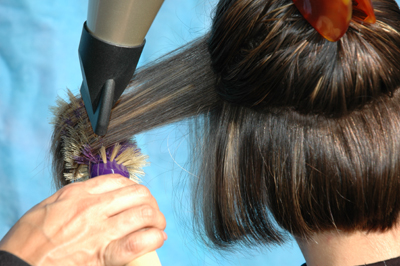
 3
3In order to avoid burning the hair, the client’s scalp and the brush, it is rather important to position the nozzle of the blow dryer in a “T” position, allowing the air flow to go in the same direction as the cuticle of the hair, we will refer to this as the “window”. This will allow an even distribution of the hot air between the hair and the brush, avoiding for the hot air to get to the scalp.
-
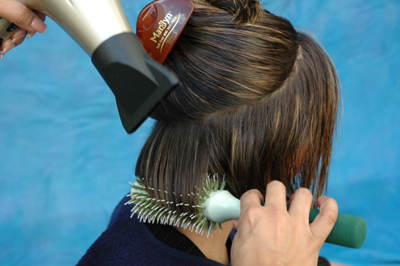
 4
4We suggest beginning the blow dry in the neck area. Follow the guide of the picture for the positioning of the brush and the blow dryer. When choosing a section to blow dry, make sure to use the brush from roots to ends to make sure that there are not tangles.
Place the section on top of the brush and allow it to fall freely on the brush. Place the brush angled to the head. Pull the brush from roots to ends twice. If you need to do it more than twice, it means the hair was too wet when you began your blow dry. -
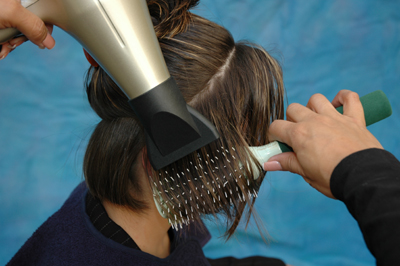
 5
5When working on the sides of the head and the front, it is extremely important to position the brush in a diagonal position in order to obtain a more natural look and avoid excess of volume in these areas.
-
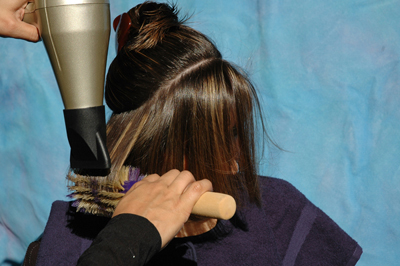
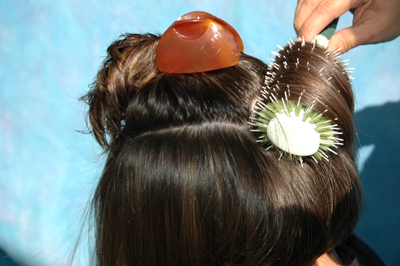 6
6Work in an upward motion towards the crown, repeating the same movement with the brush. Please keep in mind that the position of the brush will begin moving horizontally until you get to the crown. Try to keep the same position and movement with the brush until finished.
-
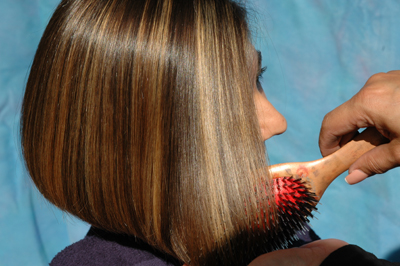 7
7Look at how the brush gives the hair a more natural shine. This is the result of the bristles in the Marilyn Brush, which allow the even distribution of the natural oils and the finishing products through each hair strand, closing the cuticle and protecting the hair from humidity.
YOU MIGHT LIKE THIS
-
Tools
Doug Martucci’s Marilyn Brush Tricks, Tips and Techniques
-
Blonde
Matrix Vavoom “Blonde Bombshell” Step-by-Step
-
Hair Color
Ruby Red from Aloxxi
-
Hair
Skyscraper Updo by ProRituals
TRENDING NOW!
-
BTC Hair Trend Report
The Biggest Haircut Trends of 2024
-
Business
3 Reasons Why Today's Highlights Are So Expensive
-
Copper
What Is The "Cowboy Copper" Hair Trend? Here's What It Really Means...
-
Blonde
Toning: 5 Fast Purple Shampoo Ideas For Blondes, Silver & Gray
-
BTC Hair Trend Report
Quiet Luxury Blonde: The "Old Money" Trend Explained
-
Uncategorized
TikTok's Viral "Scandinavian Hairline" Is Actually Not New...
-
Business
The Beginner's Salon Guide To Going Green & Reducing Waste
-
Blonde
The Biggest Hair Color Trends of 2024

