
Hair Paint Like A Pro With These 7 Tips

What’s holding you back from achieving hair painting pro status? Is your lightener to developer ratio not quite there? Or does it feel like your money pieces are a little too bold, taking away from the rest of the blend? What about your sectioning—is it hurting or helping the end result? Don’t worry, Patricia Nikole (@paintedhair) covered it all when she stopped by the BTC House in West Hollywood to share the best secrets behind her signature dimensional masterpieces. Learn how to paint hair like a pro with these 7 tips.
Products Used
1. Find The Perfect Ratio
In order to determine your ideal clay lightener mixing ratio, Patricia recommends experimenting on a mannequin head and recording your fave ratios. That’s how she learned that she likes to paint 1:2!
2. Diffuse The Money Piece
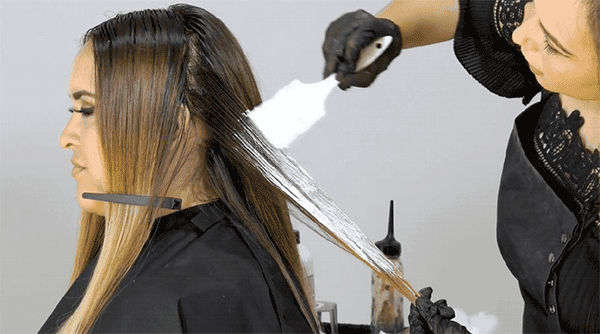
Patricia prefers a more diffused money piece instead of a bold burst of blonde. So for a seamless blend, she creates a “buffer base” by mixing Redken Shades EQ 7NB + Shades EQ Processing Solution. See how she does it in the gif below!
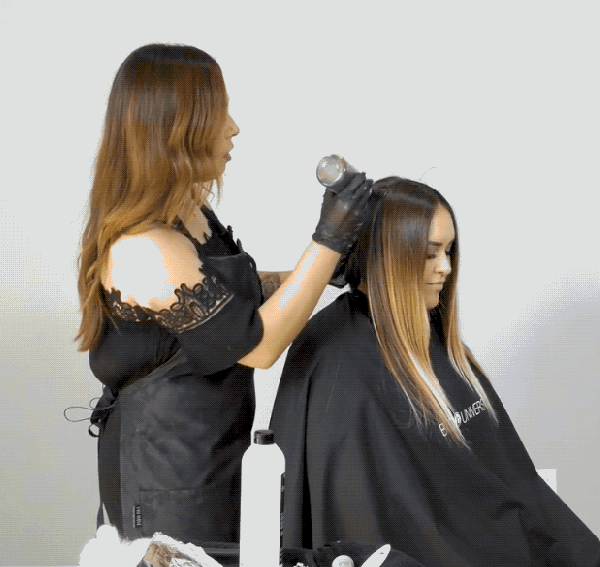
Note: The money piece should be lighter than the client’s base color for some dimension and added shine, says Patricia.
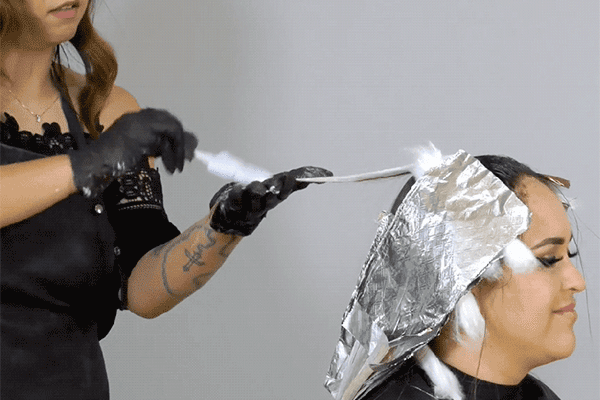
3. Use Foils & Cotton
Separate each section with foil on the midlengths only because this area will need the most lift. Then, place cotton from where the buffer base meets the lightener to prevent color from bleeding.
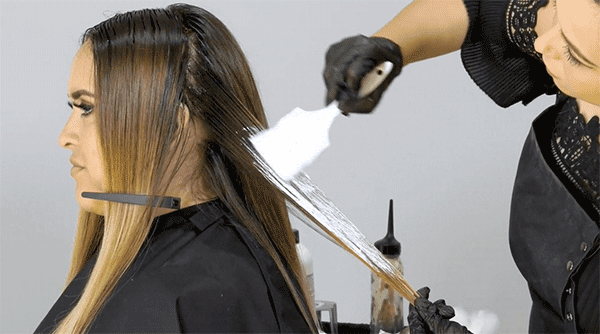
4. Don’t Heavily Saturate Each Section
Your application should only have enough saturation to paint the surface. You don’t want product bleeding through to the underside because this will create dimension as a lowlight. See what we mean in the below gif!
5. Offer A Money Piece Service
The money piece is so on-trend right now that Patricia recommends offering it as a service. It’s super quick and it’ll push balayage clients to come in more frequently for a refresher.
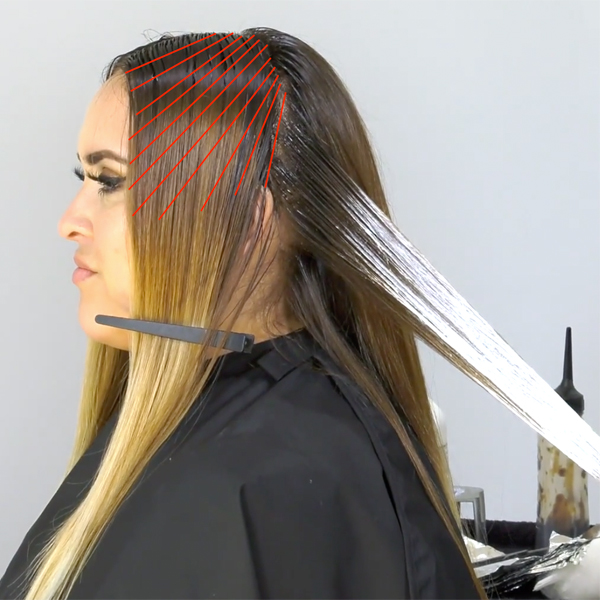
6. How Patricia Sections
Patricia likes to paint in quadrants, working off of her client’s natural parting. She then creates a small subsection from the top of the ear to the bottom of the nape on a slight diagonal back, which is where she likes to start painting.
From there, Patricia continues working off of her first subsection by taking diagonal forward section that pivots off the apex of the head. Check out an example below:
7. Comb First, Then Paint
Use a tail comb to gently blur the buffer base, then apply lightener with a super light tapping motion. Here’s what Patricia does:
- Start on the midlengths and work your way up toward the roots.
- Then, lightly drag the lightener down toward the ends with more pressure.
- For a seamless blend, finish each section by lightly tapping the lightener a few inches off the buffer base. Watch her paint in the gif below!
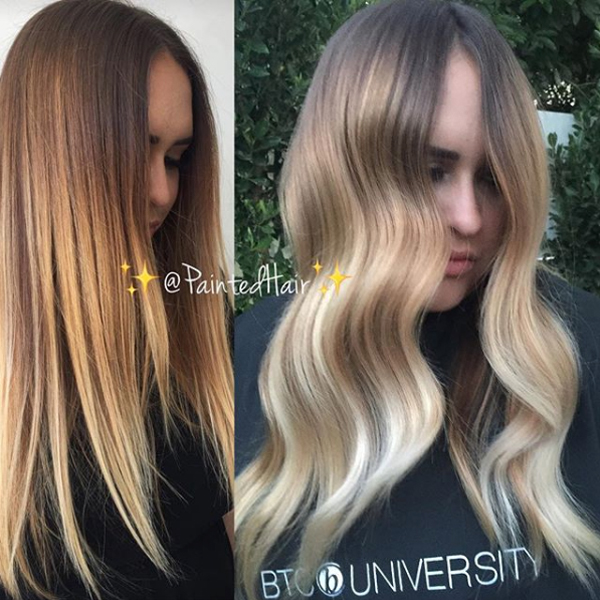
Check out the before and after!
Learn the entire step-by-step process from Patricia. Click here to purchase the video how-to.

More from
Patricia Nikole
-
Brunette
Lucy Hale’s Golden Chocolate Brunette
-
Balayage
5 Foil & Paint Tips For Faster Blonding
-
Manufacturer
Wella Announces Virtual Fundraiser To Support Hairdressers
-
THE BTC SHOW 2019
REDKEN AT #THEBTCSHOW 2019
-
#thebtcshow 2019
#THEBTCSHOW 2019: DAY 2
-
#THEBTCSHOW 2018
5 Tips For Dimensional Haircolor From Redken
-
Glossing/ Toning
@paintedhair’s Top 5 Toning Formulas
-
Balayage
You’ll Want To Watch These 3 Close-Up Technique Videos From @paintedhair
-
Balayage
4 Cut And Color Technique Videos From @paintedhair
-
Balayage
4 Secrets To Achieving Dimensional Balayage From @paintedhair
-
Balayage
3 Quickie Money Piece Videos From @paintedhair
-
Balayage
Balayage: Chestnut + Chocolate
-
Balayage
Blonde Ribbons On A Level 6 Base
-
Balayage
Melted Violet Balayage
-
Balayage
Color Correction: Blended Blonde Dimension
-
Balayage
4 Common Toning and Lightening Mistakes & @paintedhair’s Tips For Avoiding Them
-
Corrective Color
4 Close-Up Color Technique Videos From @paintedhair
-
BTC Quickies
You’ll Want To Watch These 11 Color, Cut & Styling Video Quickies

