Dry Cutting: 5 Essential Tips To Master The Technique
5 Useful Tips To Refine Your Dry Cutting Technique
Looking to get into dry cutting, but don’t know where to start? Dry cutting pro and BTC Team Member Buddy Porter (@buddywporter) stopped by The BTC House in West Hollywood to school us on the basics. Get some helpful cutting tips from the celebrity stylist who snips Ashley Tisdale and Camila Mendes’ hair and then hop over to BTC University for the full step-by-step tutorial with lifetime access.
Tip 1: It’s All In The Sectioning
Sectioning can be one of the hardest parts to figure out when dry-cutting. Buddy remarks, “Honestly, when I started learning how to cut hair dry the main issue for me was sectioning. Learning how to section hair is a little bit hard, especially if you’re not used to controlling it.”
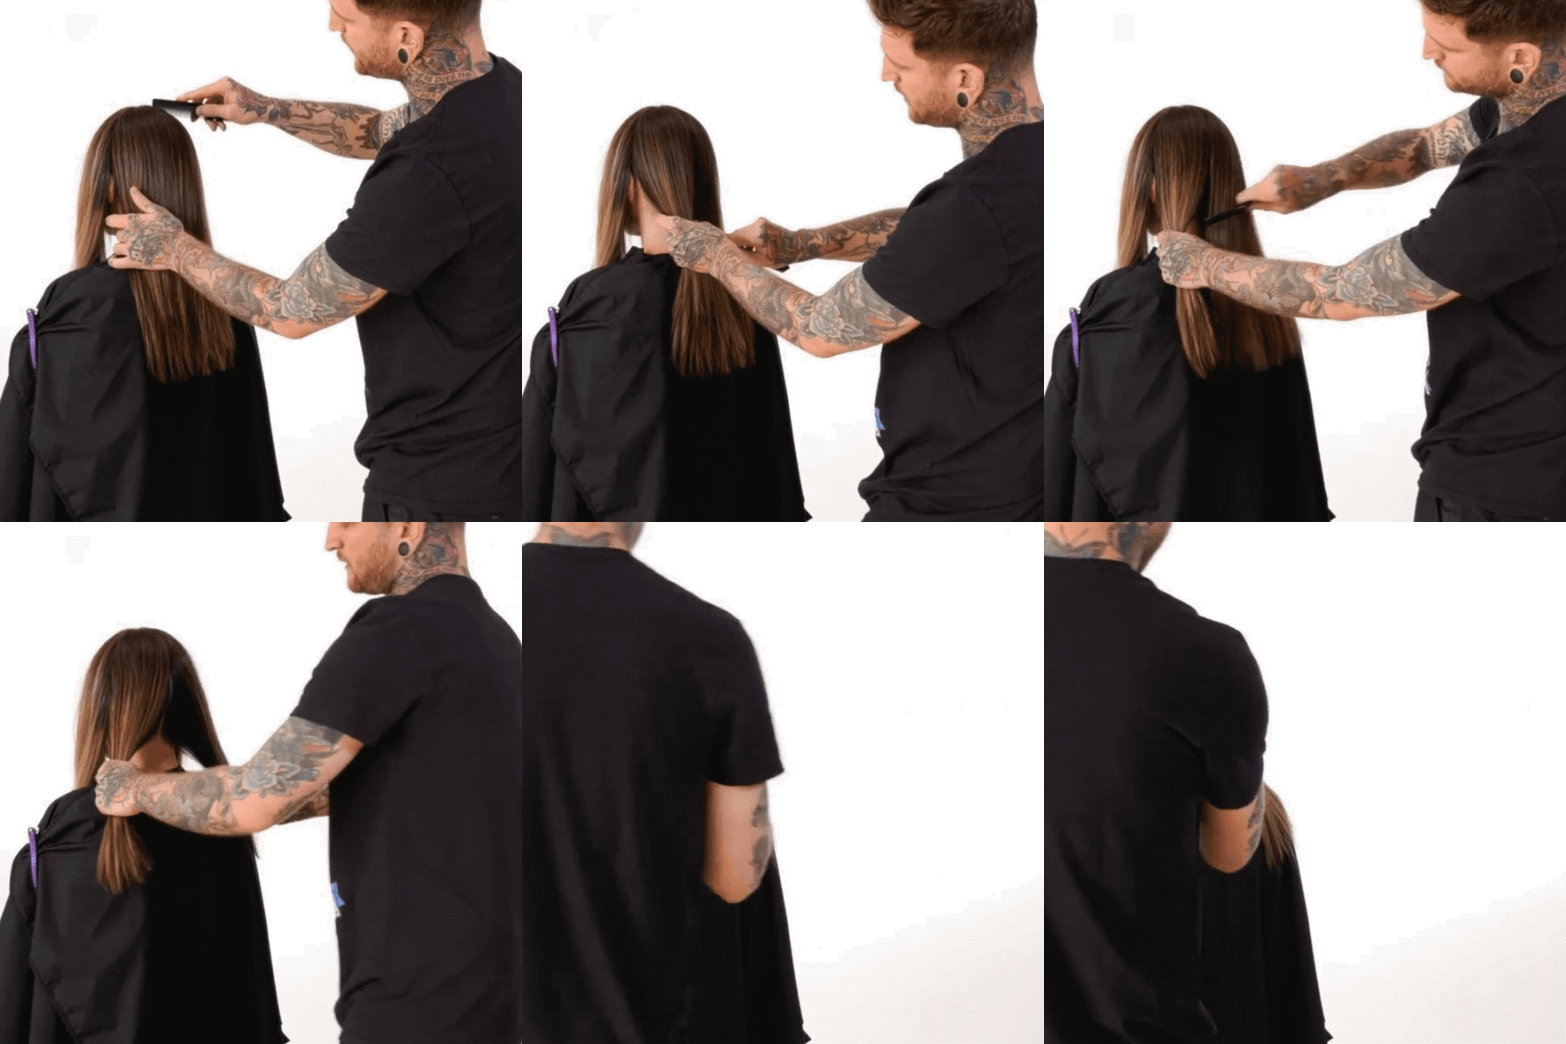
Here’s how he does it:
- Start by separating the hair from ear to ear at the crown, and then section hair down the middle in the back.
- At the occipital bone, go in at a forward diagonal to further separate the hair at the top of the ear on each side and clip out of the way on.
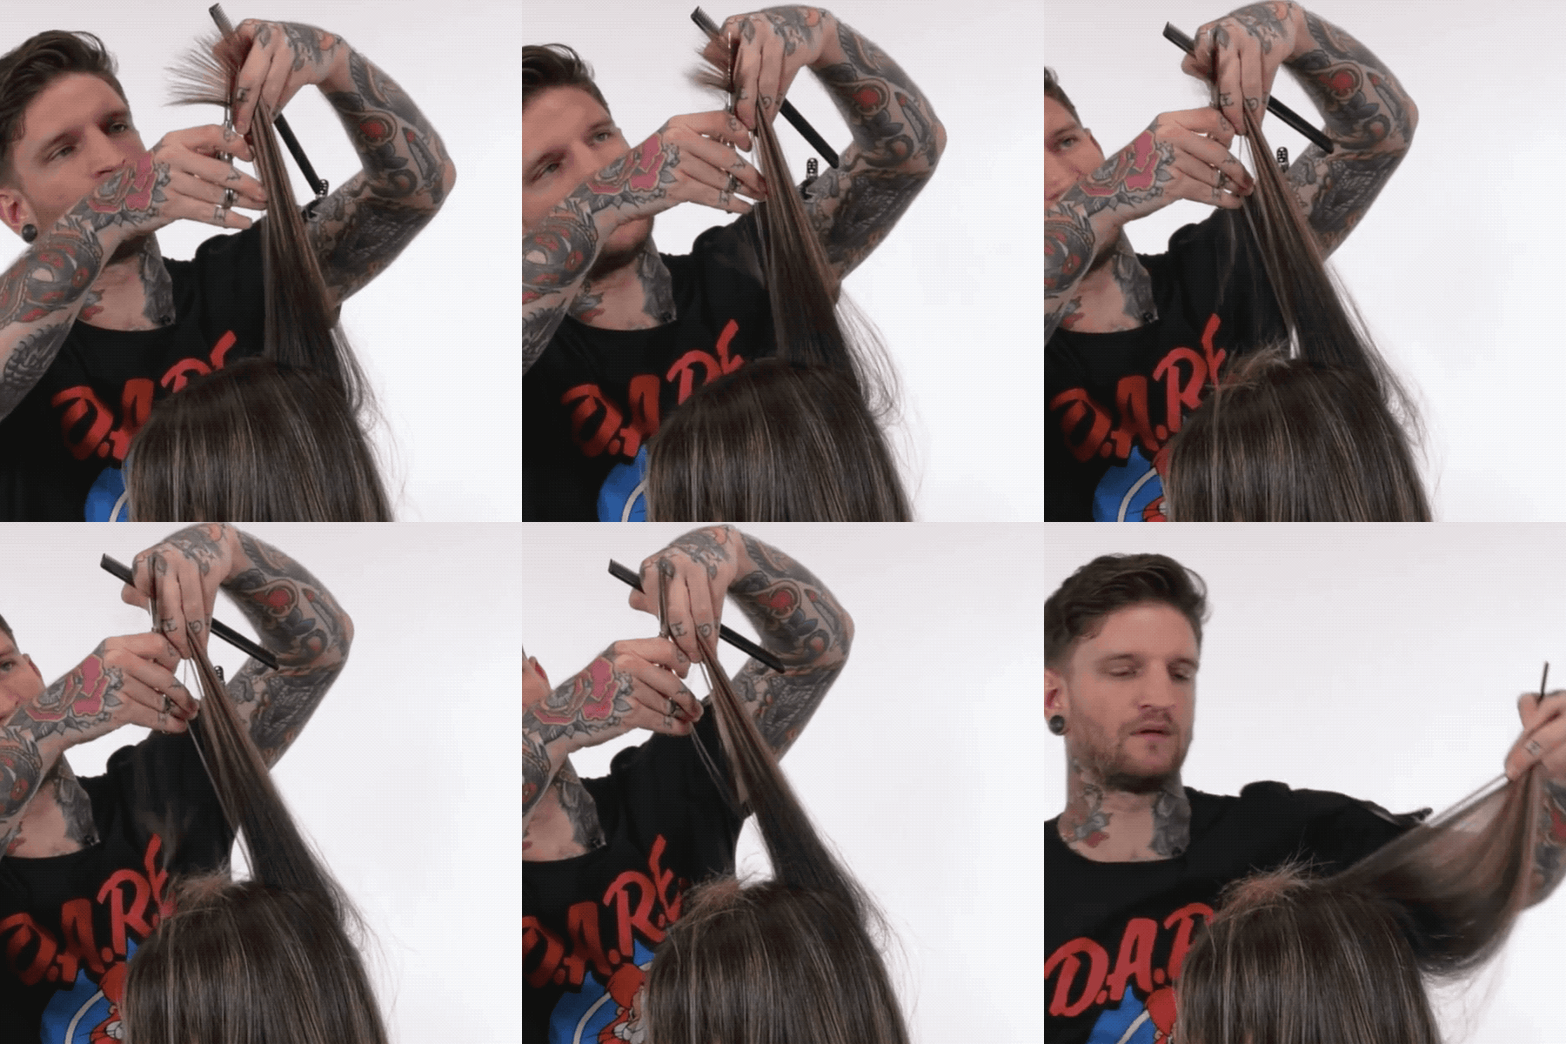
Pro Tip: If Buddy has a client who can’t achieve layers he wouldn’t section the hair at all. He recommends starting in the front and working towards the back, with most of the cut focused on the back section.
Tip 2: Keep The Head Straight
Make sure the client’s head is properly aligned and facing forward before the cutting starts. Buddy says, “With dry-cutting it’s really, really important to face your work.” Even the slightest head tilt will throw the cut off and create crooked lines, especially when aiming for a blunt cut.
Tip 3: Invest In Dry-Cutting Scissors
“You definitely want a dry-cutting scissor. If you don’t have one invest in one. It will change your career. It will change your life,” swears Buddy. “It will save you time. I’m using the ARC™ Scissors Master Series Paragon Sword. It’s their top of the line.” A good pair of dry-cutting shears can snip through wet and dry hair with ease.
Tip 4: Create Texture With Internal Layering
When adding movement to the hair with internal layering, invert the hair at 180 degrees and use the ARC™ Scissors Master Series Paragon Sword deep point cut the ends at an angle for really diffused and seamless layers.
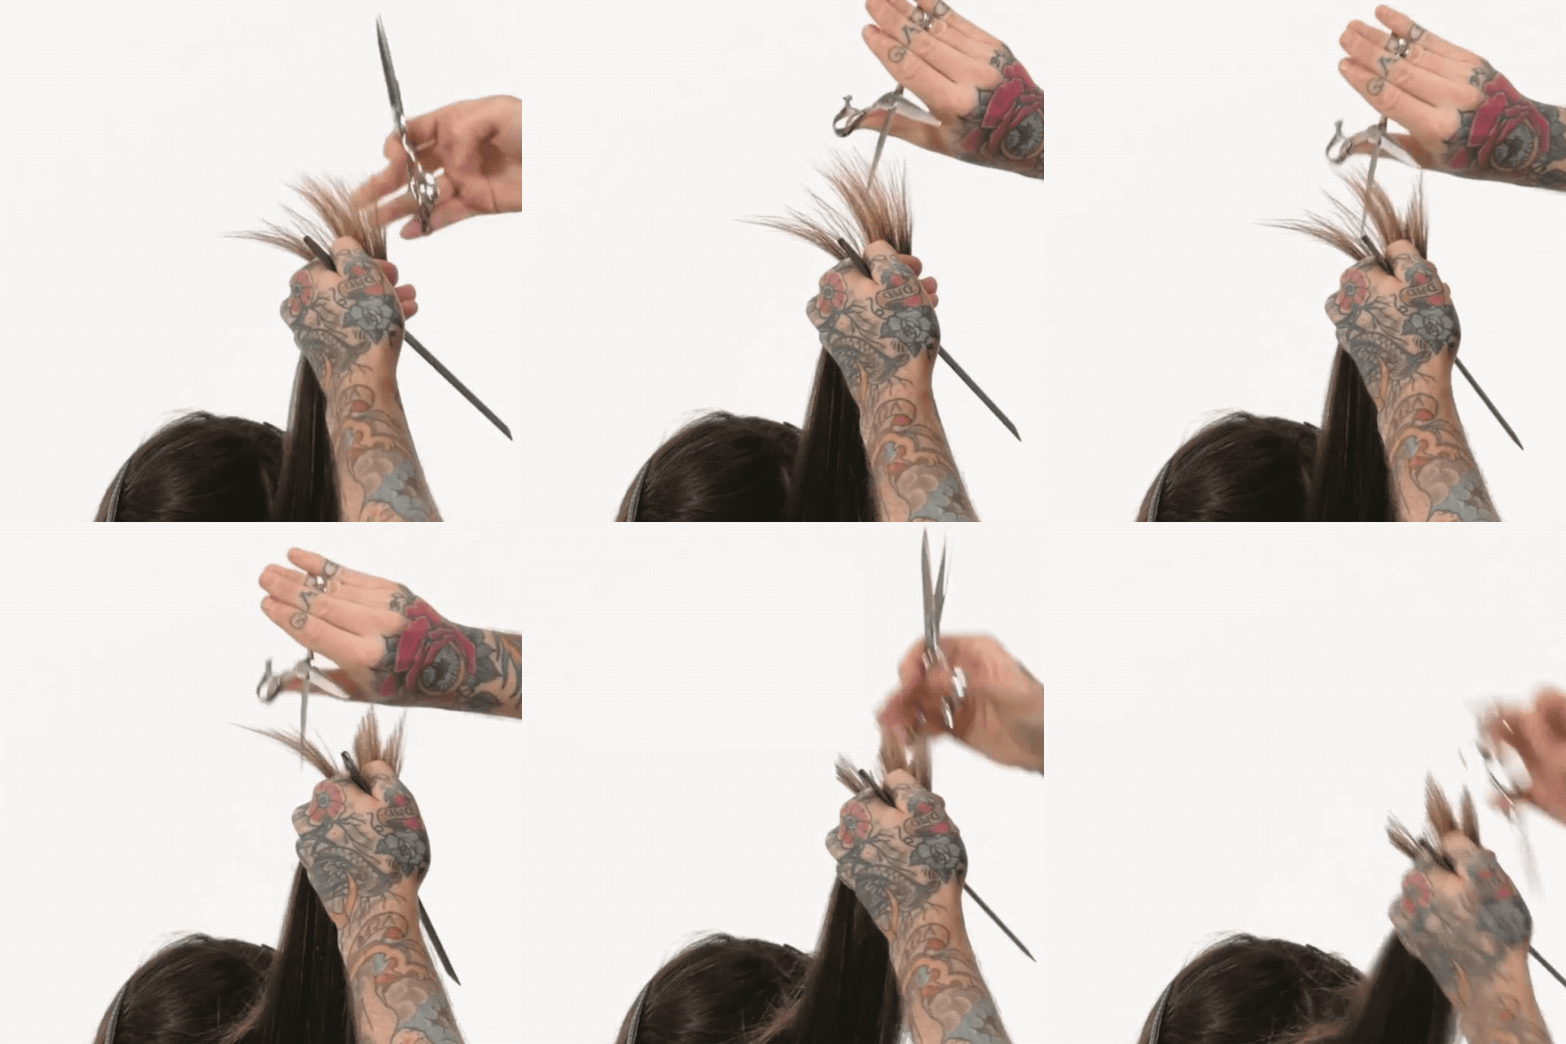
Note: “I choose how short I’m going to be cutting this by how the underneath of the layered section drops out,” says Buddy on internal layering. “If I don’t want every single hair to be affected and I don’t want a hole in this haircut, I make sure that some of that hair drops out. That way I know my perimeter is intact.”
Tip 5: Check The Layer Balance
To check for balance between layers follow the part line, pull hair out on both sides and line them up to see if they’re even. Make sure you do this following the radius of the head. Depending on the haircut, every single piece of hair won’t always be completely even on both sides and that’s OK.
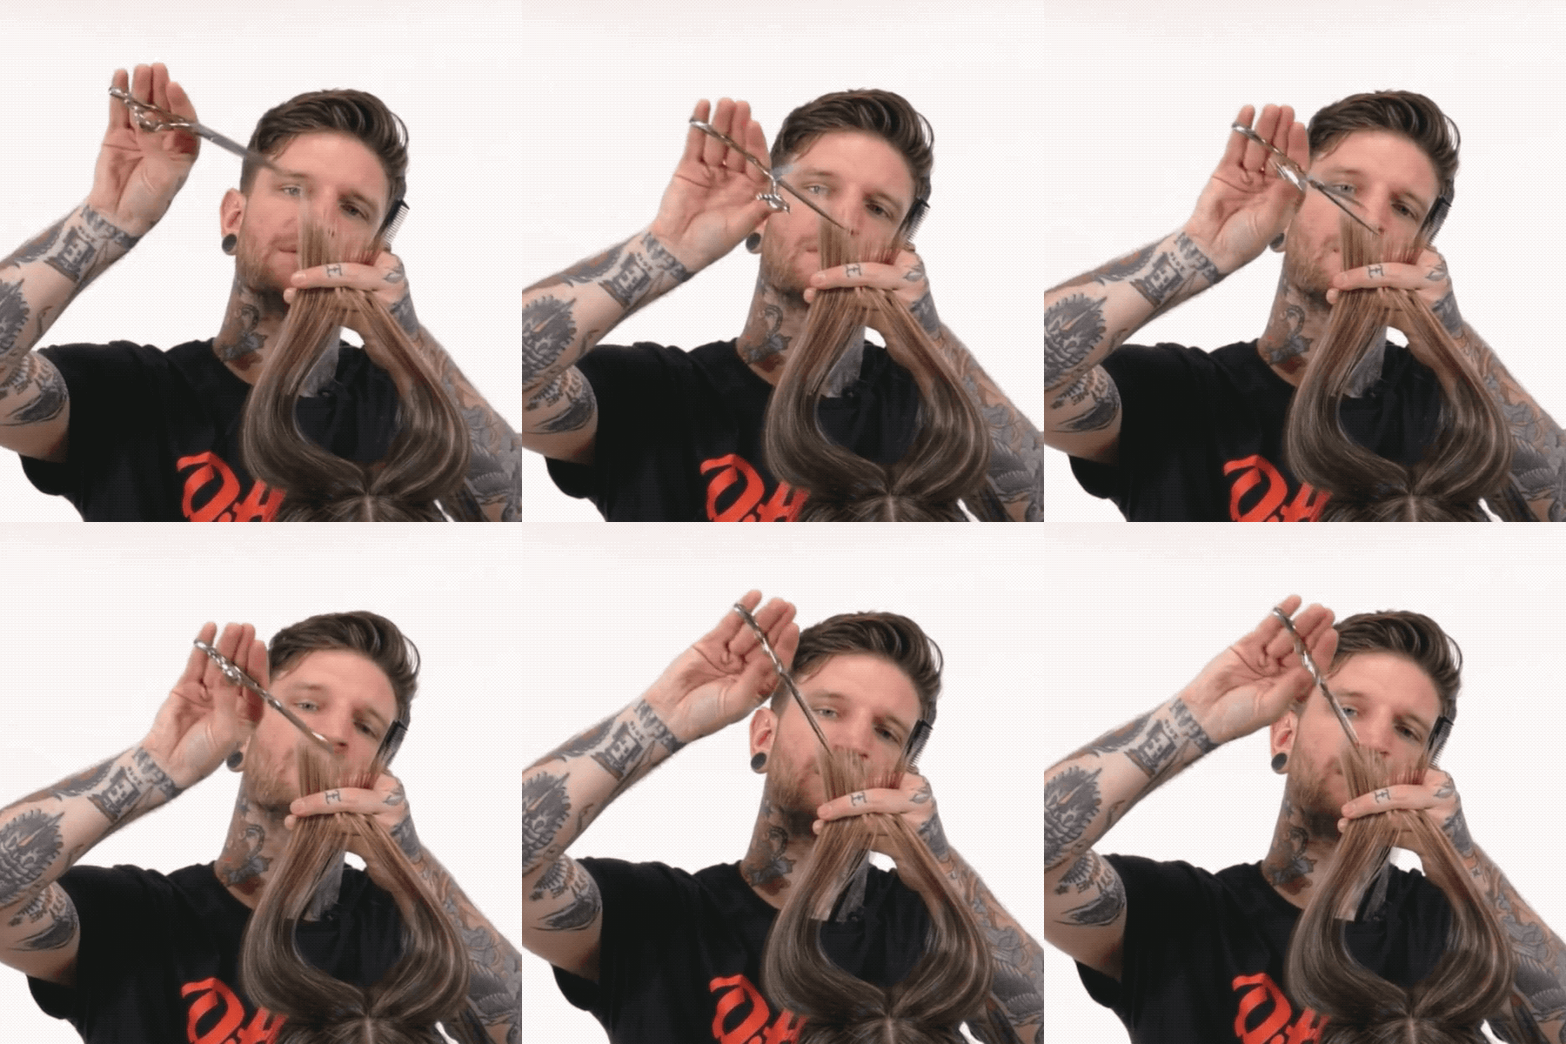
What do you do if the hair isn’t in balance? “If the hair wasn’t in balance you’re going to take a little mini, horse shoe section on both sides of the part line,” begins Buddy. “I’m bringing the hair straight up. I want it to look like a V.” If the v-shape is uneven, go in and even it out by point cutting.
Looking for more cutting tips from Buddy? Check out how he creates trendy LA layers!
More from
Buddy Porter
-
BTC Events
BTC “On Tour” New York City 2020
-
BTC Events
BTC “On Tour” Nashville—Here’s How We Closed Out Our 2019 Tour
-
BTC Events
BTC “On Tour” Nashville
-
BTC "On Tour"
BTC Hosts First Ever International Show: “On Tour” London
-
BTC Events
BTC “On Tour” London
-
BTC "On Tour"
“On Tour” London Cocktail Party
-
Bobs
Watch: 3 Dry Cutting Technique Videos
-
BTC ON TOUR
BTC “On Tour” Is Going To London, England—Here’s The Artist Lineup!
-
THE BTC SHOW 2019
Virtue® At #THEBTCSHOW 2019
-
#thebtcshow 2019
#THEBTCSHOW 2019: Day 1
-
#thebtcshow 2019
CO-LAB CUTTING AT #THEBTCSHOW 2019
-
Braids
Your Complete Guide To Braids & Beauty For Summer Music Festivals
-
Dry-Cutting
3 Dry-Cutting Fringe Tips
-
BTC Events
BTC “ON TOUR” DALLAS
-
BTC ON TOUR
“On Tour” Dallas Cocktail Party
-
BTC Events
BTC “On Tour” Dallas Show—Here’s Everything That Happened!
-
BTC Events
BTC’s Next “On Tour” Show Is In Dallas—Here’s The OMG Artist Lineup!
-
BTC Events
BTC “ON TOUR” CHICAGO
-
Dry-Cutting
How To Dry Cut Fringe & A Textured Lob
-
BTC Events
BTC “ON TOUR” New York City—Here’s What Went Down!
-
BTC Events
BTC “ON TOUR” New York City
-
BTC Events
BTC’s “On Tour” Show Is Coming To Chicago—Here’s The Artist Lineup!
-
Beachwaves
How To Style A Lob Cut 3 Different Ways
-
BTC Events
BTC Launches “On Tour” Show In New York City—Here’s The Artist Lineup!


