Bobs: 6 Extension Tips To Avoid An Awkward Grow-Out
Transitioning A Bob To Long Layers: Tips To Make Or Break Your Service
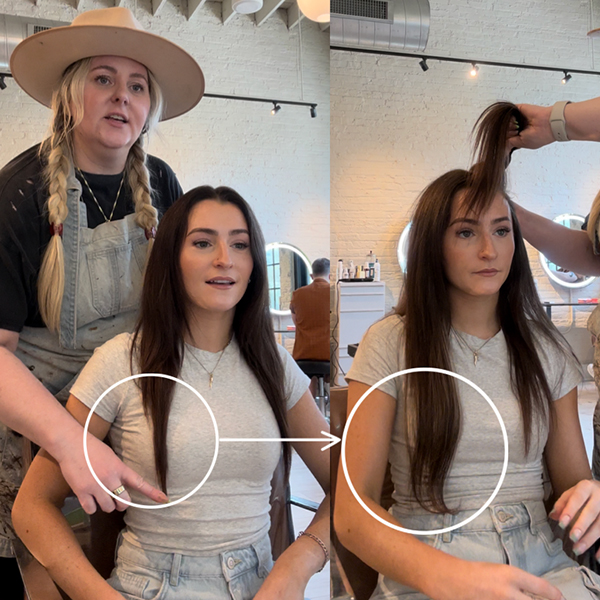
Your lifelong bob client wants extensions to skip the “awkward grow-out phase” and now you’re challenged to help them skip the awkward “oh, you got extensions!” phase. The task ahead: Blend out the unflattering “in-between” length, mend any wispy or grown-out ends into new hair and balance unwanted weight that counteracts fullness. Ready? Let’s talk strategy.
When BTC’s Editorial Director Steph sat in Hotheads® Lead Educator and Artist Natalie Ruzgis’ (@natalieruzgis) chair at her salon Thrive Hair Collective, they dove into short to long-term goals.
Steph’s hair history:
- Signature look: Blunt bob and micro fringe (for YEARS)!
- Most recent haircut: Texturized lob with grown-out curtain fringe (six months prior to extension consultation).
- Biggest concern: Avoiding the awkward lob grow-out phase where everyday styling had become a chore.
- Extra challenge: Just 10 months until Steph’s wedding! This marks the start of her hair grow-out journey to rock her natural hair for the big day.
- The goal: Use Hotheads® Premium Tape-In Extensions to create seamless midlength-to-long face-framing layers that blend into curtain fringe.
2. Consider “Coverage” in Your Method Strategy
Why tape-ins over any other method? The coverage. “There is no right or wrong answer here, everyone is different and clients have different needs,” says Natalie. “But, in my many years of experience, tape-ins for growing out a bob is the way to go for a few reasons.”
- The amount of coverage or “points of contact”: Using Hotheads® Premium Tape-In Extensions, these points exist on roughly 85 to 90 percent of the head which helps to hide the short hair.
- They are easy and quick to apply, and easier to place closer to the crown and in the nape areas without any visible detection.
- Natalie opts for a custom color blend using a variety of color combinations on different parts of the head to create a naturally soft, dimensional blend.
Rule of thumb for ordering hair: For clients with fine hair, use one to two packs. For clients with medium density, use two to three packs. For clients with thick hair, use three or more.
3. How To Avoid “Shelf Like Layers” & Blotchy Anti-Blends
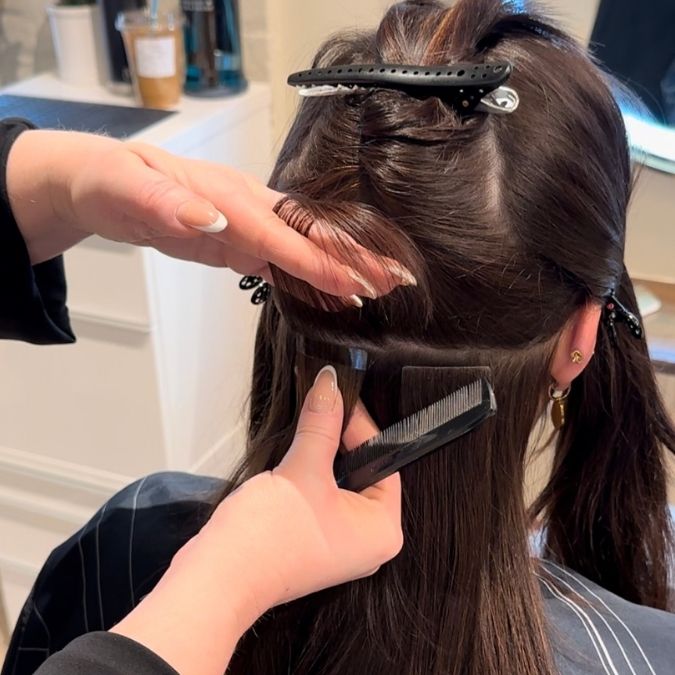
- The placement of tape-ins in the nape and crown are your key focus areas. As you create your roadmap and start applying tapes, visually check in and pull the hair in front of the client’s shoulders to ensure the entire nape is filled in.
- “Your eyes are your best tools,” says Natalie. This will reveal the difference if the blend is seamless or choppy. If you can still see the bob, you can always add more hair or soften the ends to achieve the blend.
- While you should definitely soften the ends with texturizing scissors, be very careful not to remove too much weight when transitioning a blunt bob to prevent building unwanted “steps” or “shelves” in the layers.
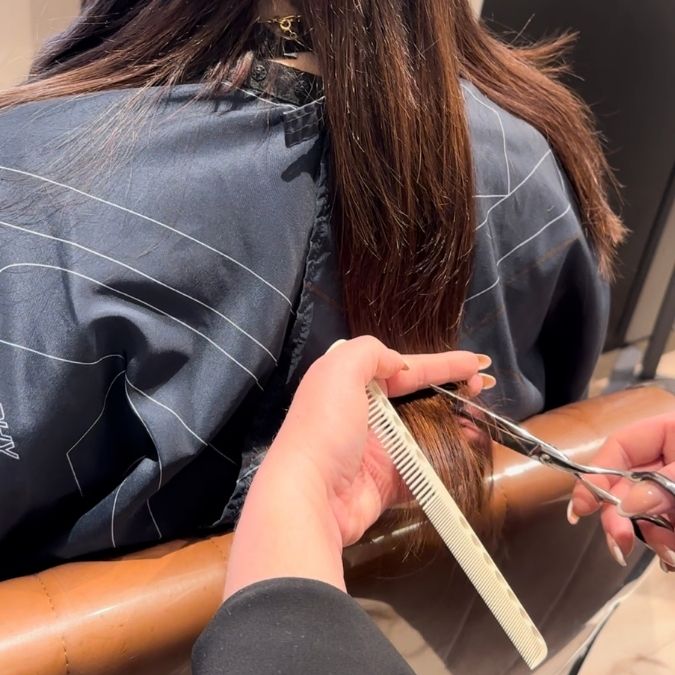
- “I often think the color can make or break the blend just as much as the proper amount of hair and placement,” says Natalie. She suggests using two to three shades or custom Hotheads® Premium Hair Extensions.
4. Clients With A Blunt vs. Texturized Perimeter
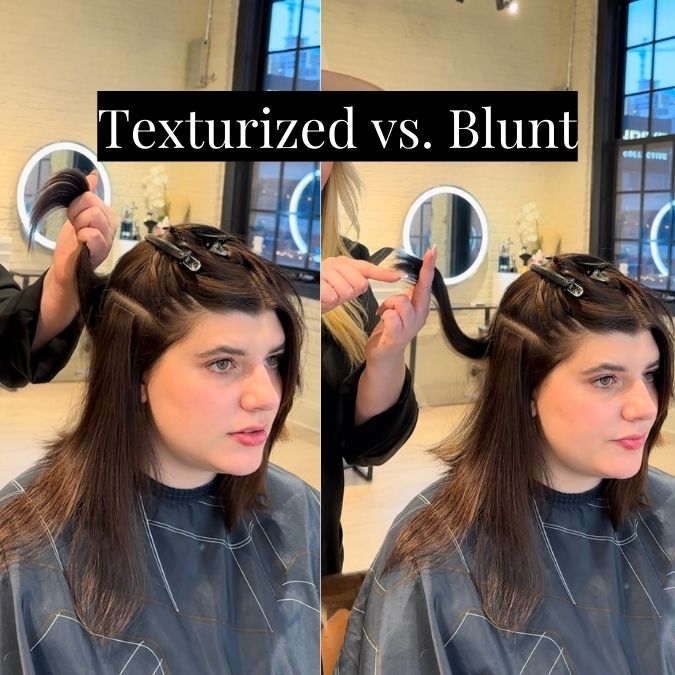
If your client comes in with a very blunt bob, you will need to soften the ends but avoid cutting too deep into the natural hair to avoid creating point-cuts that will fray out. Since Hotheads® Hair Extensions are pre-layered, this will also help with blending insurance beyond dusting the initial extensions perimeter.
How to pre-cut your client’s natural hair:
- Take vertical sections and elevate the hair off of the round of the head.
- Soften the ends using texturizing scissors.
- The elevation makes a soft layering technique that will help blend the extensions into the existing haircut.
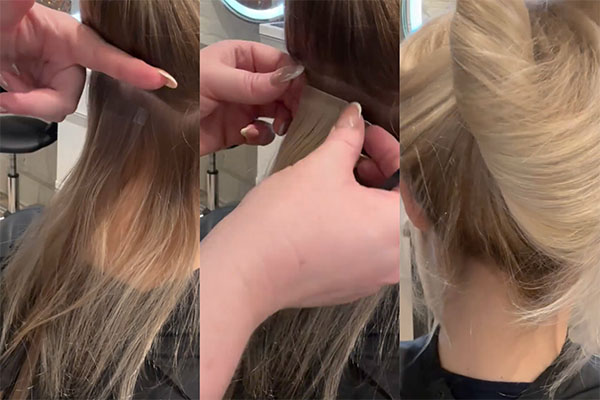
5. Clients Who Wear Their Hair Up? Do This For An Invisible Install
Now that your short-haired client has long hair, they will be itching to throw up their new strands in a ponytail. Here’s how to tailor their tape-in placement to conceal extensions.
- Drop down the tape tab at least ¼-inch from the root, so it’s comfortable to wear and pay attention to the bone structure in the nape.
- Avoid overdoing the amount of hair. Natalie suggests using just one tape tab in the middle of first section closest to the nap. Then, start a bricklay pattern in the next section using only two tapes to build density.
Check out this visual we stole from Natalie’s IG and click here for more tips.
Try Natalie’s go-to premium extension methods for every client—click here!
6. When To Remove Tapes From The Nape
When transitioning from a bob to long hair, the service is typically more focused on the long-term journey than that initial impactful transformation. If your client’s goal is to grow out their hair, Natalie calls for her typical maintenance: reapplying tapes every six to eight weeks and sew-in wefts at eight to 10 weeks. As the hair grows, Natalie will start removing extensions from the nape because the hair is starting to blend more naturally.
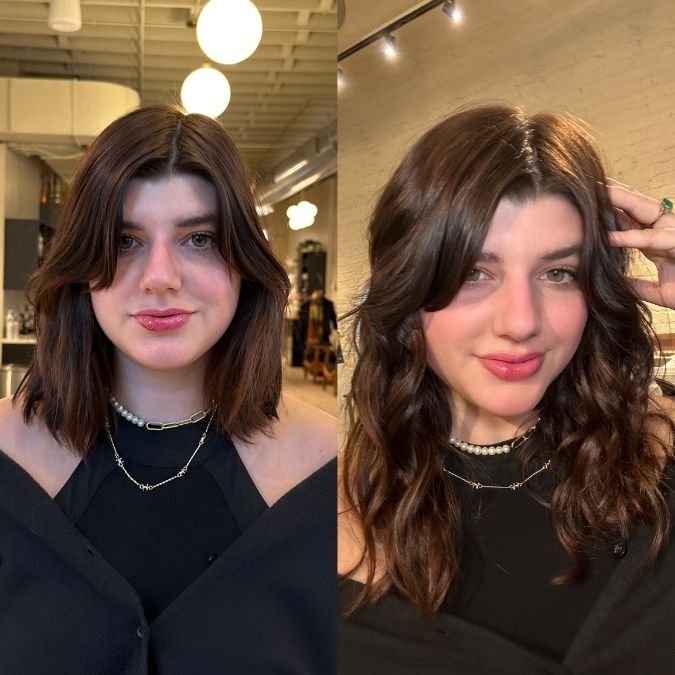
The Before & After
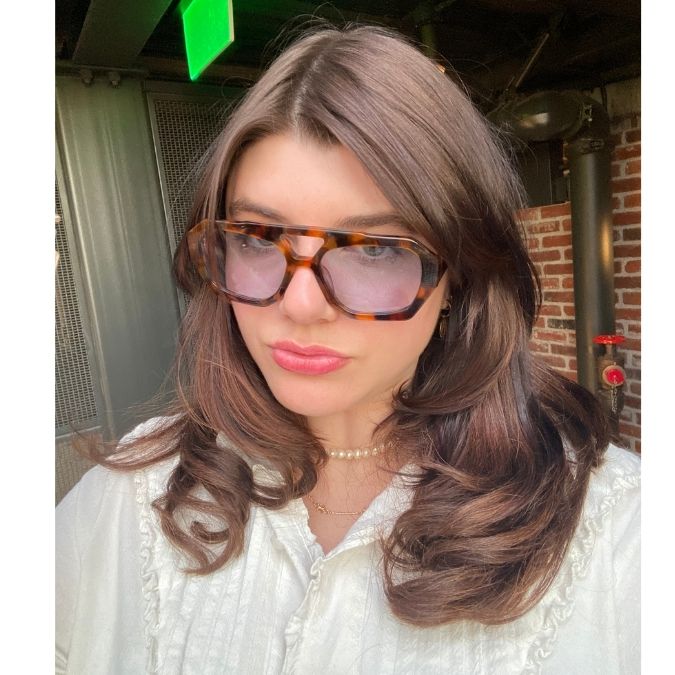
3 Weeks After Appointment, Blown-Out Client Selfie
Read Next: Filling In Holes On Fine Hair: 4 Tape-Ins Are All You Need
More from
Hotheads® Hair Extensions
-
Blonde
The Biggest Hair Color Trends of 2024
-
Consultation
Filling In Holes On Fine Hair: 4 Tape-Ins Are All You Need
-
Monthly Product Launch List
The Best Hair Product Launches Of Fall 2023
-
Hair Extensions
Premium Sew-In Wefts Line
-
Business
Ethical Traceability & Extensions: This Will Change Your Salon Business
-
Balayage
3 Tips For Dimensional, Chemical-Free Balayage
-
Manufacturer
Beauty Industry Group Announces Leadership Changes
-
Hair Extensions
How To Solve 4 Hot Fusion Extensions Challenges
-
Extension Removal
What Are Hot Fusion Hair Extensions?
-
Blonde
5 Tips For Shadow Roots + Lowlights On Extensions
-
Bridal
Boho Half-Up Rope Braid
-
Facebook Lives
Watch: Hybrid Sew-In + Tape-In Extension Application
-
Hair Extensions
Machine Weft
-
Hair Extensions
Hand Tied Weft
-
Hair Extensions
Originals
-
Business
Get Certified in 3 Extension Installation Methods With This Online Course
-
Hair Extensions
6 Mistakes That Can Ruin A Tape-In Extension Application
-
Hair Extensions
How To Properly Prep The Hair For Extensions
-
Best of 2018
The Extension Education You Need Before 2018 Ends
-
Hair Extensions
Extensions: Tape-In Application + Long-Layered Shag Video How-To
-
Hair Extensions
Video How-To: Applying, Cutting & Blending Tape-In Extensions
-
Hair Extensions
Sneak Peek: The New Ash-Toned Hotheads® Hair Extensions
-
Beachwaves
4 Extension Application Tips For Creating Upstyles
-
Hair Extensions
Ultimates


