
Instagram via @liciebaby
Formulas
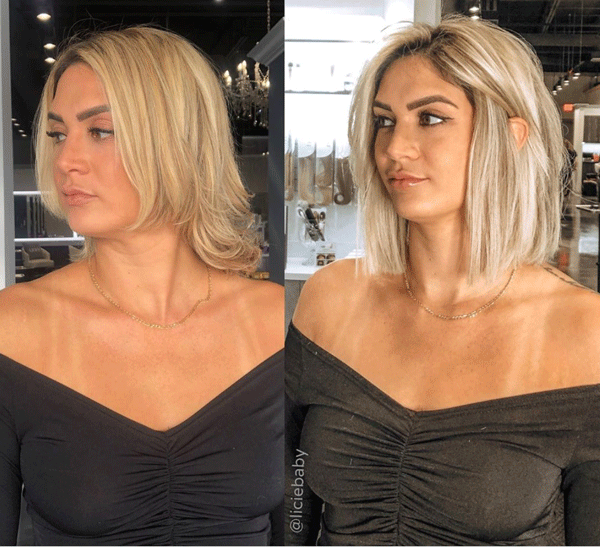
4 Tips To Build a Full Bob With Extensions
How To Avoid The Awkward Grow-Out Phase With Extensions Want to know how to skip the awkward mullet phase when growing out a pixie cut? Help your client transition with ease using this genius idea—building a bob with extensions! To lay the foundation, we tapped Hairtalk® Senior Master Educator Alicia Iannone (@liciebaby) to share her go-to tips for creating this chic style. Scroll down to learn it all! 1. Place & Shape = A Natural Finish To make sure her bobs are as natural looking as possible, Alicia implements her “build a bob” technique: “Apply the...
Keep reading for free
Create a free account or sign in to continue
Use the same email and password across behindthechair.com, BTC-U, oneshothairawards.com, and Who Does Your Hair — one set of credentials, every site.
OR
We'll check if you have an account, or create one if you don't.
To save this article, create a free account or sign in.
Join BehindTheChair
Access the industry’s #1 source for hair trends, education and community now.
OR
We'll check if you have an account, or create one if you don't.


