How To Choose The Best Type Of Extensions For Every Client
How To Determine Which Extensions You Need For A Client
You already know offering hair extension services can make you more money. But how do you go from “doing hair extensions” to being a “hair extensions specialist”? We talked to hairtalk® Master Educator Alicia Iannone (@liciebaby) for her step-by-step approach to becoming a hair extension specialist.
1. Using Correct Consultation Language
It’s a no-brainer that a consultation is crucial, but are you using the right language? Don’t just discuss length, because length is a given when it comes to extensions. Do ask about adding volume, building up thin areas, and if she wears her hair in ponytails a lot.
Some example situations…
She says: “I love the depth in this inspo pic!”
You say: “I can use a combination of Rooted and Colormelts™ extensions to keep the ends bright but achieve the depth you love.”
She says: “I go to the gym a lot, so my hair is up in a ponytail often.”
You say: “I’ll use the hairtalk® Pro tape-in extensions at your nape. These are more discreet than the Classic tape-in extensions, so when you pull your hair up, the adhesive tab will be blended and hidden.
She says: “I wish I had more volume at the crown.”
You say: “I can give you discreet, concealed volume by using a combination of hairtalk® Plus extensions and hairtalk® Pro extensions.”
2. Formulating The Plan
What makes Alicia’s services so bespoke is that she talks about extensions the same way she discusses hair color—she formulates the client’s extensions application exactly how she would formulate bowls of color. Her “formula” follows this breakdown: 50% main shade, 25% highlight, 25% lowlight.

Besides the extensions shades, Alicia also thinks about which type of extensions should be combined for the most seamless results. hairtalk offers three different tape-in options:
Classic:
- Traditional adhesive band
- Three widths for use on any hair density: Original, Petite and patented Plus
Plus:
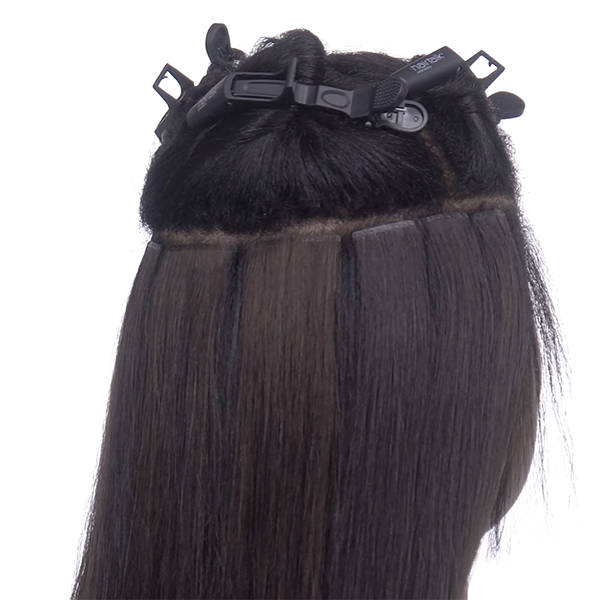
- Completely concealed adhesive band made to mimic the natural root
- Creates nearly invisible results
- Three widths for use on any hair density: Original, Petite and patented Plus
- Best used for highly visible areas
- Should be sandwiched with a Classic only
Pro (hairtalk’s NEWEST option!):
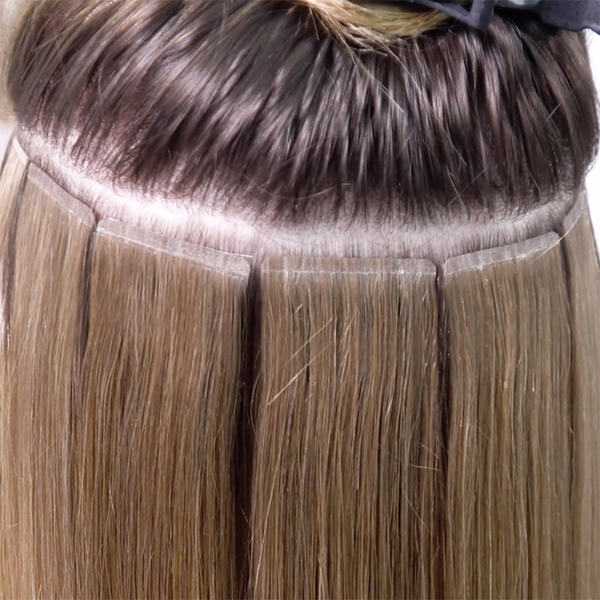
- A cross between the first two options, offering a more seamless blend than the Classic without the thickness of the Plus.
- More discreet adhesive band
- Affordably priced for the majority of applications
- Can be paired with another Pro or with a Classic or Plus tape-in
- Two widths: Original and Petite
- Available in 46 shades, including Colormelts™.
The hairtalk Pro line is the “sassier, bougier cousin to the hairtalk Classic,” Alicia said. With the addition of hairtalk Pro, customization options are greatly expanded, allowing you to create a bespoke look for your clients that no other person can replicate.

Some example situations…
She says: “I want something dimensional that looks like balayage.”
You say: “I’ll use the hairtalk Original Pro in color 61, which is our brightest blonde, on the bottom of some extension sandwiches, and I’ll use the Pro 20/60A CM, a colormelt, on top. I’ll alternate that with Original Pro in color 67 as a lowlight to build the highs and lows of dimensional balayage without the chemicals!”
She says: “I am slightly thin on top and wish I had more volume.”
You say: “I’m going to use a hairtalk Plus paired with a hairtalk Pro for a more concealed extension that will be virtually undetectable!”
Before and After

3. Determining What To Order
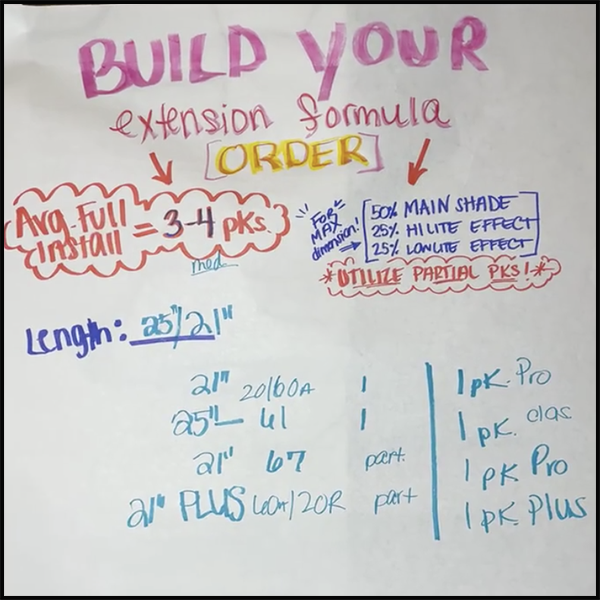
So now you have a chemical-free color game plan, plus an idea of which adhesive band styles you need to achieve the client’s desired look. The average full head extension installation requires between three to four packs of hair. Alicia breaks it down like this:
- 1 pack Original Pro 20/60A CM (colormelt) in 21-inch length
- 1 pack Original Classic 61 (brightest blonde for highlight) in 25-inch length
- 1 pack Original Pro 67 (lowlight) in 21-inch length
- 1 pack Original Plus 60A/20R (rooted shade) in 21-inch length
Pro Tip: Mixing in a longer length (in this case, the 25-inch) gives the overall feel of longer hair without an entire head of very long extensions.
Use this plan to calculate the cost of the extensions and determine the deposit amount you will charge the client, then order the extensions. Your next step is to discuss with your client how to prep her hair for the extension install appointment (such as coming with clean hair) and running through the expected at-home care the extensions will require (like using the hairtalk® Cleanse shampoo and an extension brush).

Watch The Entire Process!
More from
Hairtalk
-
Facebook Lives
Create A Bronde Balayage Without The Bleach: Here’s How!
-
Extension Application
TRIPLE YOUR PROFIT PER HOUR: HAIRDRESSERS, LISTEN UP!
-
Manufacturer
Beauty Industry Group Announces Leadership Changes
-
Hair Extensions
How To Book And Price Multi-Method Extensions Services
-
Hair Extensions
hairtalk® Launches Keratin Extensions
-
Hair Extensions
Pro Tape-In Extensions
-
Business
Get Certified in 3 Extension Installation Methods With This Online Course
-
Facebook Lives
Timesaving Technique: Instant Beaded Row™ Extension Installation
-
Hair Extensions
Instant Beaded Row™
-
Bobs
4 Tips To Build A Full Bob With Extensions
-
BTC Events
BTC “On Tour” New York City 2020
-
Hair
Transformation: Blunt Blonde Bob With Extensions
-
WATCH: Double Hand Tied Weft Extension Application Technique
-
Hair Extensions
Double Hand Tied Weft
-
BTC Events
BTC “On Tour” Nashville—Here’s How We Closed Out Our 2019 Tour
-
BTC Events
BTC “On Tour” Nashville
-
BTC University
4 Tips To Give Clients Better, Blonder Extensions
-
Hair Extensions
Give Your Clients This Guide For At-Home Extension Care
-
Brushes/Combs
Extension Brush
-
Hair Extensions
6 Mistakes That Can Ruin A Tape-In Extension Application
-
Hair Extensions
How To Properly Prep The Hair For Extensions
-
Bobs/Lobs
Watch: Lob Styling Using Extensions
-
Best of 2018
The Extension Education You Need Before 2018 Ends
-
Hair Extensions
How-To Video: Color Conversion With Tape-In Extensions


