
Fast + Efficient Foiling Techniques To Start Using ASAP!

Fast Foiling Tips + Toning Techniques
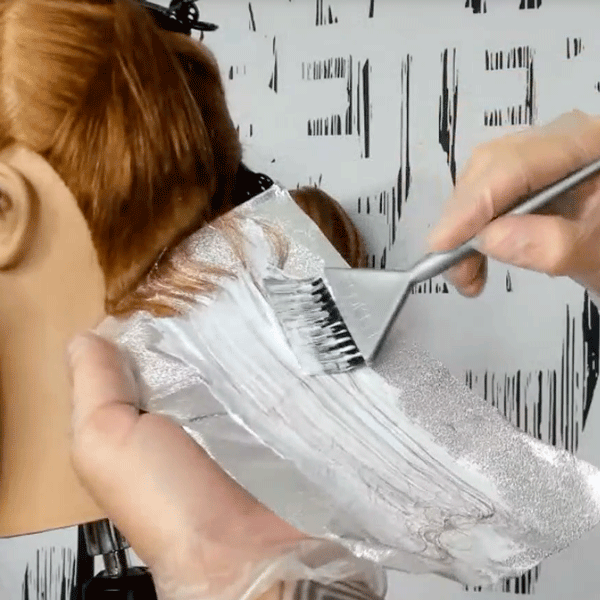
We’re always on the lookout for fast-foiling techniques you can use every day behind the chair. So we were PUMPED when Ulta Beauty Team Member and 2021 #ONESHOT Winner Sean Godard (@seangodard) stopped by BTC University to share his foiling tips and tricks. Scroll down to learn how to avoid a harsh grow out, tips for brightening up the ends and how to speed up a double-process appointment.
Want to learn it all? Click here to become a BTC-U Member and receive unlimited access to Sean’s course on BTC University!

What we learned:
Fun fact: Sean broke down FIVE different haircolor techniques in his 90-minute course. We can’t share everything, so we’re teasing these tips you need to know now!
Tip #1: Avoid lines of demarcation with diagonal-forward partings
Popping in some foils at the back hairline are perfect for ponytail-loving clients. But if you’re noticing harsh lines at their next appointment—the problem could be with your sectioning. Sean’s advice: Start taking diagonal-forward partings instead of diagonal-back. Why? Sean explains two reasons:
- Reason #1: “When the client pulls their hair up, they will see more linear ribbons of color, which is much more natural-looking than one sheet or panel of blonde.”
- Reason #2: “Clients with longer hair usually like to wear their hair down and over their shoulder. So taking diagonal-forward partings will visually extend that color so the hair that falls over her shoulder will have dimension.”
Tip #2: Create a high-contrast perimeter & interior depth in ONE foil!
“Right now it’s all about bright, bold highlights along the hairline and blended lived-in color internally,” Sean explains. To achieve this quickly and efficiently, Sean takes a fine, micro-stitch weave starting at the back of the subsection. Then, about halfway through he switches to a slice that ends at the hairline.
Tip #3: Use overdirection when brightening the ends for a seamless blend
Ever want to brighten a client’s ends while their foils process, only to spend more time blending lightener up? Sean has a fix for that. “Overdirecting the ends forward does the blending for you. Technically, you could paint a straight line and when the hair falls back, it will be blended (I don’t advise you do that, but you could!),” he explains. Sean shared his entire tip-out technique during his course, click here to check it out!
Click through the slideshow to see all of the looks from Sean’s class!
Have questions? Sean has answers!
One of the benefits of watching a course on BTC University? Artists are able to answer your questions in REAL TIME! Here are some technical questions viewers had for Sean during his livestream:
Question: How would you approach foiling for a client that needs a double-process?
Answer: “The main thing we need to consider is that the roots will get lighter faster than the rest of the hair—we’ve ALL been there! So instead of fully saturating the entire section at once, I like to create ‘foil bookmarks.’ Here’s how:
- Cut the foils into eighths so there are rectangular pieces.
- Starting about an inch away from the scalp, fully saturate the hair all the way down to the ends.
- Then, place a bookmark foil right up at the base to isolate the area while I work through the rest of the section.
- When it’s time to apply at the scalp, I take the tail comb and separate the lightened section from the foil and apply at the root. The bookmarks make it really easy for me to work through the section quickly and efficiently when double processing.”
Q: Do you have any tips for toning but still maintaining a blended look?
A: “Yes! I love to split my sections into two areas and layer my toner formulas on top of one another. For example, when creating a bright face frame, I will split the section and tone the front area with a Level 10 and the back area with a Level 8 but in the same tonal family. So when they lay on top of each other the result is blended but still bright.”
Become a BTC-U Member to receive unlimited access to Sean’s Course On BTC University!

More from
Ulta Beauty
-
Hair Color
The Bubble Technique: 5 Tips To Create Rainbow Hair Color
-
BTC Hair Trend Report
The Biggest Haircut Trends of 2024
-
Business
New To Budgeting & Investing? Start Here!
-
Business
The Ins & Outs Of Assisting: How To Be & Choose The Right Hair Assistant
-
Curly
Curly Consultation & Haircutting: Watch The Full Tutorial!
-
News
How Maui Hairdressers Are Rebuilding Post-Lahaina Fires
-
Business
How To Make 6 Figures From Stylists Who Actually DID IT
-
BTC Events
AI, Mental Health & Social Media: 7 Business Tips You Can’t Live Without
-
Business
6 Saving & Investing Tips To Grow Your Profit
-
Facebook Lives
Volume Guaranteed: Try This Layering Technique For Fine Hair
-
Bobs
The Biggest Haircut Trends of Summer 2023
-
Industry News
Vernon François Joins Ulta Beauty Pro Team of Industry-Leading Artists & Educators
-
Industry News
6 Award-Winning Hairstylists Join the Ulta Beauty Design Team
-
BTC Hair Trend Report
2023 Hairstyling: 11 Trends You Need To Know
-
BTC Hair Trend Report
2023’s Biggest Haircut Trends
-
Business
5 Steps You Must Take To Build A Strong Salon Culture
-
Beachwaves
6 Tips For Faux Blowouts & Effortless Waves
-
Blonde
The Biggest Hair Color Trends Of Winter 2023
-
Accessories
15 Styling Trends That Will Be Everywhere in Winter 2023
-
Balayage
5 Tips To Upgrade Your Cutting, Blonding & Styling Techniques
-
#ONESHOT HAIR AWARDS
Modern Art
-
BTC University
Dear Stylists, 4 Smart Ways To Protect Your Income
-
Facebook Lives
25-Minute Butterfly Layers Cut & Style
-
Business
Client Retention Checklist: 7 Ways To Keep Them Coming Back

