
Fringe Cutting 101: 4 Things To Consider For Customized Fringe


Use These 4 Tips To Create Custom Fringe On Every Client
How to instantly look more chic: FRINGE. This it-girl upgrade is even more sophisticated when done by one of LA’s coolest cutters Tim Morrison (@timm.morrison). We predict you’ll have more and more clients asking to get banged this fall, so get ready with Tim’s top four tips to create the perfect fringe for every client.
Products Used
1. Examine the hairline closely.
Move the hair around at the hairline to see how it reacts—this is the most important thing to Tim. “A raised root or flat spot is going to dictate how much freedom I have to play around with different fringes,” he says. Move the hair around and see what it wants to do. “If the root direction is immediately up, fringe probably isn’t a good idea as it’ll stick straight up,” he said. “That doesn’t mean she can’t have face-framing hair, though—the weight of the long hair will void the cowlick, so it’s free range at that point.”
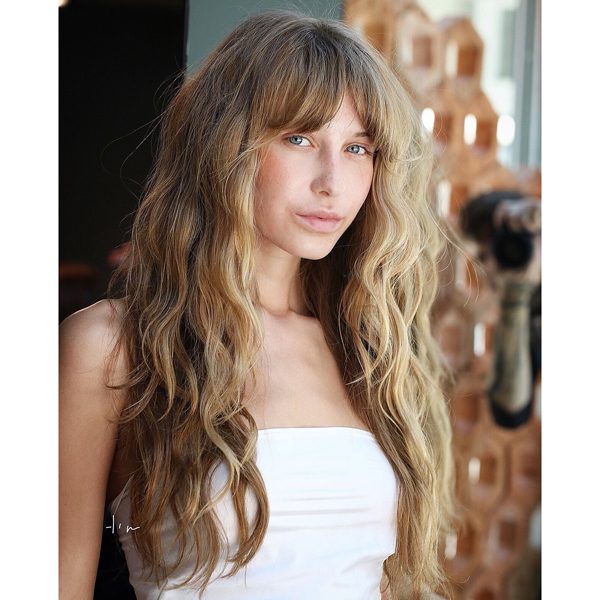
Face-framing fringe is good for hairlines with cowlicks. Tim uses Sebastian Professional Shaper Zero Gravity to keep the shape he wants without the hair feeling weighed down.
2. Analyze her face shape.
“Don’t just slap any old fringe on anyone,” Tim cautions. “Take into consideration the roundness or long face shape of your client.”
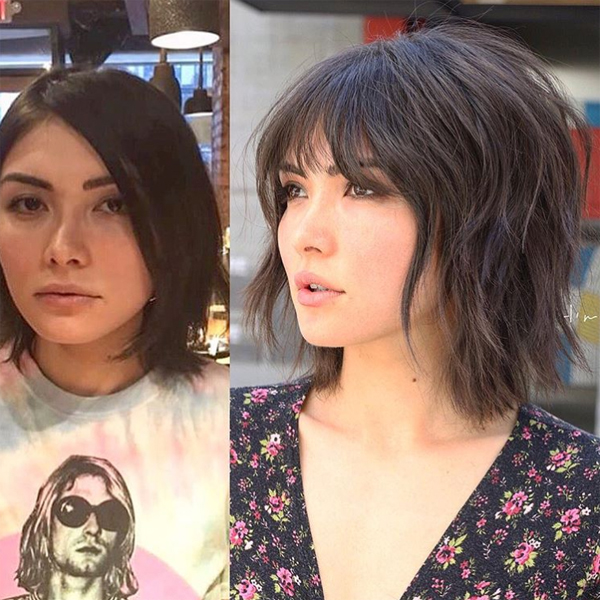
- Rounder face: Create the illusion of a face that is longer with something straight across, or sweeping so that it lays over the cheeks.
- Longer face: Create the illusion of an oval face shape with a longer fringe.
3. Base the fringe on her texture.
Tim takes a section that is 2 inches deep at the hairline for the fringe, but this also depends on texture.
- Fine hair and sparse hairline: Take a 3-inch-deep section.
- Thick hair: Sometimes all you need is a section 1-inch deep—if you take too much, the fringe can overpower the face.
4. Teach her to style her fringe perfectly.
The difference between someone who loves her fringe and someone who can’t wait to grow it out? The styling technique! So teach her to style it right. Tim’s go-to fringe styling products are:
- Sebastian Dark Oil: Tim uses this for shine and smoothness.
- Sebastian Sublimate: This finishing cream is just the right consistency and not sticky at all, Tim says.
- Sebastian Shaper Zero Gravity: A flexible spray for weightless hold is the finishing touch.
Watch Tim style this fringe below!
Now click here to learn this razor undercut technique!
More from
Sebastian Professional
-
Celebrity
The Best Hair & Beauty Looks From The Oscars 2022
-
Haircare
Potion 9
-
Awards Shows
Lily James’ Luxurious Blowout at the 2022 Oscars
-
Awards Shows
2021 Beauty Envision Award Winners Announced
-
Haircare
No.Breaker
-
Industry News
Wella Beauty Envision Awards 2021 Now Open For Entries
-
Bobs/Lobs
Faux Curly Bob
-
Industry News
Wella Company’s Hairdressers at Heart Announce New Scholarships and Initiatives
-
Manufacturer
#AmplifyDiverseHair For National Diversity Week With Wella—Here’s How!
-
Awards Shows
Wella Beauty Envision Awards Winners Announced
-
Industry News
Breaking News: 2020 Wella Professionals International TrendVision Award Winners Announced
-
Awards Shows
Coty Professional Beauty’s 2020 Beauty Envision Awards Open for Entries
-
Celebrity
Billie Eilish’s Two-Toned Mullet
-
Pomades/ Pastes
Eruptek
-
Gel
Volupt Spray
-
Business
What You Should Know About Coty’s Plans To Sell Its Professional Beauty Brands
-
Shine
Dark Oil Fragrance Mist
-
Haircare
Dark Oil Lightweight Mask
-
Conditioners
Dark Oil Lightweight Shampoo & Conditioner
-
Balayage
Rooty, Foilayaged Blonde
-
Pomades/ Pastes
Shine Crafter
-
Conditioners
Penetraitt Shampoo & Conditioner
-
Haircare
Penetraitt Masque
-
Manufacturer
Breaking News: Coty Professional Beauty Announces Executive Leadership Changes

