Wet Balayage: 4 Tips To Pick Up The Pace
Sick of lightening services taking way too long? L’Oréal Professionnel artist Natalie Eiley (@nat_doeshair) knows that time is money, so she’s sharing her wet balayage secrets that will cut down appointment times LIKE THAT. Use these four tips to achieve bright balayage more quickly, fit more clients in and make more money behind the chair.
1. Balayage On Wet Hair
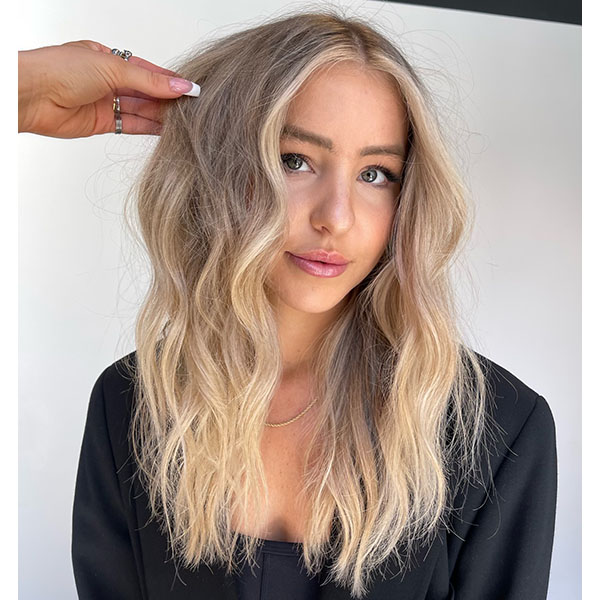
Natalie’s biggest tip to speed up balayage? Applying to wet hair. It’s more porous, which will take in product quicker and lighten faster. The result? A bright face-framing balayage refresh (no foils required!) in 90 minutes or less.
Pro Tip: Hard water causing metals in the hair? Natalie always preps blonding services with a metal detox. This creates a clean canvas and will prevent color from shifting, looking dull and brassy. She preps with L’Oréal Professionnel Metal Detox Spray, then finishes with L’Oréal Professionnel Metal Detox Shampoo.

Clarify and rejuvenate your clients’ hair with the Metal Detox Starter Kit!
2. Do THIS To Make Time For More Clients
If you want to make more money during a balayage session, Natalie’s advice is to multitask. Especially if you have an assistant, you can do small things like mix your formulas while your client is getting their hair washed at the bowl. When you’re done painting and the lightener is processing, take another balayage client. You can finish two sessions in nearly the same amount of time!
3. Use A Cotton Barrier
Natalie’s client had previously lightened hair, so the focus of the service was to refresh her balayage and focus on the ends. With less lift required, this is the ideal client for ditching foils and using a cotton barrier instead.
Try this: Natalie placed cotton barriers between her painted sections to prevent lightener from bleeding and maintain clean sectioning while painting more efficiently.
4. Blend With Your Fingers
For seamless balayage blends, Natalie paints with her brush and then simply feathers upwards with her fingers. This technique easily gets rid of any harsh lines from her brush to gradually transition her root melt to her bright ends. Try Natalie’s formulas:
- Formula A (roots): L’Oréal Professionnel DIA Light 7.01 + 6-volume DIA Activateur
- Formula B (mids to ends): L’Oréal Professionnel Blond Studio 9 Bonder Inside + 20-volume developer
- Formula C (gloss): L’Oréal Professionnel DIA Light 10.21 + 6-volume DIA Activateur
Check out the before and after!

Products Used
More from
L'Oréal Professionnel
-
Health & Wellness
Stylists Support Clients—But Who’s Supporting Us?
-
Industry News
SalonCentric x Green Circle Salons Partner for Sustainable Beauty
-
Celebrity
How To Get Sabrina Carpenter’s Grammys Hair
-
Blow Dryers
Professionnel AirLight Pro
-
Celebrity
Grammys 2025: The Best Celebrity Beauty Looks
-
Blow Dryers
Celebrity Hairstylist Cesar Ramirez’s Tips For Using the L’Oréal Professionnel AirLight Pro
-
Industry News
California Becomes the Latest State to Require Textured Hair Education
-
Awards Shows
The Best Celebrity Hair Looks From the 2024 MTV Video Music Awards
-
#ONESHOT HAIR AWARDS
3,000 Hairstylists in one Place? Here’s What You Missed at the 2024 BTC Show
-
News
L’Oréal Professionnel Launches First Hair Dryer For Pro Stylists at the 2024 BTC Show
-
Monthly Product Launch List
20 Major New Hair Innovations To Kick Off Fall
-
BTC Hair Trend Report
Get to Know Dimitris Giannetos: the Most Influential Celebrity Hairstylist Right now
-
BTC Hair Trend Report
8 Hair Launches to Heat up Summer
-
Industry Events
Connecticut Becomes the Third State to Require Textured Hair Education
-
Manufacturer
L’Oréal’s Professional Products Division Announces The Texture Of Change Movement & Petition
-
Copper
Dark Auburn
-
BTC Events
AI, Mental Health & Social Media: 7 Business Tips You Can’t Live Without
-
Balayage
Your Official Guide To Barbie Blonde
-
Industry News
L’Oréal Professionnel Launches Head Up for Mental Health Awareness
-
Brunette
Trend Breakdown: Hailey Bieber’s Glazed Brunette
-
Balayage
HONEY BLONDE CURL FORMULA
-
Color Depositing
How To Formulate Coppers Without Lightener
-
Blonde
Curly Copper Color Block
-
#ONESHOT HAIR AWARDS
The BTC Show 2022: 10 Things We Saw


