
WATCH: 3 Knotted, Braided Upstyles

Winter is here—which means you need party-ready styles for holiday soirees and New Year’s Eve bashes. And BTC predicts knots and braids will continue to trend into 2018, so check out how to create three trending updos courtesy of Michael Shaun Corby, Living Proof Creative Director and Liz Greco, Living Proof Educator on our exclusive Facebook Live at Living Proof headquarters in Cambridge, Mass.!
Products Used
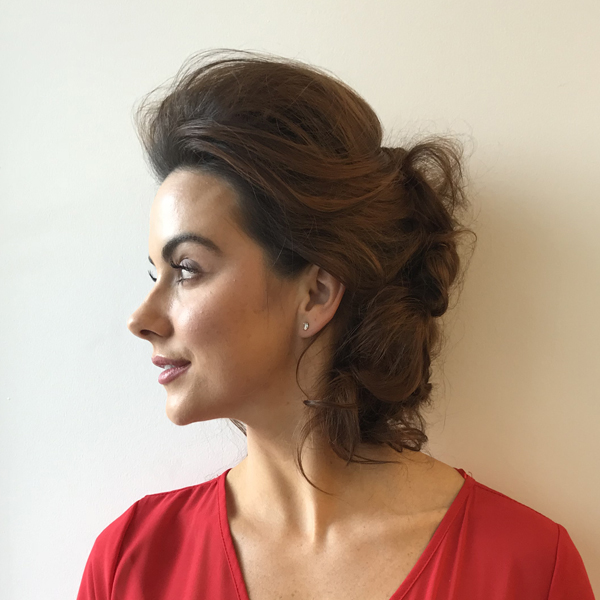
Look 1: Put Away Your Pins
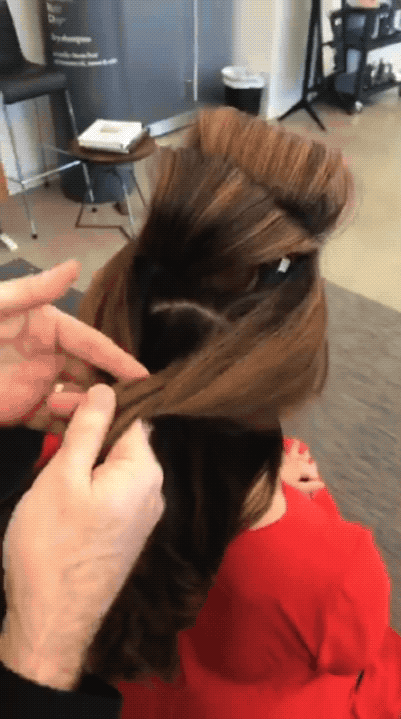
This updo is almost entirely pinless—just a few large hairpins at the very end anchor the style. The rest is all creative knotting and braiding. Here’s a quick breakdown, but make sure to watch (starting at 6:13) for the full how-to!
- Prep the hair with Living Proof Style Lab Flex Hairspray.
- Create three Windsor Knots (like tying a tie!) down the back of the head, finishing each knot with a natural braid.
- Push each braid up like a drawstring.
- Tuck, twist and pin for support at the end.
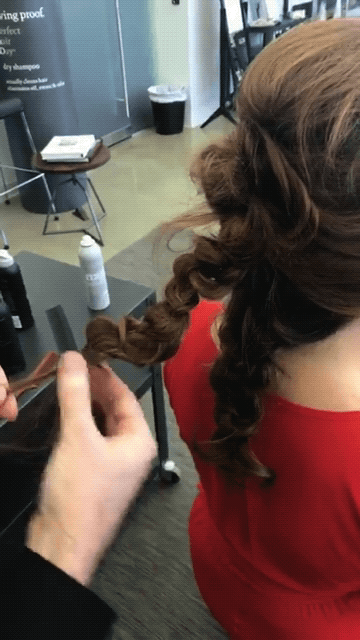
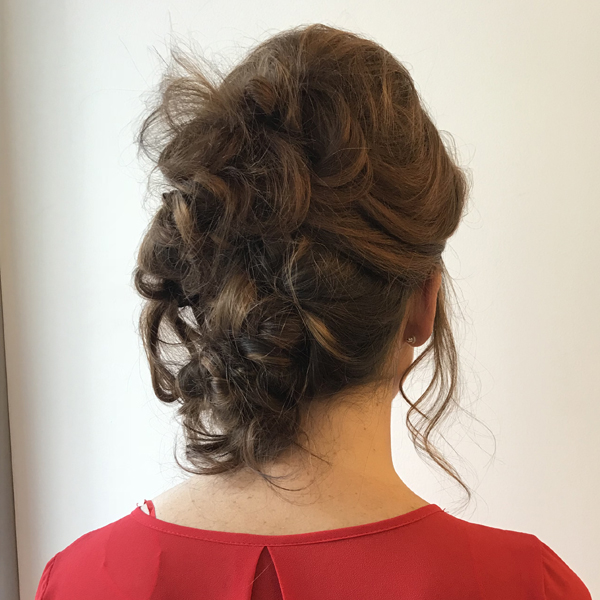
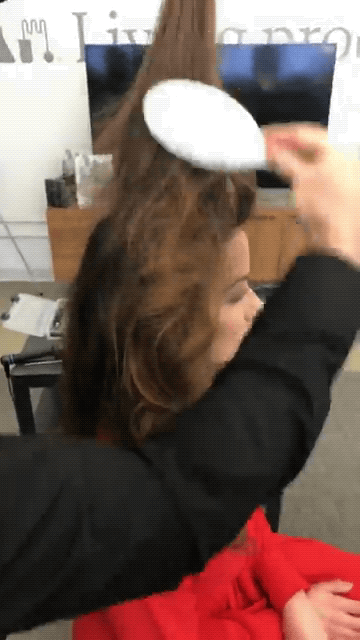
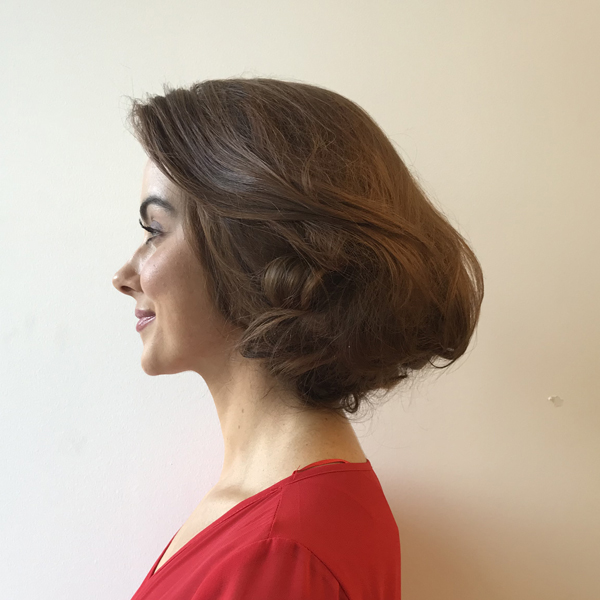
Look 2: Perfect Your Lacing Technique
Big hair is in, but tight, compacted backcombing is not. Instead, use a lacing technique to create soft, airy volume and easy structure to build updos (or this gorgeous faux bob). MSC breaks it down with these tips (and watch more at 42:00!):
- Prep the hair with Living Proof Full Dry Volume Blast to add even more airiness.
- Work in larger sections for lacing than you would for traditional backcombing.
- Hold the hair up at 90 degrees, but with very little tension.
- Use a natural boar bristle brush and gently float around the section, lightly brushing the section down toward the head.
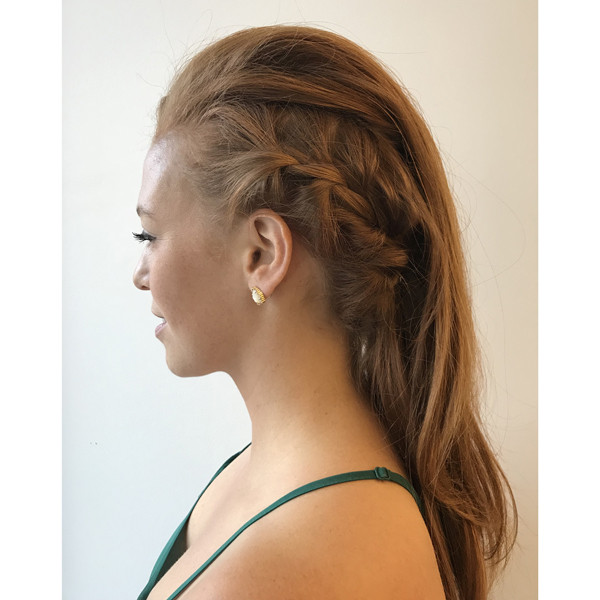
Look 3: Add Extra Interest
For this look, Liz added some edge by taking small sections, twisting slightly and securing with clear elastics at the back. Doing this helps mold the entire shape as you work, especially if you hit it with Full Dry Volume Blast. Watch at 36:42!

Watch The Full Video With Three Exclusive How-Tos!
More from
Michael Shaun Corby
-
Styling
WATCH: Five Faux Transformations
-
Beachwaves
Undone Glam Waves
-
How-To: Braided Bob, French Faux Hawk and Classic Waves
-
Blowouts
Balanced Blowout
-
Hair
Long-Haired Pomp
-
Curly
Cool-Girl Curls
-
Hair
Flawless Fringe
-
Hair
The Perfect Push-Up
-
Hair
Studio Waves
-
Hair
French Faux Hawk
-
Bobs
Braided Bob
-
Hair
Major Lift
-
2017- Spring/Summer
High Roller
-
Hair
Double Pony
-
Curls
How-To: Flawless Curls
-
Blowouts
6 Tips for the Go-Out Blowout

