
Transition Traditional Highlights To Dimensional Balayage

6 Ways To Add Natural Depth To Blondes
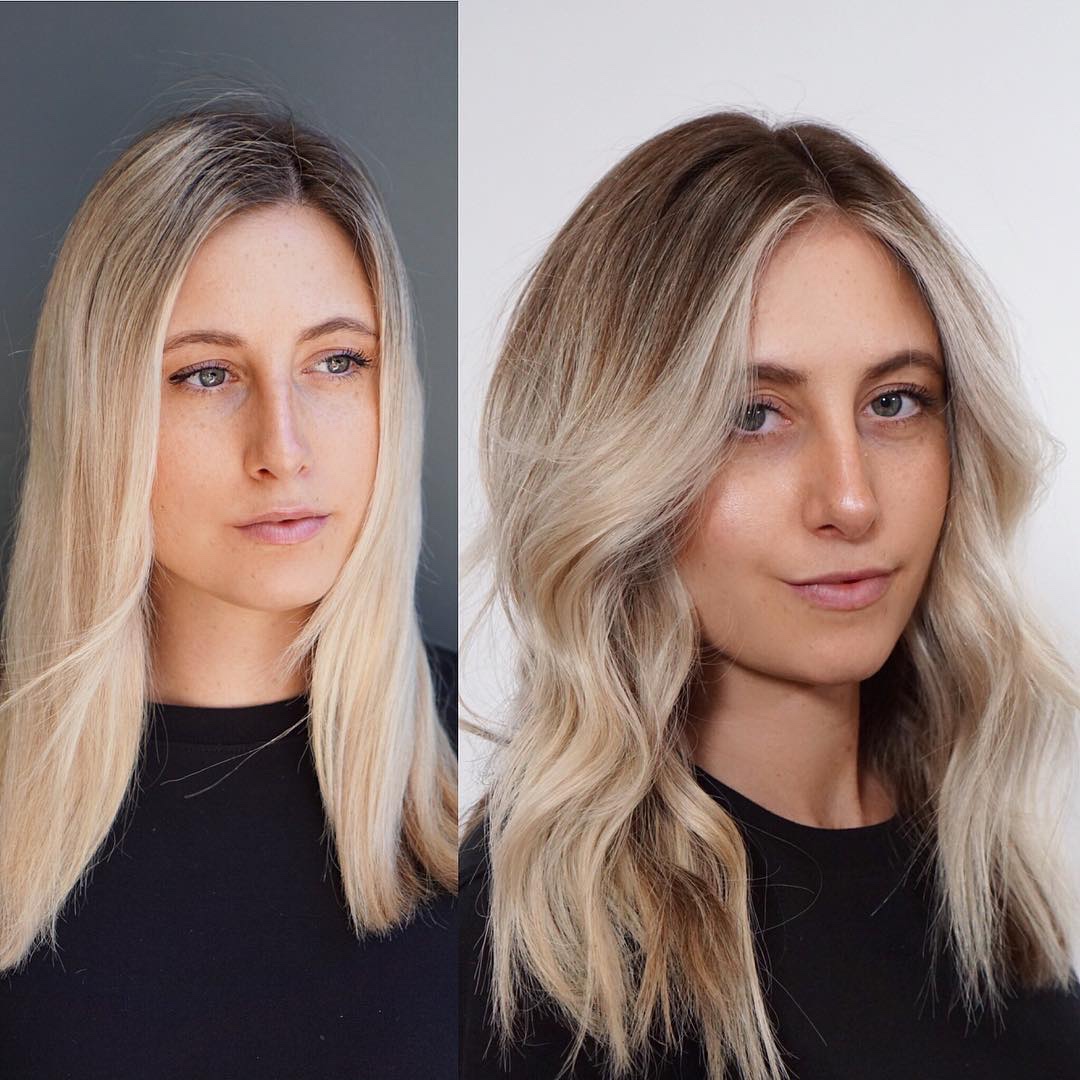
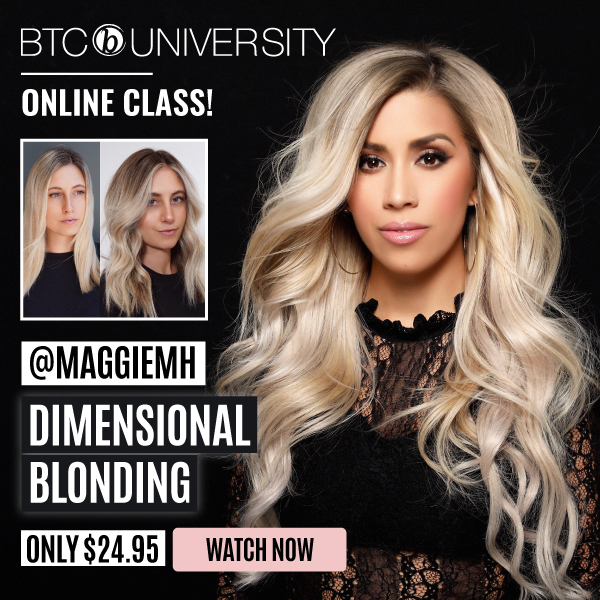
Fall is the perfect time to transition your blondies from bright, sun-kissed highlights to a sultry, dimensional balayage. So Maggie Hancock (@maggiemh), the 2017 #ONESHOT Hair Award winner for Platinum Shot of the Year, stopped by The BTC House to spill the tea on how to master this on-trend transformation. Get her tips below, then click here to get the full tutorial at BTC University!
1. An Honest Color Consultation Is Key
Besides letting her know that adding depth will save her some money, Maggie says it’s important to explain that you’re going to match the shadow root with her natural level. Not only will this ease any fears of not being able to go bright blonde again BUT it’ll also give you a chance to rebook her for a retouch in about 12 weeks. Win-win.
2. Use Demi- Or Semi-Permanent Color
Blonde clients tend to go back and forth between shades, so it’s best to use demi- or semi-permanent color so the transition is easier and results in less damage. Permanent haircolor is more ideal when covering gray or toning an all-over bleach blonde.
Pro Tip: If a client is more ashy, Maggie says to add warmer tones to the base formula so the color looks richer.
3. Foil Placement Should Be Tight To The Scalp
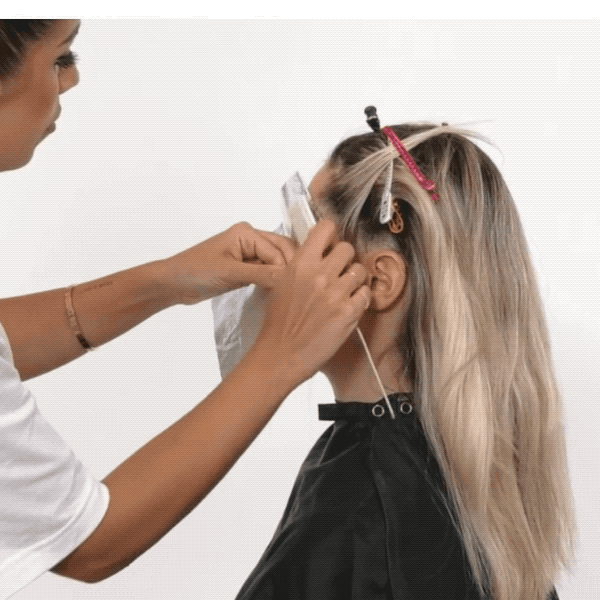
There’s nothing more frustrating than foil that won’t stay put, especially when painting the hairline, which is why Maggie uses a comb to tap and secure it in place. “I also like to put a little bit of pomade around the hairline,” she shares. “It helps make the foils stick and makes weaving easier.”
4. Let The Money Piece Follow The Part
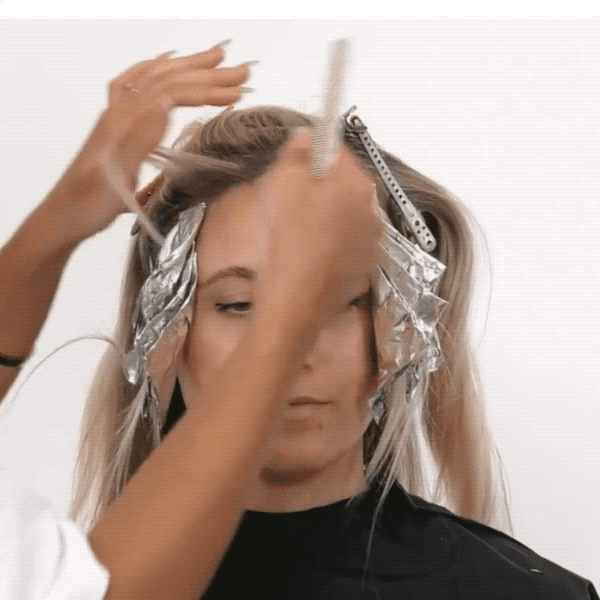
When it comes to the money piece, Maggie likes to paint where the client usually parts their hair. Here’s what she does from there:
- Pull the section apart and determine how thick the money piece is going to be.
- Then, pull the hair up at a 90-degree angle and paint underneath.
- Place the hair in a foil, then apply the lightener from the roots to the midlengths on the surface to ensure the front is the boldest.
Pro Tip: Keeping the face-frame bright is a great way to ease blonde clients into a darker look. This keeps the tonality around the face consistent so it won’t seem like too drastic of a change.
5. Add Depth & Dimension With A Root Smudge
Maggie likes to start her shadow root application below the occipital bone because it creates depth underneath. From there, she moves to the crown, takes a heavy weave and pulls the formula down from roots to ends to help achieve a balayage look.
Pro Tip: Run a wide-tooth comb through the hair once or twice to soften the root smudge. “I’m not combing multiple times,” she advises. “I feel like when you do that you’ll start seeing spots.”
6. Use Saran Wrap Or Meche To Prevent Color Transfer

When working with multiple formulas, clip a piece of Saran Wrap or mesh over the shadow root so pre-existing blonde pieces won’t accidentally mix in with the darker formula.
Now that you’ve got these tips, click here to get Maggie’s soft blonde blend formula!
More from
Maggie Hancock
-
Glossing/ Toning
9 Toning Tips for Every Client
-
Blonde
Make Blondes Lighter With A Faux Bleach Root
-
Blonde
Blonding: 3 Ways to Spot a Bad Level 9
-
Balayage
15 Hair Color Trends You Need To Know In 2022
-
Bobs
The 10 Biggest Haircut Trends Of Winter 2021
-
Balayage
WARM BALAYAGE LOOKS FOR FALL
-
THE BTC SHOW 2021
Social Climbing At #THEBTCSHOW
-
Ponytails
Trend Alert: 5 Tips To Style Bubble Ponies
-
Beachwaves
8 TikTok Hair Trends That Went Viral In 2020
-
Blonde
13 ’90s-Inspired Chunky Money Piece Formulas
-
Business
10 Tips For Growing Your Instagram
-
Balayage
7 Balayage Techniques To Learn Right Now
-
#thebtcshow 2019
#THEBTCSHOW 2019: Day 1
-
#thebtcshow 2019
Schwarzkopf Professional at #THEBTCSHOW 2019
-
Business
Celebrate Mother’s Day With Advice From These Inspiring Hairdresser Moms
-
Embellishments
Embellished Holiday Updo On Short Hair
-
Balayage
7 Balayage Articles You Need To Read Before 2019
-
Beachwaves
Your Complete Guide To Styling Bobs & Lobs
-
#THEBTCSHOW 2018
6 Tips For Longer-Lasting Styles From Insta-Famous Hairstylists
-
#THEBTCSHOW 2018
Co-Lab Styling at #thebtcshow 2018
-
Beachwaves
Insta-Approved Styling Tips To Show Off Haircolor
-
Styling
Quickie: Master This Waving Technique For Bobs & Lobs
-
Beachwaves
3 Perfectly Unpolished Updos For Your Cool-Girl Clients
-
Buns
@maggiemh’s Tied Up Faux Hawk

