5 Things You’re Skipping In Shag Cuts
How To Personalize Your Client’s Shag Cut
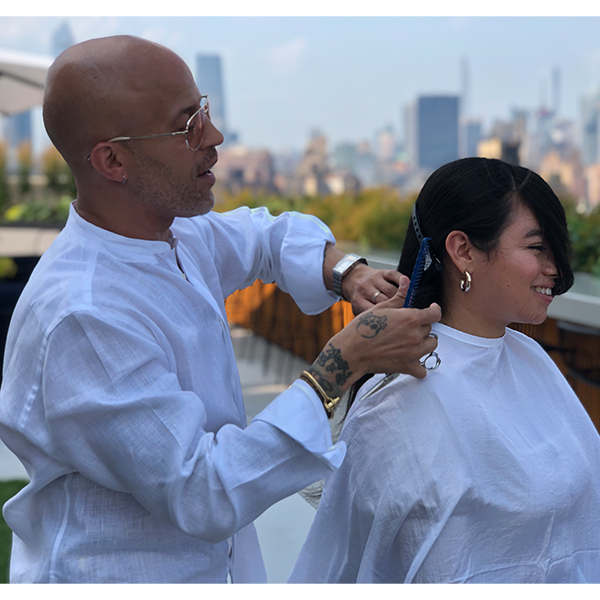
We know, literally every client is requesting some version of the shag cut—but you may be missing some key steps that will set your shag apart from the rest. Watch Global Director of Development at Pureology Yureesh Hooker (@yureesh) show you his technique above, and get the five things your cuts are missing below!
1. Cut The Corners
“I want my clients getting compliments about their hair when they’re coming into the salon, not just when they’re leaving it,” said Yureesh.
To maximize the longevity and structure of a shag, Yureesh says to “cut the corners” for a seamless grow-out. This ensures your clients won’t have tails sticking out of their head or a lopsided style as it starts to grow out.
- How to “cut the corners”: Hold bangs at a vertical angle away from the face. When elevating the hair out vertically, you will see a corner at the ends of the hair—point cut this corner off!

2. Blending Out “The Hole”
This may be the most important tip for any face framing haircut! Be sure the front of your shag does not look disconnected from the back and try out this trick for a blended face frame.
-
Take a diagonal back section in the front hairline large enough that you have some density in it to create a guide. As you comb it to your chosen elevation and overdirection, you will see a noticeable lack of density—that’s the hole!
-
Choose where the shortest length of your face frame will be, measuring from the part to the high recession, or where the density becomes significantly less. Cut the beginning of the face frame in this area diagonally from the top down, about 4 inches from the shortest length to longest. Do not worry about the guide meeting the longest hair just yet, this will happen in the bottom piece of the diagonal back section!
-
Take the bottom of the same section from the low recession to the ear and look at where the part of the section that you just cut ended. Now, cut a diagonal line starting at the low recession that is a little shorter (about 2 inches) than where the part of the section that you just cut ended to the final length. That negative space that was created allows the top of the section to fall into it, creating the illusion of a seamless line with consistent density!
Want To Be A Pureology Brand Educator? Click Here To APPLY!
3. Use Hairspray For Grip
Have you ever used hairspray throughout a haircut instead of just for styling? Yureesh preps his client’s hair layer by layer with a spritz of hairspray to create a manageable grip on the hair for precision cutting. This allows Yureesh to hold the hair loosely without losing any pieces that need to be cut.
For a shag especially, it is important to only cut necessary hair to build just the right shape. Using a hairspray like Pureology Style + Protect Lock It Down Hairspray allows for extra security when sectioning and a firm grip for elevation to help the hair stay where it is supposed to.

4. Avoid Where It Is Thin, Adjust Where It Is Thick
A shag cut does not have to be a mirrored image on both sides! It’s important to go with your client’s natural hair and assess what needs to be cut where, Yureesh said.
Remember this tip to help to avoid leaving clients with a shag that is unbalanced for their hair type or face shape. Depending upon the parting, thickness, or density on certain areas of the head, use your best judgment to “not cut something that is not there,” Yureesh said.
5. Cut “Softly”
To add precision on a texturized shag, do not limit yourself to only slide cutting! A softer cut can create a texturized look by slightly moving the shears open and closed down the hair shaft while overdirecting the hair at an elevation and away from where it is naturally going to fall.
Pro Tip: When deciding hair length before cutting the front face frame, pull the hair straight down in front of the clients face and use their lips as a gauge for length. THEN pull the same hair to the sides to check length as well—Yureesh noted that because we do not wear our hair directly in front of the face (even though we measure like we do!), checking the length on the sides of the face is super important for blending.

More from
Pureology
-
Awards Shows
The Best Hair & Beauty At The 2024 Emmy Awards
-
Clarifying
Clarifying Primer
-
Hair Color
Color Sealer
-
Facebook Lives
Make More Money With This Color Treatment!
-
Haircare
Color Fanatic Multi-Tasking Leave-In Spray
-
Conditioners
Color Fanatic Multi-Tasking Deep-Conditioning Mask
-
Hair Color
Color Fanatic Color Sealer
-
Celebrity
12 Hair & Beauty Looks From The Golden Globes
-
Multi-Cultural
Your Guide To Transitioning Chemically Relaxed Hair
-
Conditioners
Strength Cure Shampoo & Conditioner
-
Haircare
Your Client’s Guide To Summer Hair Damage Repair
-
Distributor
L’Oréal USA Announces New Executive Leadership Appointments & Beauty Brand Updates
-
Haircare
13 Treatments & Masks Your Clients Will Thank You For
-
Haircare
Hydrate Superfood Treatment
-
News
Pureology Partners with [salon]718 To Open Brooklyn Flagship Salon
-
Blowouts
The Silk Press: 7 Tips To Perfect The Process
-
Haircare
Hydrate® Shampoo
-
New Appointments
Pureology Announces New Artistic Director Team
-
Consultation
7 Steps To Elevate The Client Experience In Your Salon
-
Blonde
Bright Platinum Blonde
-
Balayage
Bold Brunette Blend + Money Piece
-
Hair Color
How-To: Dipped Cherry A-Line Bob
-
News
BREAKING NEWS: Finalists Announced for the 2016 Stylist Choice Awards!
-
Business
6 Holiday Retail Items Your Clients Will Love


