4 Foil + Balayage Tips For Single Session Blondes
Tutorial: Blonde Transformations In One Session
There is seriously no better feeling than giving a client their dream haircolor in only one session. But transforming brunettes into bright, face-framing blondes is a lot of work—and requires foils, paint, strategic placement and creative tricks to get the job done FAST.
That’s why Anna Cantu (@anna_cantu), Farouk Systems Global Board Artist, is sharing a 40-minute tutorial on single-session blonding transformations AND styling tips to finish every appointment like a pro. Watch the video and keep scrollin’ for helpful tips!
Get 25% OFF the CHI Hemp Blonding Kit! Click here + use code: BTCSPECIAL for the discount.
1. Tone As You Lift For Cool Results
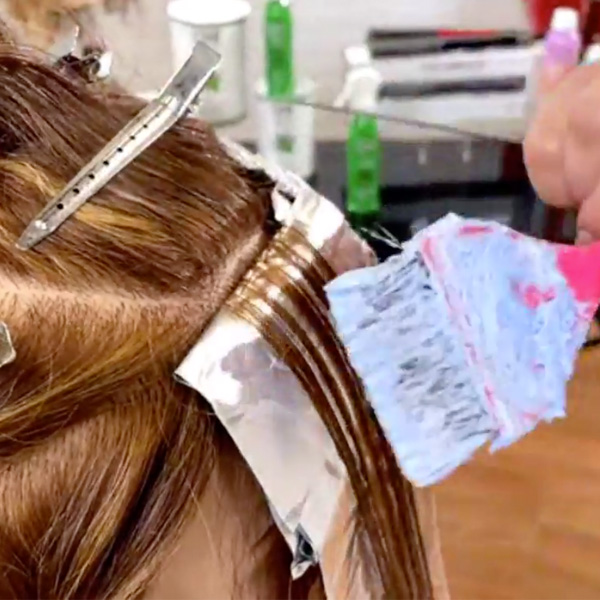
For single-session blonde transformations, especially with darker starting levels, lift is KEY. Anna uses CHI Bleach & Shine Lightener, starting with 20-volume and working up to 30-volume. The natural blue tone starts neutralizing yellow and orange pigments that are exposed when lifting, aka toning as she lifts.
Bleach & Shine is also great for single sessions because you CAN use heat for maximum lift. While the foils process, Anna prefers to do 10 minutes under heat to kickstart the lift, and then another 20 minutes without.

2. Foil Placement For Maximum Impact
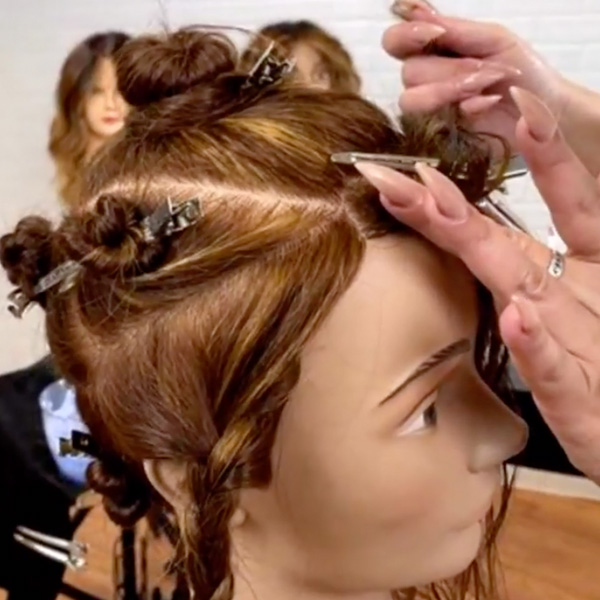
Details are everything, especially around the hairline! That’s why Anna suggests taking 1/8-inch and 1/2-inch babylight sections with darker, Level 3 canvases. “It’s so important to take fine sections that you can see through,” says Anna. Don’t cheat with bigger sections or you won’t achieve enough impact in only one session.
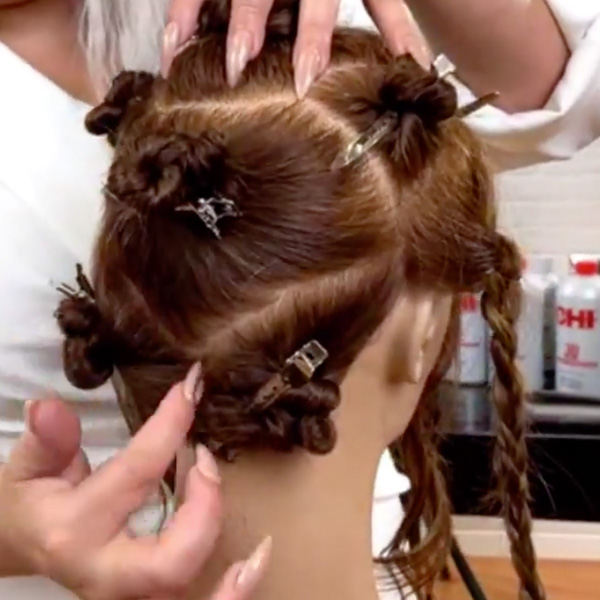
Sectioning Breakdown
- Face Frame: Triangle through the top
- Diagonal to the ear point on both sides
- Top temple area: Curving around in a U-shape to the apex, create a triangle from that point to the ear point on both sides
- Back: Low V into the nape area for hairline detail
- Balayage the ends


3. When Foils Process Too Fast
Picture this: You get to the point in a foil application where some sections are looking white and bright, and others need more time to process. To slow down lift, Anna applies CHI Bond & Seal Treatment. Grab a towel and mist directly on the hair to slow down lightener activation and gently dab. It also helps equalize porosity and pH levels.
Here are some other ways to use Bond & Seal:
- Protect the hair before lightening. Lightly mist all over before sectioning and lifting, especially on prelightened ends.
- Prep styling and blowouts. It’s formulated with aloe vera to condition and protect the hair.
- Retail! Clients love to try the products you use in the salon and this natural bonder is super easy to use at home.
4. Previously Lightened Blondes? Try This!
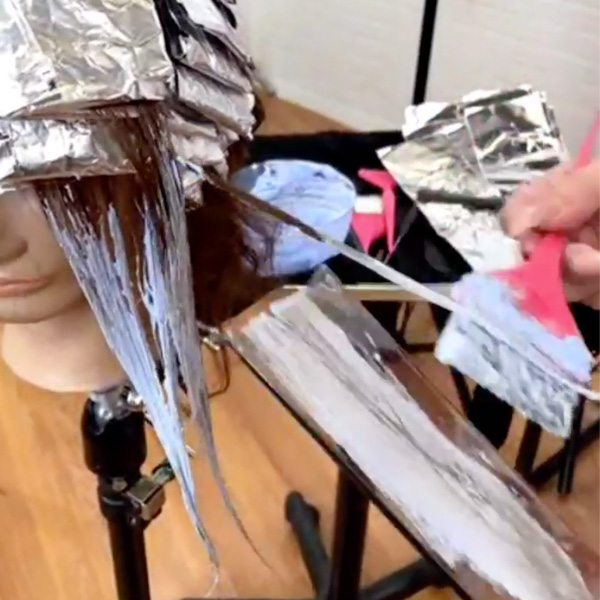
When a client already has prelightened ends, Anna uses balayage as a fast way to add brightness between foils. She mixes CHI® Bleach & Shine with developer (1:2) for the best consistency. Anna paints the ends in a V-shape on a board and uses saran wrap to control heat.

Products Used
More from
Farouk Systems, Inc.
-
Color Express 10 Minute Permanent Hair Color
-
Monthly Product Launch List
The Best Hair Product Launches Of Fall 2023
-
Industry Events
Dr. Farouk Shami Honored at City of Hope’s Spirit of Life Celebration Gala
-
HOUSTON: There’s One Day Left To Enter Farouk’s Hair Masters Giveaway
-
Industry News
Dr. Farouk Shami To Be Honored At City of Hope Celebration
-
Business
Struggling With Retail? 8 Tips To Make The Sale
-
Business
6 Things You Didn’t Know About The LG CHI Color Master Factory
-
Base Breaking
Need A Clean Base For Pastels? Try This Corrective Color Method
-
New Appointments
Farouk Systems, Inc. Announces Executive Leadership Updates
-
Collections
Technicolor
-
Foilayage
The 4-Foil Money Piece: Do THIS To Save Time!
-
#ONESHOT HAIR AWARDS
The BTC Show 2022: 10 Things We Saw
-
The BTC Show
#THEBTCSHOW 2022
-
Color Melt
How To Create A Rich Copper Root Melt
-
BTC Quickies
5 Color Tricks We Stole From Instagram
-
Product Launches
2021’s Most Talked About Product Launches
-
Industry News
Farouk Systems, Inc. Earns International Leaping Bunny Certification
-
Industry News
FAROUK SYSTEMS MOURNS THE LOSS OF DEAR FRIEND & BUSINESS PARTNER, JOHN MCCALL
-
BTC Events
#thebtcshow 2021
-
Events
Farouk System at #thebtcshow 2021
-
BTC Events
Connection Center at #thebtcshow 2021
-
Color Mixer
The LG CHI Color Master™
-
Business
Want A Successful Business? These 2 Tips Are Essential!
-
Secrets To Perfect Flat Iron Waves


