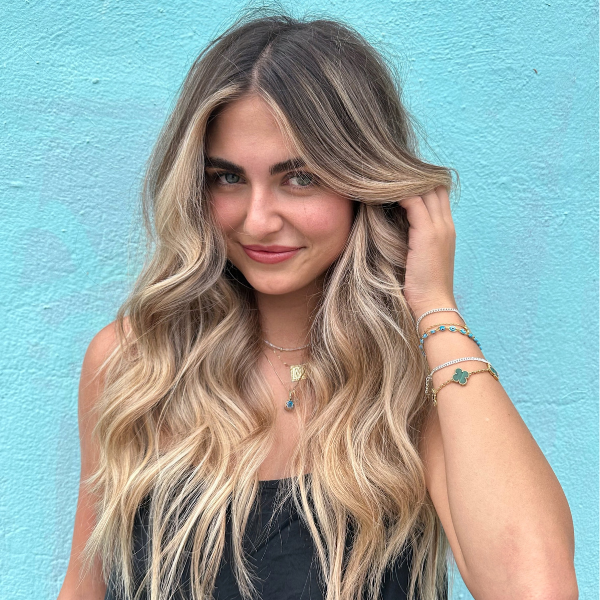
How to Create a High-Contrast Balayage in 35 Foils or Less
Use This Blueprint for Dimensional Balayage With Fewer Foils
Want to achieve a high-impact, low-maintenance balayage in 35 foils or less? Join BTC University and Alfaparf Milano Professional Ambassador Eric Coyle (@ericmichaelhair) as he shares his process for creating a dimensional, lived-in look using his “less is more” approach to create a beautiful balayage.
Simple Way to Add Depth: The Upside-Down Triangle
Eric’s first strategy for achieving a simple, organic look is to focus on foiling the hair the way it lays. His approach prioritizes minimal sectioning, using five core sections around the head. He sections off behind the ears and forward on both sides, then creates an upside-down triangle at the crown, leaving the rest of the hair that remains in the back to be split down the center.
By creating an upside-down triangle at the crown, he sets up a foundation that allows the highlights to stand out while maintaining a backdrop for dimension.
Don’t overcomplicate it! Over-complicating sections and getting lost in the foil work will minimize the dimension that high-contrast looks require. Keep your sections simple for a more effortless final look that can go longer between color sessions.
Foil for Flow: Create Movement With These Tips
Sticking to a strategic foil pattern is not always in your client’s best interest. When you’re focusing on blend, movement and lived-in hair color, try these three tips:
- For an organic blend, use organic placement: Alternating between subtle zigzag and straight partings as you foil adds an even more organic feel, enhancing the “lived-in” look.
- Use diagonal sections to mimic movement. As you move up the head, place foils in a diagonal-back pattern that mimics the hair’s natural movement. Plus, painting V-shapes within these foils provides an extra layer of blend insurance.
- Want a seamless blend? Use teasylights! To avoid a stark contrast, Eric recommends backcombing each foil before painting it to maintain a gradual transition between your client’s natural hair color and the highlights.
Watch Eric’s demo for the secrets to perfect teasylights:
Can Your Foils Pass This Saturation Test?
Proper saturation is essential for creating consistent results from strand-to-strand and foil-to-foil. Eric’s go-to lightener is Alfaparf’s BB Bleach High Lift 9—for this look, he begins with 20-volume developer and increases to 30 for a consistent lift without overprocessing the hair.
Here are Eric’s tips for properly saturating each foil:
- Prepare your lightener in small batches, re-mixing every 20 minutes. This keeps the lightener fresh for consistent results.
- When you start painting, leave some room toward the roots to be able to blend up as you saturate.
- Take a fine-tooth comb and comb through each section to ensure every strand is properly saturated and no dark spots are left untouched.
Remember, however you see the hair in the foil before you close it, that is how it’s going to lift.
Watch Eric’s saturation tips in action:
Attention Overfoilers: Leave This Section OUT
The key to creating high-contrast looks is to make sure your foiled pieces have a beautiful backdrop to fall on top of. Eric’s advice? Do not panic when you see large sections of hair left out of the foils.
The more hair that is in foils means the more hair you need OUT of foils to provide the dimensional transformation.
See just how much hair Eric leaves out for added dimension:
Watch all of Eric’s tips and tricks for the perfect express balayage on BTC-U!
More from
Eric Michael Coyle
-
Warm Honey Blondes & Bronde Hair Inspiration Photos
-
The Biggest Haircut Trends of 2024
-
Muted Copper Ribbons
-
Subtle Ombré is The New Balayage—5 Tips You Must Know!
-
Your Official Guide To Barbie Blonde
-
BTC “On Tour” Dallas 2023
-
Honey Blondes: 3 Things To Know When Lifting
-
Blondes Turning Brown? Here Are 3 Reasons Why
-
Are Your Products’ pH Levels Ruining Your Haircolor?