
6 Ways to Accelerate Your Foiling Skills
Summer is officially here and that means your clients will want to update their looks for the season. To help you brush up on your color technique and get your clients summer-ready, follow these six foiling tips.
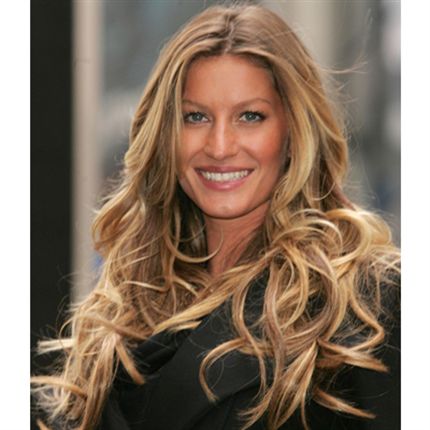

Summer is officially here, and whether your clients are jumping aboard the ombré train, testing out the pastel waters or just want to warm up their color, they’ll definitely want to update their looks for the season. To help you brush up on your color technique, follow these six foiling tips from Goldwell Artistic and Techniculture Director Patrick McIvor and get your clients summer-ready!
1. Ombré How-To
Backcomb the shorter hairs in each section out of the way and pinch the ends to control the longer hair. This allows you to easily highlight the proper area of the section.
2. Go Low, Gradually
It’s difficult to convince that blown-out, platinum, Level 35 client she needs more dimension/lowlights—so go slow. “I usually start by applying a few Level 8 or 9 lowlights to gauge their reaction to ‘darker hair’ before doing anything else,” says Patrick. “If the client can tolerate this first step, I’ll gradually add a few more lowlights during each subsequent visit.”
3. Tip for Tips
Never bring all the lowlights through the ends. Instead, as you move the brush down the strand, pull it away at various points for a more natural look. Think about it—hair should never be darkest at the ends. What’s more, ends are usually the most porous areas and tend to grab more color. Gently tapering lowlights on the ends produces the same softness you achieve with point cutting because the color does not uniformly stop at the same point, just as the lengths don’t stop at the same point when you point cut.

4. Don’t Get Horizontal
Foil placement is as critical to your results as strand selection. “I never place foils horizontally because this pattern creates noticeable lines,” Patrick says. “Instead, I prefer a diagonal back and diagonal forward placement. This produces a soft, natural result and makes it easy to find the strands when retouching.”
5. Pop Art
When working with a tone-on-tone design without wide variations in levels, Patrick suggests placing foils vertically to make the color “pop.”
6. Selection Process
For natural-looking highlights, don’t be afraid to mix up the sizes and shapes of your strands. Think pasta—angel hair, spaghetti, linguini or fettuccine-sized weaves. If you look at someone with natural highlights, you’ll observe that they are never uniform. Creating a “pasta buffet” like this—and placing the lightener or color at various points on each strand—will produce a much tastier, and more believable, highlight result!

