3 Tape-In Extensions Tricks For Balayage
Watch: Chemical-Free Balayage How To
Your balayage client keeps requesting to go brighter but their hair is fragile and finer through the ends—what now? Here’s an idea: Build a natural blonde blend, add fullness and skip the chemicals with tape-in extensions. Blonding specialist Heather Kaanoi (@h_kaanoi) is sharing her best tips on placement, building a gradient and blending—just TAP the photo above to watch the tutorial and keep scrollin’ for a quickie cheat sheet using Flaunt Paul Mitchell® extensions.
Want to boost your salon biz? Click here + start offering tape-in extensions services!
1. Fast Flaunt Guide To Choosing Tape-Ins
Extensions first-timer or new to Flaunt? We’ve got you. Here’s a quickie breakdown of when to reach for Standard or Deluxe, how to customize colors with sandwiching and precisely contour the head shape.
- Standard: For areas that are easily hidden. Standard tape-in wefts feature the traditional seal on the outer surface and can be used for most of the head in traditional full-head applications.
- Deluxe: For areas that are more exposed, like the hairline or the nape if your client wears their hair up a lot. Deluxe gives the effect that the weft is growing directly from the scalp—think lace front wigs.
- Contour Head Shape: We know that every 1-inch square on the head, the contour shifts. Flaunt tape-ins are 1.1” wide, so they fit the head shape and can easily fill in cowlicks and areas that need TLC.
- Sandwich: Customize chemical-free color by stacking and combining both Standard shades (natural and ombré) and Deluxe (natural and rooted) to build a balayage blend.
Toning Trick: Deposit only! Avoid applying lightener to the extensions. Instead, to customize and color match, deposit color or tone with semi- or demi-permanent shades.
2. Thinning Shears Trick For Softer Blends
Here’s a common extensions scenario: A client has preexisting highlights but finer overall texture, so the brightness gets lost between the mids to ends where there is less density. This is where you can use tape-ins to build your balayage, while adding fullness and length—BUT you want to avoid creating bold ribbons of bulky blonde through the ends.
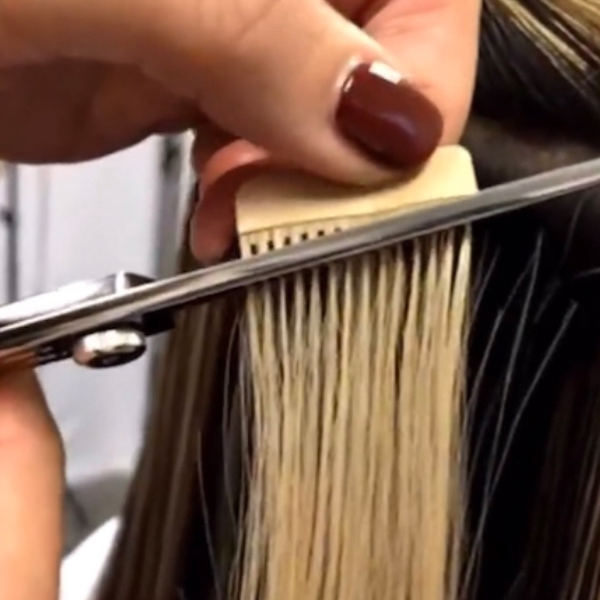
Try this weight removal tip! Use thinning shears directly below the base of the adhesive tape tab to remove some density. This will soften the deposit of the blonde in the application for a more natural blend. Then, sandwich with a darker Deluxe Rooted extension.

Watch The Full 50-Minute Video Tutorial—Click Here!
3. Build Natural Balayage Results With Creative Weft Placement
- For clients that wear glasses: Leave two fingers width of natural hair above the ear, so when they slide their glasses on, the tape-ins won’t cause discomfort or tangling.
- The distance between weft rows: Hair density determines how much space should be left between each row, typically between 3/4 inch to 1 inch. For extremely thick density, only leave ½ inch.
- Around the hairline: Start the extensions application ½ inch away from the hairline. This is the perfect spot to apply Deluxe extensions—for a lace front effect—where clients might have more exposure at the root.
Bonus Prep Tip: Before you get started, blow-dry the hair smooth. The hair should be clarified without any conditioner applied at the root.
Slide Through The Before & After Pics Below

Products Used


