
Formulas
Berry Pink Dimension
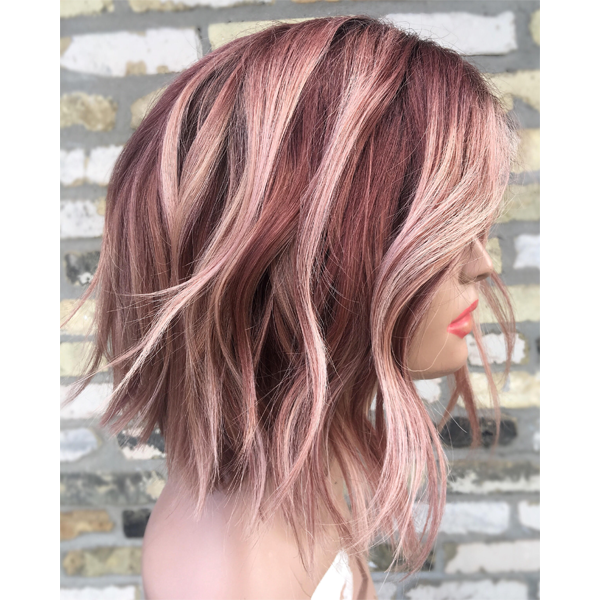
Get your clients on trend with one of this year's hottest fashion colors—PINK! Milwaukee colorist Sai Phet (@hairbysaiphetkhosa) generated over 27k likes on our Insta with this multi-dimensional blend of berry and rose hues using his custom color technique. “To create this look, I like to use my merge and melt balayage technique,” shares Sai about this wig look, which he's created on clients. “The name came about because I’m literally merging the lightener onto the demi-permanent color...It’s almost like when we contour and highlight and blend together with a damp blender. It is a guaranteed beautiful result every...
Keep reading for free
Create a free account or sign in to continue
Use the same email and password across behindthechair.com, BTC-U, oneshothairawards.com, and Who Does Your Hair — one set of credentials, every site.
OR
We'll check if you have an account, or create one if you don't.
To save this story, create a free account or sign in.
Join BehindTheChair
Access the industry’s #1 source for hair trends, education and community now.
OR
We'll check if you have an account, or create one if you don't.


