3 Foil Placement Tips For Dimensional Brunettes

Highlight Education: 3 Foiling Tips For Maximum Dimension
Bold dimension isn’t about what you put in, it’s about what you leave out, and no one knows this better than BTC Team Member Mick Lewis (@hairbymickk). Known for his high-contrast highlights and bold dimension, Mick taught his highlight placement and painting techniques on BTC University and we are sharing some need-to-know deets to bring back to the salon ASAP.
Keep scrollin’ to read it all and click here to purchase Mick’s entire course on BTC University and receive unlimited access!

What We Learned:
You can learn Mick’s full technique in his 90-minute course, but we’re teasing these tips you need to know now!
Tip #1: Use Pivot Partings To Create A Full Face-Frame
“For me, a money piece doesn’t just happen at the top. That bold, blend all the way to the bottom is just as important when creating high-contrast color,” Mick explains. “It’s about creating a full face-frame.”
For the hairline above the ear, Mick uses a pivot parting placement and weaved sections to create internal contrast and connect the entire face-frame. Check out his steps below:
- Start with a diagonal-back weave at the hairline in front of the ear.
- Pivot slightly using the top corner of the bottom foil as a starting point working towards the ear. This section will be slightly thicker in size to create bolder contrast throughout the ends.
- For the last section, take another pivot parting so the weave ends just above the ear. This will create brightness and bold contrast within the interior when the client’s hair opens up.
Tip #2: Allow Highlights To Pop With A Highlight “Cluster” Placement
To avoid over-foiling and ensuring there is enough depth, Mick creates clusters of highlights with alternating weaves to create strategic brightness and dimension.
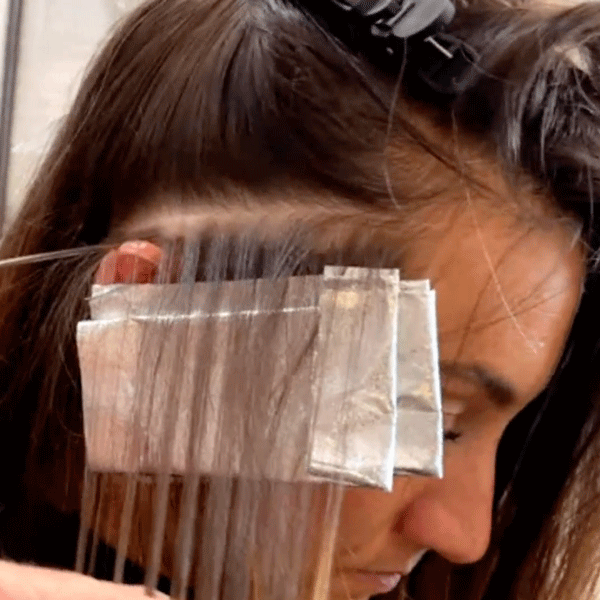
When working closer to the hairline, Mick takes fine weaves (almost a babylight). As he works back the weaves become chunkier, creating more darkness around the finer weaves allowing them to pop.
Pro Tip: When painting at the hairline, Mick brings the lightener all the way up to the root, fully saturating through the ends. As he works back, Mick initially applies the lightener lower—about a quarter to half of an inch below the root—and feathers the product up, creating a soft blend.
Tip #3: Use Triangular Sectioning For Gradual, Blended Lowlights
Strategic pockets of depth help those fresh highlights to stand out, so Mick uses a triangular placement to apply lowlights in the center back. This allows the majority of the lowlight to be high and gradually taper down towards the ends.
Start with a horizontal parting at the curve of the head. Then, create a triangle moving downwards with the point near the occipital bone. Work from the bottom of the triangle up, taking horizontal partings so that the majority of the lowlight sits at the top.
Pro Tip: To keep the perimeter light and avoid covering all his highlights, Mick paints the lowlight three quarters of the way down the section. Then, he takes a blending brush and blends the product through to the ends.
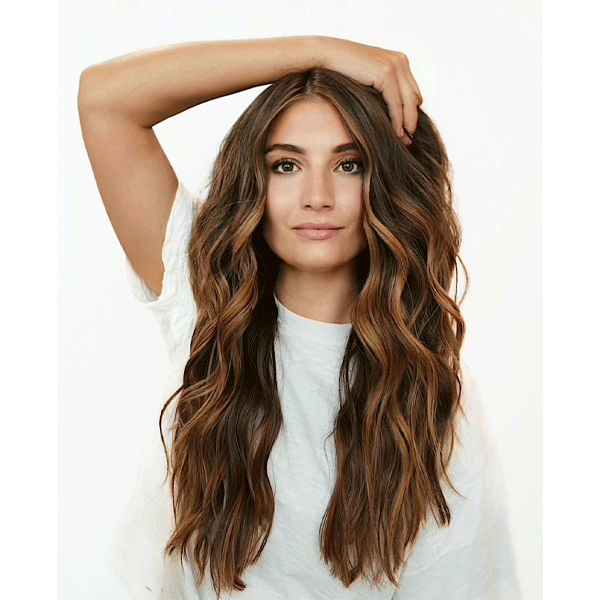
Slide For The Before & After
Click The Beaker For Mick’s Full Formula!
Have Questions? Mick Has Answers!
One of the benefits of watching a course on BTC University? Artists are able to answer your questions in REAL TIME! Here are some technical questions viewers had for Mick during his livestream:
Question: How would you approach this technique for a client with finer hair? Do you foil less or more or the same?
Answer: “If the client had super, super-fine hair, I would probably be applying the same amount of foils but the sectioning wouldn’t be as chunky. You have to take into consideration what type of hair the client has and where. If the client doesn’t have a very strong hairline, a money piece might not be right for them. If the client has a lot of hair just on the finer side, I would take the same placement but just a little bit smaller of a weave.”
Q: If you have a client with a very dark natural starting level that has been over-highlighted, what pattern would you use to replace depth?
A: “The first thing you should do is talk to your client and establish realistic expectations. We are always telling our blonde clients that ‘To achieve this, it will take a few sessions,” but we don’t do the same for our brunette clients and the truth is sometimes it does. So if a client is trying to add depth back into their hair, especially if they are really, really over-processed, sometimes the lowlights are difficult to establish. So I let them know that over time as their natural color starts growing in we’re going to see a lot more dimension and contrast, but we’re going to be struggling with all of the existing blonde for awhile. That way they just know what to expect from that appointment and they get excited about their hair journey and they feel like they are in good hands because you are going through the process with them.”
Click Here To Purchase Mick’s Course On BTC University & Receive Unlimited Access!