
Speed Up Foiling Services With These 4 Techniques


4 Techniques For Faster Foiling
Ready to learn how to give clients a full highlight service in less time AND use less foils? We thought so. For The BTC Show Online Joico Brand Ambassador Larisa Love (@larisadoll) shared her go-to foiling techniques for speedier appointment times. Scroll down for a sneak peek at her segment and click here to learn everything from Larisa PLUS over 18+ hours of education from the industry’s top educators!
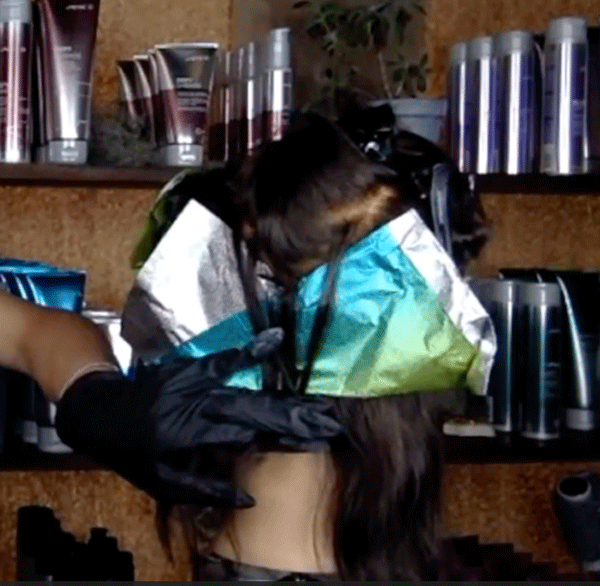
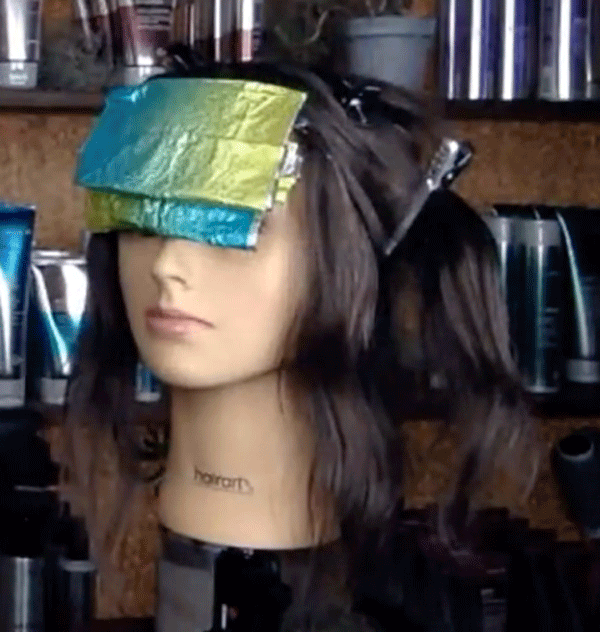
#1: Arrow Technique
Place highlights at the hairline and within the interior with one foil! Check out the sectioning, foil folds and placement below.
![]()
Sectioning: Start with a horizontal parting from the recession to the center back of the head.
Foil Fold: Fold the corners of the foil into the center. This will create an arrow-shaped foil.
Technique Breakdown:
- Create a weaved section at the hairline in front of the ear. Then, take a bolder weave at the horizontal parting, make the weave slightly less bold when moving into the interior to create dimension.
- Take both weaves in one hand and place the foil with the center point—or the top of the arrow—in the corner of the two sections.
- Apply lightener ensuring full saturation. To finish the ends, lay a foil flat and continue applying.
- Lay a second arrow-folded foil on top and fold the bottom foil in half to insulate.
![]()
Pro Tip: Tension is key to ensure foils don’t slip. So keep tight tension throughout the application.
#2: Crescent Technique
This technique uses sectioning and folded foils that mimic the client’s head shape to cover more area and create a more natural result. It is also great for beginner stylists who are trying to nail down placement because it works with the hair’s natural fall.
Sectioning: Section out the face frame with a diagonal back parting to each ear. This technique is all about big, rounded sections. Beginning at the front hairline, create a rounded parting that mimics the shape of head and matches the shape of the folded foil, ending at the nape.
Foil Fold: Fold the corners of the foil into the center, creating a triangle. Then, fold the top point of the triangle down. Gently fold any corners down to create a rounded, crescent shape.
Technique Breakdown:
- Create a weave following the rounded parting. The thickness can depend on the desired boldness of the highlight.
- Place a small amount of lightener at the bottom of the crescent-shaped foil. Place an unfolded foil vertically on the lightener to stick the two foils together. Line up the foil with the curved part and apply lightener to the entire section.
- Recreate the crescent fold and apply to the top of the section, fold the bottom foil up to insulate the entire section in foils.
Pro Tip: Since this technique covers such large sections, after completing one side of the head, Larisa suggests using those sections as a guide for the other side. Be sure to have the same amount of foils on both sides so there is equal brightness throughout.
#3: V-Shape Technique
This technique is great for clients that want a quick partial highlight. It also helps visualize where the highlights will live because the partings work with the natural fall of the hair.
Sectioning: Section out the client’s face frame and create a V-shaped section so that the middle point is directly behind the client’s ear.
Foil Fold: Holding the foil horizontally, fold the foil in half on a diagonal so that it creates a “V” shape.
Technique Breakdown:
- Create a continuous weave along the V-shaped parting. The thickness of the weave can depend on how bold the highlights will be.
- Place the foil so that it lines up with the V-shaped section and apply lightener, feathering the product up when closer to the root. Connect an unfolded foil to the bottom of the V-shaped foil for the mid to ends.
- Refold the V-shaped foil inward to enclose the section, fold the bottom foil up to secure the entire section.
- Continue working up the head, creating V-shaped sections.
#4 BONUS: Root Shadow Cheat For Face Frame
Larisa’s gradual tease technique creates dimension and a natural shadow root without relying on a toner.
Sectioning: Create a center part and then create a center back parting from ear to ear. The farther back the parting, the larger the face frame, so establish the desired end result with your client before parting.
Technique Breakdown:
- Use the arc of the eyebrow as a guide and create a rectangle section.
- Create a babylight weave at the hairline.
- Apply the lightener getting as close to the root as possible, feathering the product up against the grain of the hair to blend even more.
- Take a horizontal section directly behind the foil and tease the section one time. Apply lightener and secure in a foil.
- Take another horizontal section, leaving no hair out in between, and tease that section twice. Larisa explains why, “Because what goes up, must come down. So, I am creating a shadow root effect without relying on a shadow root! The more you tease, the more the hair will fall, the less you tease, the higher the color will be. Gradually increasing my teases will create a tear-drop effect without relying on a teardrop while toning.”
Pro Tip: Tease higher up in the section to create more dimension. For this technique, Larisa teases from mid to ends.
Click Here To Purchase The BTC Show Online And Have Lifetime Access!!

More from
Joico
-
Balayage
One Step, Three-Layer Multidimensional Balayage
-
Balayage
Sunset Copper Balayage
-
Monthly Product Launch List
The Best Hair Launches Of March 2024
-
Hair Color
Blonde Life® SilverLight™ Lightening Powder
-
Bond Building
Defy Damage® IN A FLASH™
-
Da’Vine Joy Randolph’s Glamour Waves
-
Celebrity
Zendaya’s Classic Volume Bob
-
Celebrity
The Best Beauty Looks At The 2024 Oscars
-
Blonde
Building The Perfect “Summer Blonde”
-
Gray
Make Gray Hair Look & Feel Younger: 3 Tips Every Stylist Should Try
-
Haircare
KBOND20 Defy Damage Power Masque
-
BTC Events
BTC “On Tour” Nashville Recap: Everything You Missed
-
Monthly Product Launch List
The Best Hair & Beauty Launches Of November 2023
-
Haircare
Inner Joi™ Strengthen Shampoo
-
Conditioners
Inner Joi™ Strengthen Conditioner
-
Haircare
Inner Joi™ Strengthen Masque
-
Haircare
Joico Launches Vegan, Naturally-Derived Haircare Line, Inner Joi™
-
Blonde
How To Create A Natural Shadow Root Through Teasing
-
Blonde
“Fake” A Full Foil In 3 Steps: Here’s How
-
BTC Hair Trend Report
Your Guide To Fall & Winter 2023’s Hair Color Trends
-
Blonde
Honey Blonde Curls: 3 Strategic Placement Tips To Create Brightness
-
Hair Color
Bold Color Trends You Need To Know For 2024
-
BTC Events
AI, Mental Health & Social Media: 7 Business Tips You Can’t Live Without
-
Manufacturer
Joico Announces Jeannetta Walker-Rodgers as Global Technical Director

