Root Taps, Shadows & Melts—Do You Know The Difference?
3 Ways To Elevate Toning For Lived-In Blondes
When creating a lived-in look, which technique delivers the most natural result: root tap, back tap, shadow root or root melt? Trick question—all of the above! Joico Celebrity Artist Jill Buck (@jill901) is here to explain what each of these techniques are, plus when and where to use them when blending out harsh lines.
Technique #1: Root Melt For Interior Depth
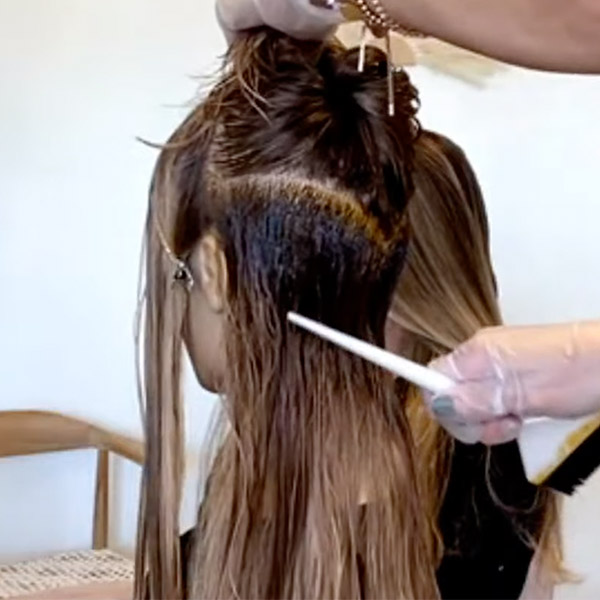
Jills wants her end result to be bright around the face and have more depth in the interior. So, she applies her root melt in the back sections first, so it has a longer processing time.
Thinking of the hair in zones: Zone 1: The base, Zone 2: The mids and Zone 3: The ends—Jill focuses her root melt in Zone 1. To achieve a flawless melted effect, Jill applies her product in a V-shape.
Below, she demonstrates with the back of her brush how far down she tones the root melt.

Try Jill’s go-to products to achieve a naturally bright, healthy blonde: Joico Blonde Life Demi-Gloss Toners, Lightening Powder and Coconut Oil Developers.
Technique #2: Natural Shadow Root Roadmap
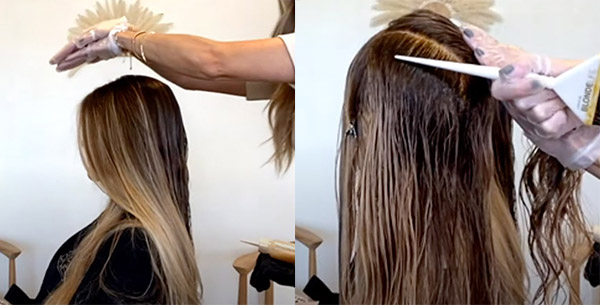
Jill’s fool-proof trick for mapping out a shadow root? She places her hands above the client’s head and notes where there is a natural shadow. Not only does this create a natural placement, but it helps the client visualize what their shadow root will look like before Jill applies product.

When applying her root shadow, Jill works in a teardrop section, only applying her formula to the base and stopping right at the round of the head, helping her achieve a natural, lived-in result.
Technique #3: Back Tap For A Bright Face Frame
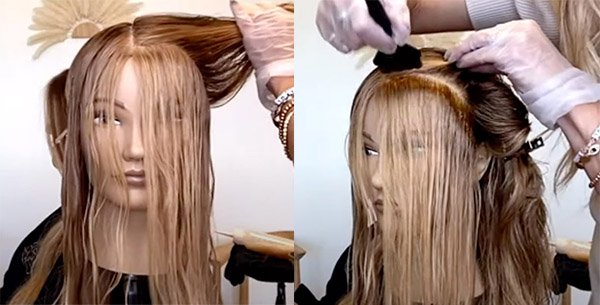
Here’s the thing: Blondes want to SEE brightness. That’s why Jill opts for a back tap along the hairline. Sectioning off the hairline to stay organized, Jill grabs a smaller brush (for more control) and taps the toner just enough to blur any lines of demarcation.
Pro Tip: If you’re doing this technique at the bowl, don’t direct the hair away from the face. Jill likes to bring the hair towards the face so that she can hit the top side of the hair.

But Wait—What Is The Difference Between A Root Tap & Back Tap?
Root Tap:
- Tapping toner onto the roots, about an inch or two down
- Painting both sides of the hair
- Jill uses this technique for clients with thick/coarse hair and brunettes/darker tones
Back Tap:
- Tapping toner onto the roots, about an inch or two down
- Painting only one side of the hair, letting the toner penetrate through to both sides
- Jill uses this technique for clients with finer hair and blondes/lighter tones
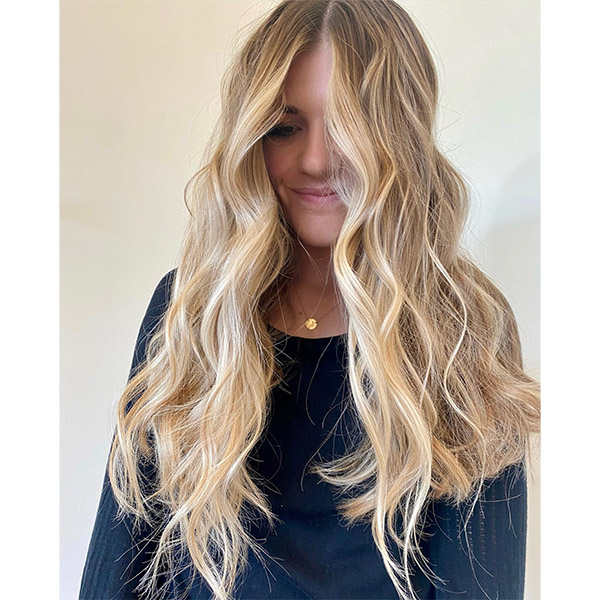
Slide to see the before & after:

Tap the beaker to see Jill’s formula:


Get a FREE sample of Blonde Life: click here!
This content is sponsored.
More from
Joico
-
BTC University
10 Best Holiday Gifts for Hairdressers: Blonding Specialist Edition
-
News
This Subscription-Free Beauty Box Delivers Trending Pro Beauty Products
-
BTC "On Tour"
BTC “On Tour” 2024 Wraps Up In Los Angeles
-
Curls
How To Use A Consultation To Address Curly Client Concerns
-
BTC Events
Celebrity Colorist Justin Anderson Joined BTC’s “On Tour” Nashville Benefit Show
-
BTC Hair Trend Report
The Biggest Hair Color Trends of Fall 2024
-
Blonde
Butter Blonde Guide: Toning, Lightening & Technical Tips
-
Blonde
Lightening Textured Hair: The Must-Dos & Mistakes To Avoid
-
Brunette
Soft-Dimension Brunette Without Any Lightener: Here’s How
-
#ONESHOT HAIR AWARDS
3,000 Hairstylists in one Place? Here’s What You Missed at the 2024 BTC Show
-
Monthly Product Launch List
20 Major New Hair Innovations To Kick Off Fall
-
Blonde
Dark To Beige Platinum Blonde Transformation
-
Blonde
How to Connect 6 Inches of Regrowth in Less Than 25 Foils
-
Curls
Curls Like Us™ Collection
-
Hair Color
Dark Brown To Smoked Pearl Blonde Transformation
-
BTC Hair Trend Report
8 Hair Launches to Heat up Summer
-
Business
Why Promoting Women to Leadership Positions is the Key to a Successful Hair Brand
-
Color Protecting
Blonde Life® Color Enhancing Masques
-
Detangler
Blonde Strong™ Detangler
-
Monthly Product Launch List
9 New Product Launches To Bring Into Summer
-
News
The BTC Beauty Box is Back & Better Than Ever—Same Best-Sellers, No Subscription Needed.
-
Blonde
Virgin To High-Lift Dimensional Bronde
-
Met Gala
MET GALA 2024: EVERY CELEBRITY BEAUTY LOOK FROM THE RED CARPET
-
Met Gala
GIGI HADID’S MARILYN-INSPIRED MET GALA BOB


