Protective Styling: How To Create Perfect Bantu Knots
3 Tips For Creating Flawless Bantu Knots Every Time
Summer is almost here…Which means plenty of heat, humidity and other environmental stressors are on the way. A.K.A.: protective styles season. Be ready to offer delicate curls and coils the moisture they need to thrive—and look great while doing so!
JCPenney Salon Senior Manager of Education & Service Jaimee Harris Smith (@hairbyjsmith) is sharing her go-to, low-manipulation Bantu knot technique that keeps the hair healthy by protecting fragile ends and reducing breakage.
1. Start each protective style with a moisturizing haircare routine.
Before starting any protective style, Jaimee always preps the hair to ensure it’s properly moisturized. Here is her go-to haircare routine for prepping Bantu knots:
- Cleanse and condition with Design Essentials Almond & Avocado Shampoo and Conditioner.
- Prime globally with Design Essentials Almond & Avocado Moisture Pre-Styling Whip.
- Apply Design Essentials Almond & Avocado Leave-In Conditioner to the midlengths and ends for additional moisture and help detangling as you style.
Pro tip: Jaimee finds that creams work best for adding moisture to tighter curl types. For looser curl types, use foams—like Design Essentials Almond & Avocado Curl Enhancing Mousse—to add texture.
Check out Jaimee’s up-to-down Bantu knot style:

JCPenney Salon is seeking shear talent…Apply today!
2. Customize your sectioning to set your Bantu knots apart.
Bantu knots are incredibly versatile, meaning they can be as simple or intricate as your client requests. The secret to this versatility is all in the sectioning.
Here is Jaimee’s unique process:
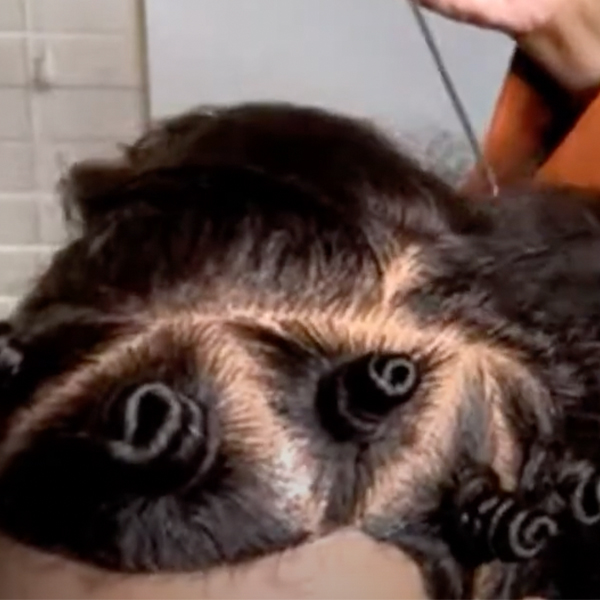
- Single out your first section by creating a parting all the way around the perimeter of the head. This outlines where your first row of knots will be.
- Start with a triangle parting at the top of the head. This will be your first knot and your guide for subsequent sections.
- Coat the ends with a little extra cream or foam for additional protection, then hold the section right off the head at a 90 degree angle.
- Begin twisting the hair directly from the scalp, wrapping the hair at the base as you do so until a knot forms.
- Once you reach the end of the twist, tuck it into the knot with your finger or rat tail comb and secure with a pin or an elastic.
Pro tip: Remember to twist in the same direction for all of your knots!
Scroll to see Jaimee’s step-by-step process:
3. Connect subsequent knots at the previous triangular point.
To ensure her parting stays consistent throughout the entire row, Jaimee always creates her next knots at the triangular point of the previous section.
Continue with this technique throughout the entire row, then repeat on the opposite side.
Pro tip: For clients with exceptionally curly hair, Jaimee uses a KeraCare Edge Tamer to gently clean up partings near the hairline.
Jaimee creates eye-catching Bantu knots by ensuring proper sectioning:

Click here to join the JCPenney Salon team!
This content is sponsored.
More from
JCPenney Salon
-
Curls
3 Must-Know Facts About Low Tension Protective Styles
-
Business
How the Right Salon Can Help You Build A Successful Career
-
Blowouts
3 Fast Blowout Tips For Bobs & Lobs
-
Curls
Flexi-Rod Set: 4 Tips For Bouncy, Long-lasting Curls
-
Braids
Braiding Tips To Upgrade Upstyles
-
Facebook Lives
Bantu Knots, Foil Rods & Comb Twist Sets: 3 Setting Techniques For Natural Hair
-
Award-Winning
NAHA 2020: Styling & Finishing Award
-
Award-Winning
NAHA 2020: Team of the Year
-
Manufacturer
JCPenney Announces New Additions To The Salon By InStyle
-
#thebtcshow 2019
#THEBTCSHOW 2019: DAY 3
-
#thebtcshow 2019
Texture Co-Lab at #THEBTCSHOW 2019
-
BTC Events
BTC “ON TOUR” DALLAS
-
BTC ON TOUR
“On Tour” Dallas Cocktail Party
-
BTC Events
BTC “On Tour” Dallas Show—Here’s Everything That Happened!
-
New Appointments
JCPenney Names Rachel Jud As Vice President Of Salon
-
BTC Events
Everything That Went Down At BTC “ON TOUR” Chicago
-
BTC Events
BTC “ON TOUR” CHICAGO
-
Conditioners
Textured Hair Troubles? Read This!
-
BTC Events
BTC’s “On Tour” Show Is Coming To Chicago—Here’s The Artist Lineup!
-
Braids
No-Heat Styles To Teach Your Clients
-
Business
Four Ways To Support Breast Cancer Awareness Month From JCPenney Salons
-
Braids
WATCH: Braids, Knots + Upstyling Cheats
-
Blowouts
Don’t Let Your Client Leave Without This Blowout
-
Haircuts
Long-Layered Cut


