10 Finger Wave Tips for Flappers

Finger waves are having a moment right now. And that means more and more of your Halloween clients will want to incorporate them into their costumes—flapper girls, Downton Abbey characters, Old Hollywood celebs. Are you prepared to create this timeless look for your Halloween-loving clients? Here are 10 tips you need to become a master—fast!

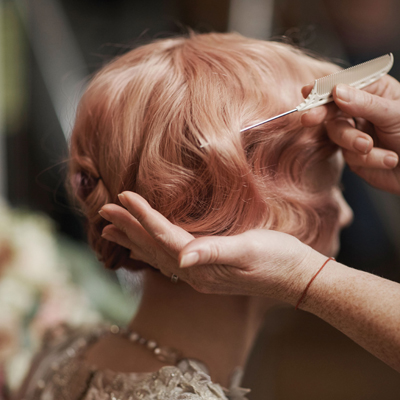
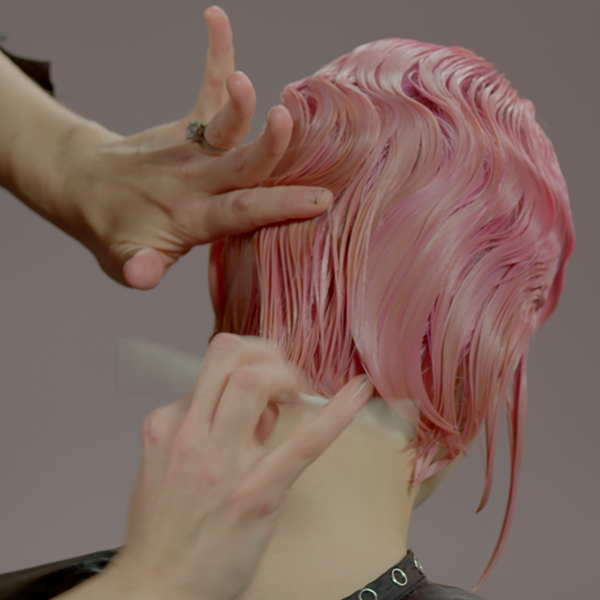
1. Make It Wet
It’s impossible to do a traditional finger wave without completely saturated hair. Period. Saturate with water AND product, then comb through. “If you don’t, you won’t get moldability and pliability,” says Paul Mitchell International Trainer Mary Cuomo(@cuomocromeans). As you work, re-wet the hair often.
2. Two Combs Are Better Than One
When legendary hairdresser Guido gave models finger waves at the Marc Jacobs A/W 2016 show, he used two combs. Using two combs instead of a finger and a comb offers more defined, symmetrical finger waves. Watch below, and get ready to be amazed.
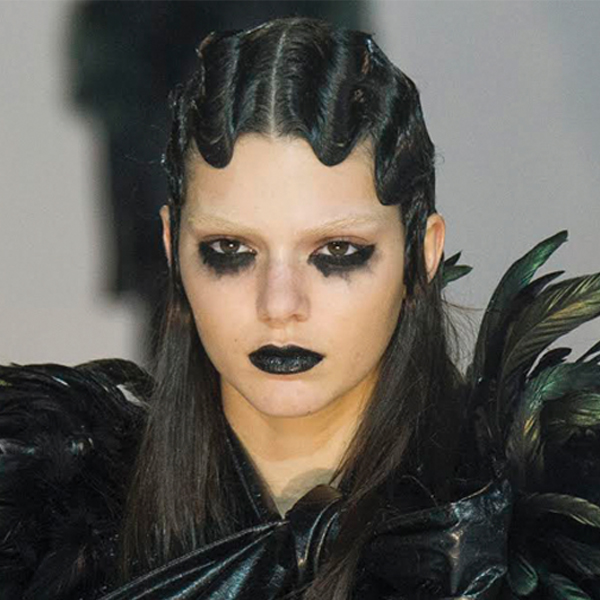
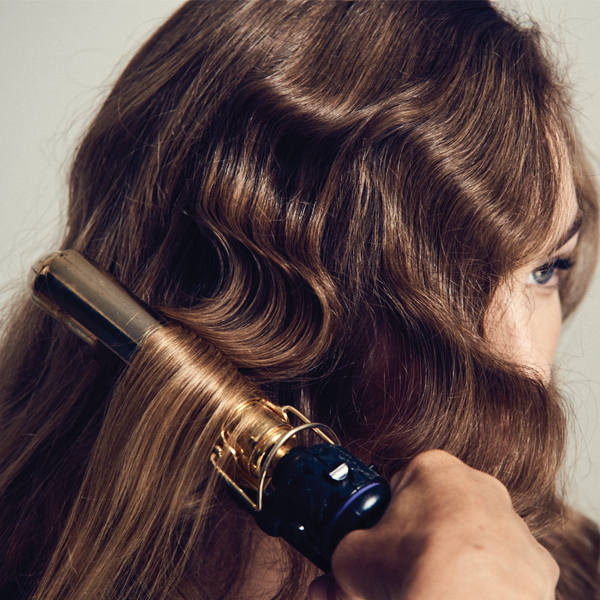
3. Exaggerate the Wave
To exaggerate the ridge of a finger wave, lift the hair with a chopstick and flat iron the shape into place. This is helpful on clients with super-straight or thick hair that can’t easily hold the style.


4. Consider The Part
If you’re new to finger waves, start with a deep side part, which allows for an asymmetrical design with strong, sculpted waves. Center parts are not for newbies, as this requires mastering the exactness of perfectly-mirrored sides.
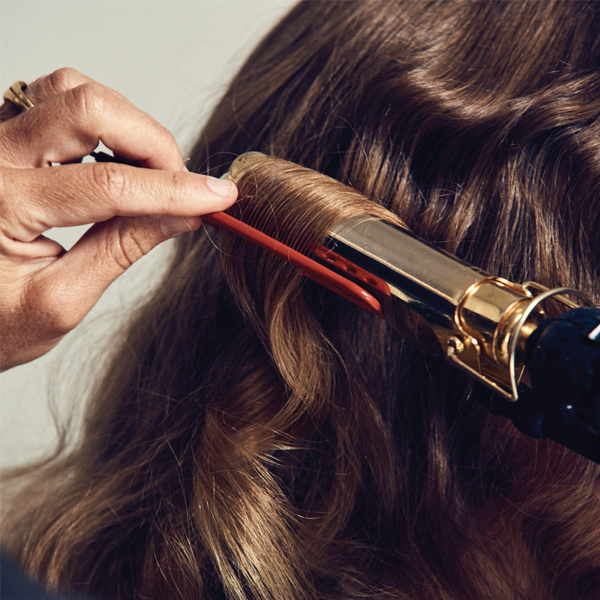
5. Add Some 1940s Charm
For a more undone, textured finger wave with Old Hollywood vibes, leave out the ends (below the jawline), then curl these with a small curling wand and pin in place. Once set, remove the pins, and lightly brush through the hair with a boar/nylon mix brush, keeping the finger waves in their original form.

6. Use a Twist and Slide Technique
L’ANZA’s Matt Swinney’s secret to finger waves lies in the way he slides and twists his comb as he’s creating the waves, making sure to apply plenty of pressure with his opposite hand. Watch his technique below.
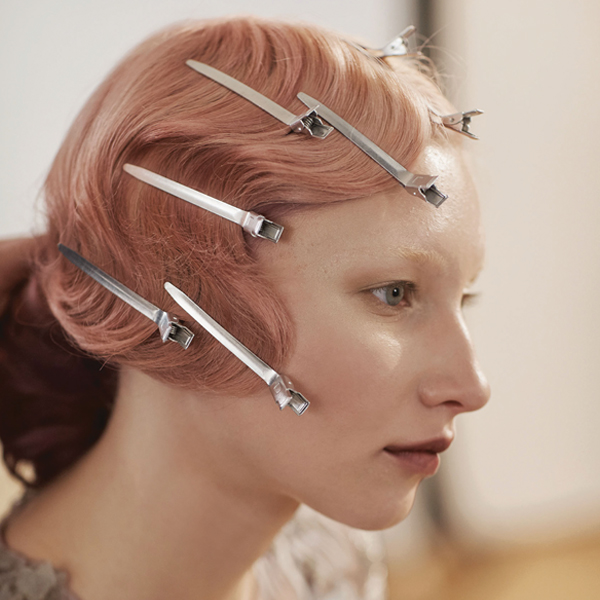
7. Holding the Wave
Another skill you have to master when creating finger waves? Setting. Here are two tool options for holding the wave in place.
- A duckbill clip: provides a simple hold on softer waves. Antoinette Beenders, Aveda Global Creative Director, uses this method after blow-drying Aveda Thickening Tonic into hair to give it a boost and help hold the wave.
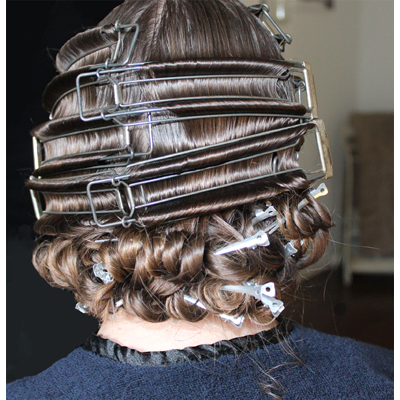
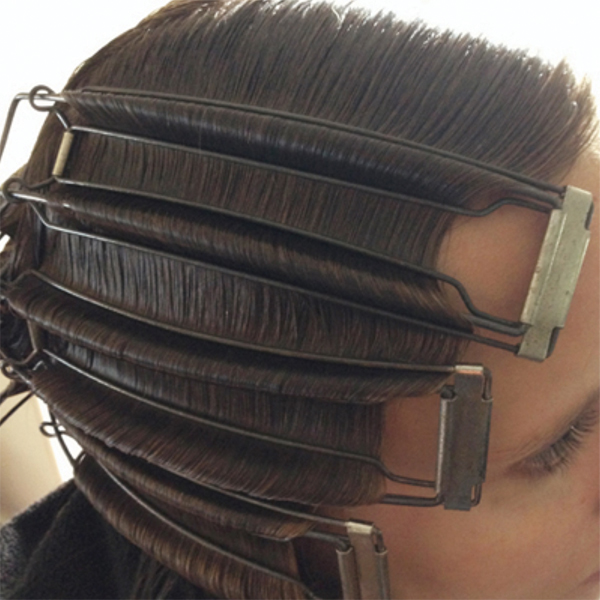
- An old-fashioned clamp: distinctly defines ridges. Many hairdressers find these vintage clamps in antique stores.
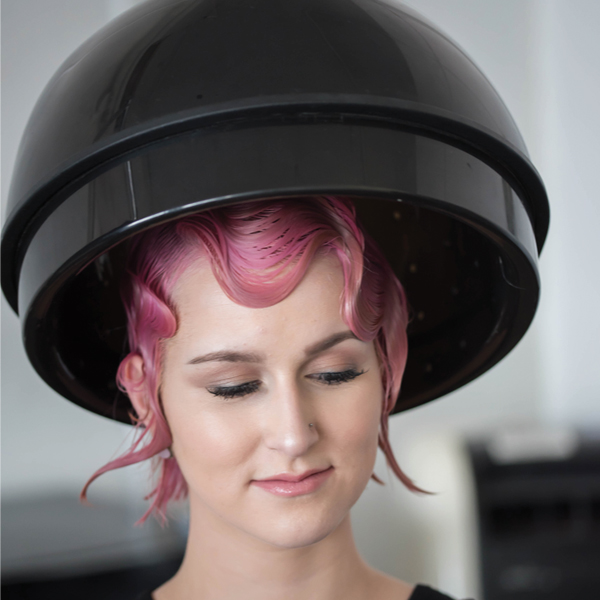
8. 100 Percent Dry
A finger wave set must be completely dry. Bumble and bumble’s Global Artistic Director Laurent Philippon compares a mastered finger wave to a sculptor’s work—it’s a process that can’t be rushed. Once your finger waves are complete, place your client under a hood dryer for at least an hour until she’s 100 percent dry. Factor dry time into your appointment.
9. The French Way
Haven’t quite mastered the classic finger wave? Try this:
Use a Marcel iron and a comb to create ridges. Hold the hair with a comb, insert the iron, push upward to the desired ridge, click to get steam (but don’t pull), release and continue. Voila! You just cheated finger waves.
10. Go For the Faux Bob
For longer-haired clients, don’t forget to create a faux bob! Gather the ends of the hair into a ponytail and secure with an elastic at the nape. Using the ponytail as a base, roll it up into itself to create a faux-bob, and secure with bobby pins. Finish by refining the waves with the end of a pintail comb.