5 Tips For A Personalized, Lived-In Shag
Custom Shag?! Try This Progressive Layering Technique
Who are we kidding—shags are having a MAJOR moment, and clients of all hair types and textures are lining up to try it. TIGI Global Brand Ambassador Philip Downing (@philipdowning7) is teaching you how to create a rock n’ roll shag for every client, tailored just for them. Keep scrolling to learn Philip’s progressive layering technique for creating personalized texture and movement.
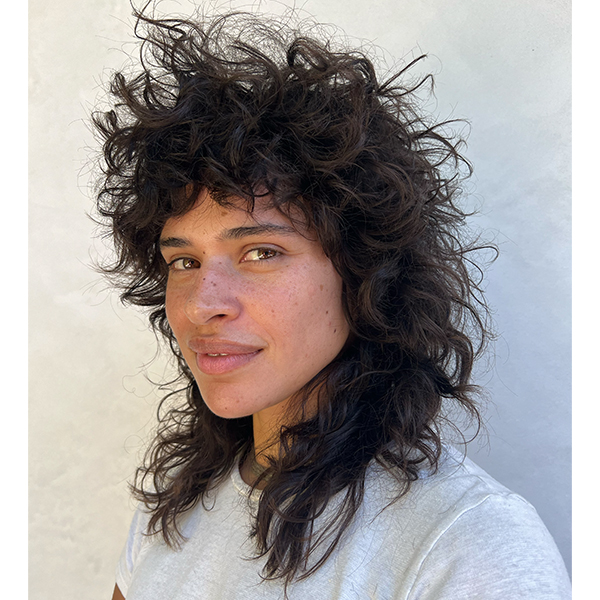
See the Before and After of Philip’s custom shag technique!

Like what you see? Click here to shop TIGI’s Artistic Edit collection!
Products Used
1. Section using the client’s head shape as guide
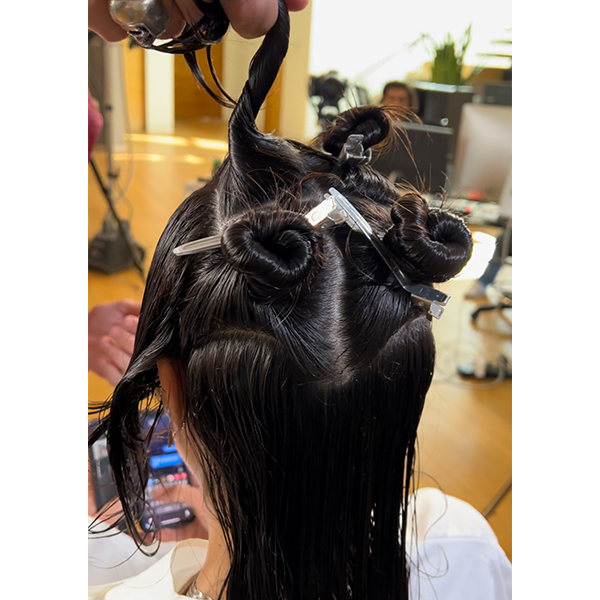
Sectioning doesn’t need to be copy and paste! Philip begins customizing his technique from the start, using the client’s head shape as a guide to map out his sectioning. Check out Philip’s sectioning strategy (including the products he always preps with)!
- Prep the hair with a cocktail of TIGI Artistic Edit Base Player™ Protein Spray and Wave Rider™ Versatile Styling Cream to encourage natural movement.
- Isolate the fringe with two diagonal forward sections.
- Take a center parting from the back of the fringe to the occipital bone.
- Then, take a curved, horizontal parting using the round of the head as a guide. This will help preserve density while cutting.
- Next, create a curved parting starting at the ear and ending at the top of the occipital bone. Repeat on the other side.
Pro tip: When sectioning, make sure you’re not making each section too big. Not only will this help avoid taking too much hair at once, but it also will give you more room to edit and add dimension as you cut.

2. Use block layering to blend each section while creating movement
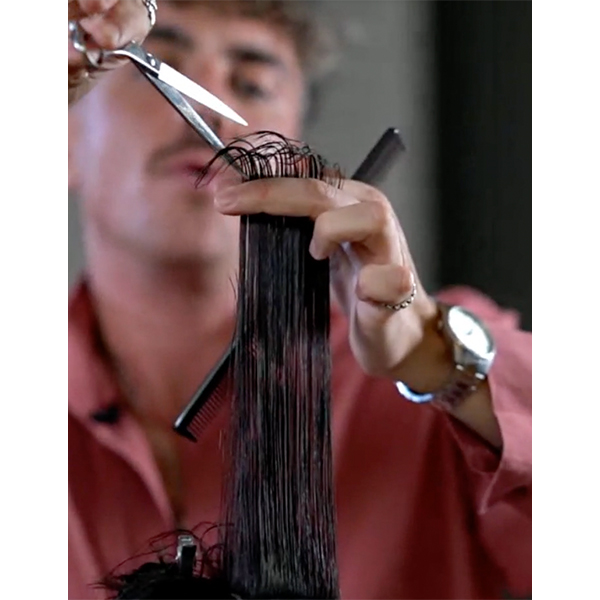
Philip prefers to use a block layering method for shags because it’s a safe, secure way to layer. You’ll always know exactly where you’re going next; the first section is the shortest and each following section uses overdirection to maintain length.
Pro tip: Block layering offers a lot of wiggle room. The shortest you can take exaggerated layers is the occipital bone and the longest you can take them is the hairline, giving you about three to four inches of length to experiment with.
3. Alter Your Cutting Direction For The Client’s Hair Type
Remember, it’s all about customization and that includes which direction the hair is cut! Lucky for all of us, Philip made this cheat sheet:
- Horizontal slide cutting removes more hair than vertical, making it ideal for clients with straight, finer strands.
- Vertical slide cutting creates a softer result for curls and clients with thicker densities.
For example: Since Philip’s client is getting a maintenance cut, he chose to point cut square to the head shape to create corners and add weight. To maintain her curls and natural texture, he followed with gentle vertical slide cutting to blend.
Pro tip: Pay attention to areas that may be denser than others. Including the crown or the occipital bone, where weight tends to build up.

4. Customize the fringe following the round of the head
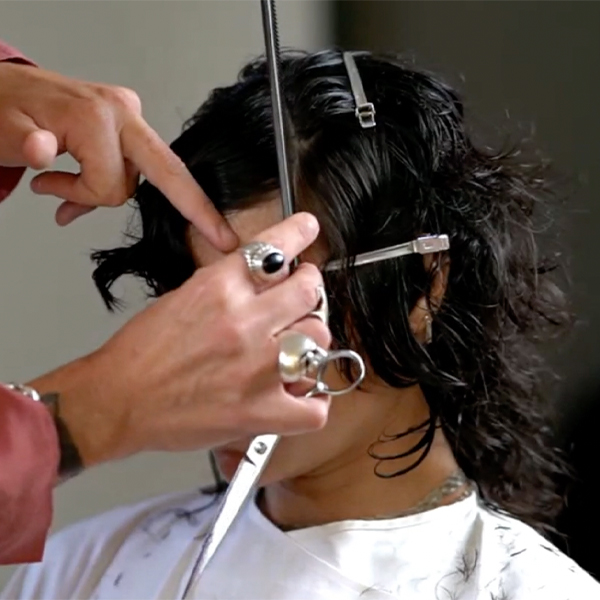
Fringe is a great way to accentuate your client’s face shape. Here’s how Philip uses his client’s natural head shape to customize her fringe:
- Use your cutting comb to determine placement. For the depth of the fringe, place the comb at the front of the head, where the comb starts to dip is how far back the fringe should live. Then, place the comb on a diagonal at the eyebrow. This will help determine the width of the fringe, anything beyond that point eats into the hairline.
- Utilize high elevation to create softness. Position your fingers square to the forehead and point cutting at a slight angle to avoid blunt lines.

5. Aim to lightly personalize throughout the cut
We’ve all had that client who comes in loving her hair cut, but insisting that it doesn’t “sit right.” Thanks to Philip, there’s a solution in sight: visualization. Not matter your cutting technique, make a visualization of where you want the hair to fall naturally. This will make it so much easier for your client to manage, style and adore their hair after they leave the salon.
Pro tip: You can also customize your client’s experience with a thoughtful product cocktail. For instance, Philip finished his look using a combination of texturizing Artistic Edit Juxta-Pose™ Dry Serum and Contortionist™ Flexible Hairspray—the most flexible, workable hairspray in TIGI’s portfolio.
Check out the finished look!

Want to watch Philip’s progressive layering technique in action? Click here to get all of his insider tips and tricks!
This content is sponsored.
More from
TIGI® Professional
-
BTC Hair Trend Report
The Biggest Haircut Trends of Fall & Winter 2023
-
BTC Hair Trend Report
Your Complete Guide To Color Blocking
-
Bobs
Retouch Haircuts: 4 Ways To Touch-Up Your Client’s Cut
-
Conditioners
Juxta-pose™ Dry Serum
-
Frizz
Contortionist™ Flexible Hairspray
-
Frizz
Wave Rider™ Versatile Styling Cream
-
Conditioners
Base Player™ Protein Spray
-
Beachwaves
3 Hair Cheats For Heatless Styling This Summer
-
Blow Dryers
The Secrets To Long-Lasting Supermodel Blowouts
-
Manufacturer
Anthony Mascolo Discusses Bed Head By TIGI’s 25th Anniversary + A New Pro Exclusive Line
-
Coronavirus
COVID-19: What The Current Closure Means For U.K. Salons
-
Haircare
Bed Head Ego Boost™
-
Styling
Salty Not Sorry™ Salt Spray
-
Haircare
Bed Head Gimme Grip™ Shampoo
-
Hair Color
Ruby Copper
-
Balayage
Want To Paint Faster Face-Framing Blends? Watch This!
-
Blonde
4 Color Placement Tips To Work Smarter, Not Harder
-
Balayage
WATCH: Avoid Splotchy Hand Painting With @wesdoeshair’s Secrets
-
Blonde
’90s Money Piece Bob
-
Haircare
Your Client’s Guide To Summer Hair Damage Repair
-
Facebook Lives
Watch: Men’s Clipper & Razor Cutting Tutorial
-
Coronavirus
Beauty Changes Lives Announces An Additional $70,000 In Grant Money Is Now Available
-
Business
3 TIGI Videos To Motivate You In Quarantine
-
Balayage
5 Hair Tutorials To Watch Right Now


