Ombré Layers, Weave Cutting and Flat Ironed Beach Waves
“We’ve definitely seen a shift over the past year from clean lines to raw edges,” notes NAHA Winner Andrew Carruthers of Lunatic Fringe in UT and Sam Villa Education Director. “The difference is, it’s not the shredded looks of the late ’90s and early 2000s. Now the texture is focused on the ends, and we’re leaving density in the interiors.”

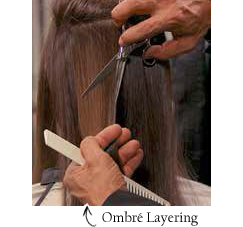
To that end, Andrew’s Ombré Layering technique has become a go-to for hundreds of his students and colleagues because, like ombré haircolor, it maintains depth or weight at the base and produces lightness on the ends. To perform the technique, envision upside down triangles on each section. Using blunt shears or blending shears, outline along the edges of each side of the triangle, mirroring the placement of ombré or balayage color. “The amount you remove will be dictated by the density and texture of the hair,” Andrew explains, “and by the effect you want on the ends—peaked or softer.”
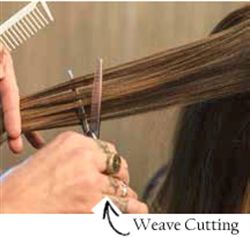
Weave Cutting is another approach to producing raw texture. Like Ombré Layering, it can be done with blending shears for a softer edge or blunt shears for a sharper edge. To start, identify the sections you wish to texturize. For a highly visible effect, work on horizontal sections; for a subtler result, use diagonal sections. Using your shear, weave out the section the way you would weave a foil highlight, then cut the weave. You can go over the section several times with your blending shears or nip at the section with blunt shears. If the hair is fine, stay closer to the ends. If it’s dense, you can move farther up the strand (just avoid working too close to the top of the head). “These techniques produce the specific peaks and valleys that you need for raw textures,” Andrew explains. “They’re perfect for clients who like to wear their hair messy and tousled.”

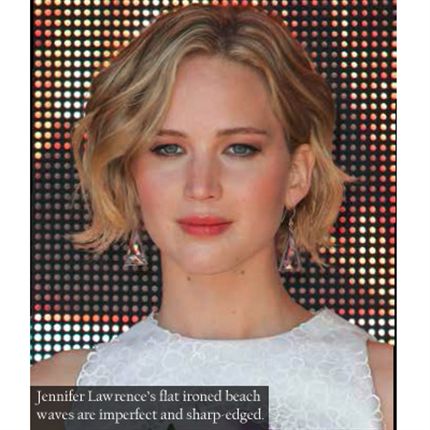
And when it comes to waved textures, those loopy, consistent mermaid coils are so yesterday, Andrew believes. Instead, he’s introducing clients to his Sleeker Beach Wave, created with a flat iron and similar to recent looks sported by actress Jennifer Lawrence as her pixie grows out. “Work in diagonal or vertical sections so that the waves don’t sit on top of each other,” he advises. “Create s-shaped patterns in each section, starting at the base and working toward the ends. Use a flat iron with soft tension, curve the base in one direction and then reverse the direction for the next curve. Repeat this pattern all the way to the ends. Do not put tension on your section in order to avoid pulling out the curves as they are created. The result is a real, DIY, lived-in feeling.”
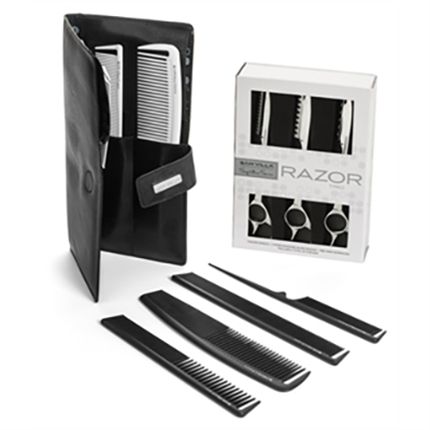
Sam Villa’s Razor Kit is now 50% OFF in the BTC bookstore!!
GRAB YOURS TODAY!
More from
Sam Villa
-
Haircuts
Midlength Shag Haircut
-
Industry Events
Sam Villa & The Beyond Project Partner with the Salvation Army’s SEEDS of Hope
-
The BTC Show 2021
REDKEN at #thebtcshow 2021
-
BTC Events
6 Genius Cheats For Cut + Color Services
-
Balayage
5 Genius Hair Videos From Instagram
-
Haircuts
Sam Villa: 5 Cutting Tips For Texturizing The Crown
-
Haircuts
WATCH: Sam Villa’s Slide-Cut Shag
-
Best of 2017
Everything We Learned About Cutting Bobs In 2017
-
Dry-Cutting
WATCH: Sam Villa’s Dry-Cutting Fringe Technique
-
Styling
WATCH: Voluminous Pony + Two-Strand Braid
-
Bobs
Cut An Asymmetrical Bob Without Diagonal Lines
-
Bobs
Twist-Cutting Bob Technique
-
Business
4 Communication Tips From Sam Villa
-
Events
Sam Villa: An Educator, Inspiration and Light In The Industry
-
Festival
A Sam Villa Festival Braid
-
Haircuts
5 Tips For Creating Your Best Layers
-
Bobs
A Sam Villa Updo, Plus Cutting Curls and Bobs
-
Braids
Sam Villa’s Top 7 Tips for Braids and Flyaways
-
News
BREAKING NEWS: 16th Annual Stylist Choice Award WINNERS ANNOUNCED
-
News
BREAKING NEWS: Finalists Announced for the 2016 Stylist Choice Awards!
-
News
BTC BREAKING NEWS: The 2016 BTC Stylist Choice Awards Voting Polls Are OPEN
-
Braids
Braid Parade: Your Big, Fat, Fabulous Resource for Everything on Your “Plait” – Part 1
-
Bobs
Sam Villa’s 6 Best Bob Tips
-
Haircuts
Hot Tip: Creating Volume with a Razor


