Barbers: How To Create Custom Clipper-Cut Designs
Watch: @robtheoriginal Cut A Portrait With Clippers & Trimmers
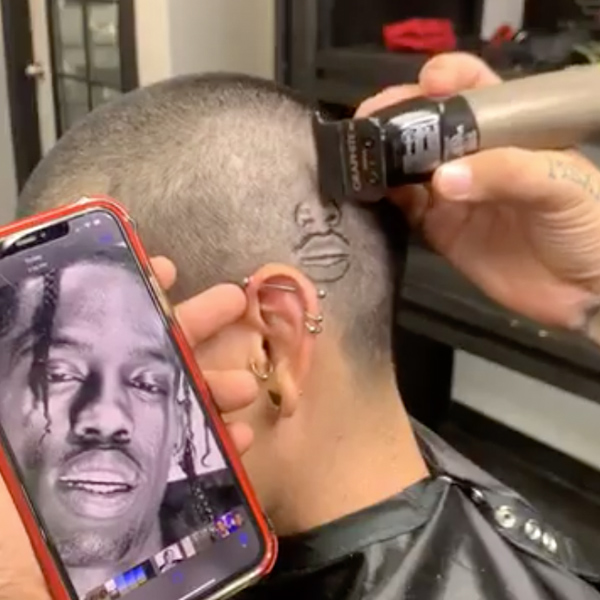
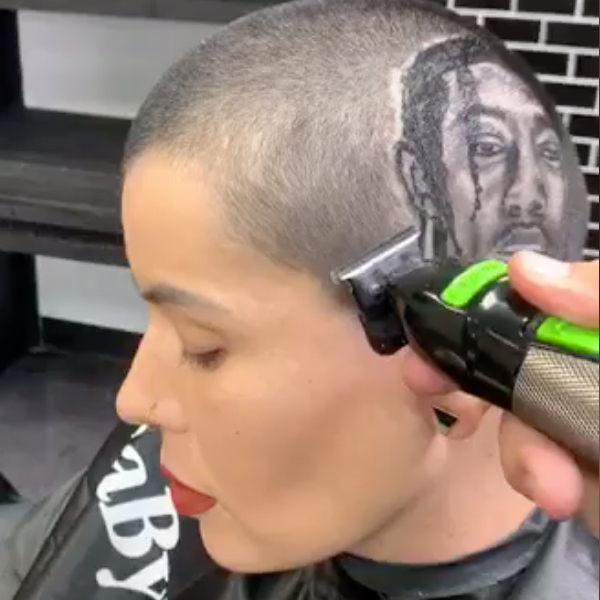
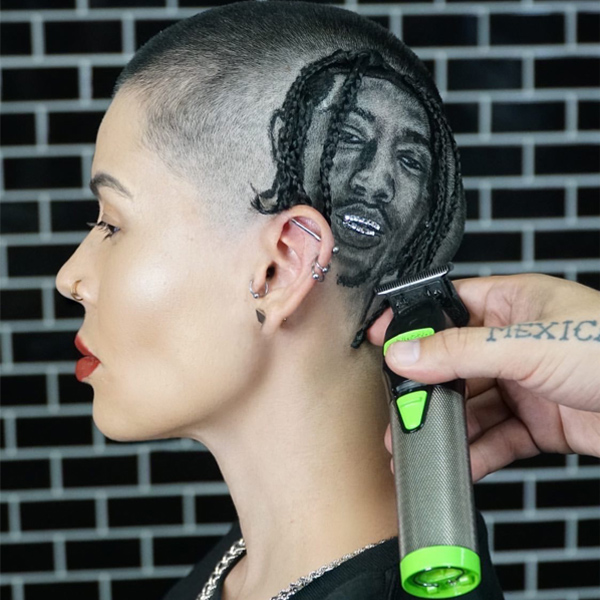
Ready to learn how to create custom, clipper-cut designs like a pro? For the barber and artist who is looking to take their craft to the next level, we asked BaBylissPRO® Creative Artist Rob Ferrel, aka “Rob The Original” (@robtheoriginal), to demo how he creates visual portraits in his clients’ haircuts. Watch Rob sketch and carve a photo of Travis Scott using trimmers and clippers and keep scrollin’ for everything you need to know to try it yourself!
Click HERE to watch the 80-minute live demo on BTC’s Facebook!
1. Where To Start A Clipper-Cut Portrait
- Reveal Contrast: After finding an inspo photo, Rob uses the Color Splash app to edit the picture so it’s black and white to reveal contrast—you can also use iPhone effects! This determines where to create light and darkness in the portrait.
- How To Create Colors: Rob doesn’t work with any color—just the hair and scalp, using different layers of hair to create different color effects. Whenever the scalp is exposed, this will create lighter colors. Leaving more hair in specific areas will create darker colors.
- Where To Start: Start from the bottom-up. When working on a small canvas like a specific area of the head, Rob recommends starting with the lips and the nose. This way, you avoid running out of space to sketch.

Click here to design & personalize your own clipper with the BaBylissPRO CustomFX App! DOWNLOAD HERE!
2. Creating Your Canvas: Must-Know Tips
- Find a flat area on the head. Look for dips, scars or tattoos that could interfere with the portrait.
- Rob always starts by cutting the hair down to a .5 with his BaBylissPRO® CustomFX Clippers to create an even, short canvas.
- Use multiple eyeliners to sketch the portrait. Rob uses a white pencil liner to sketch out the white areas, like teeth or eyes. He prefers liquid black eyeliners to draw lines and sketch the portrait because the product will dry and prevent smearing as he sketches.
- The only time Rob leaves the hair longer is when he is creating a 3D portrait. For example: A mustache or dreads on a Bob Marley portrait—cool, right?! Get creative by adding stones, adornments or pops of color to customize any design.
3. Sketching & Carving 101
- Sketch and carve as you go, keeping the photo on your phone as a guide so you can zoom into details to create the portrait.
- This is KEY: Rob holds the BaBylissPRO® CustomFX Trimmer like a pencil. Flip it upside down and use the corner of the T blade to sketch out heavy lines. He recommends a graphite blade because it cuts closer to the scalp and the teeth are sharper.
- Use a straight razor to get closer to the scalp in areas that need extreme detailing.
- Outline the portrait with a tapered or a bald fade to make it pop. Rob recommends using the BaBylissPRO® CustomFX Trimmer to create the skin fade.

4. How To Charge For Clipper-Cut Designs
When Rob started creating clipper-cut designs, he charged $300 per cut. The price is determined by how much time it takes to create the look. How many typical haircuts would you be able to do in the same amount of time? If the cut takes 3 hours and you would typically do 2 cuts an hour, that appointment = 6 haircuts, so charge accordingly.

Products Used
Watch the video below to see the finished look and click HERE to watch the 80-minute live demo on BTC’s Facebook!
More from
BaByliss Pro Barberology
-
Barbering
The Barber-Approved Gift Guide For Men
-
Blowouts
Bob Styling Guide: 5 Ways To Style Short Hair
-
Fades
Line Ups: Dos & Don’ts Every Barber Should Know
-
Barbering
Clipper & Trimmer Blade Guide: When To Use Each One
-
Barbering
2023’s Top 9 Hair Trends For Men
-
Barbering
4 Pro Barbering Tips You’ll Want In The Shop
-
#ONESHOT HAIR AWARDS
The BTC Show 2022: 10 Things We Saw
-
The BTC Show
#THEBTCSHOW 2022
-
Barbering
5 Genius Blonding, Color + Cutting Cheats To Try Now
-
Blow Dryers
ROSEFX Dryer
-
Barbering
Barbers: How To Fade Out Dents
-
Barbering
Men’s Cutting: 3 Techniques For Better Blends
-
Barbering
Watch: How To Seamlessly Blend Tapered Fades


