Articles > Braids > Sam Villa’s Top 7 Tips for Braids and Flyaways
Last updated: October 30, 2017

Sam Villa’s Top 7 Tips for Braids and Flyaways

close formula

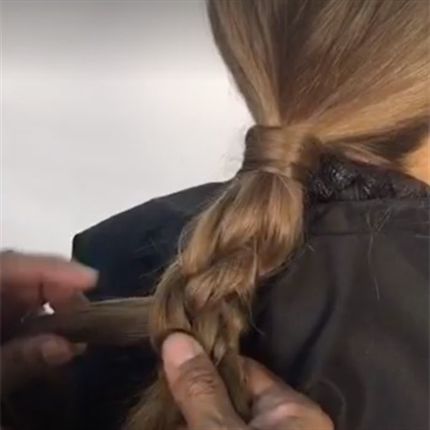
When Sam Villa says he has something cool to show you, there’s no question—you stop what you’re doing and watch! That’s why we set him up for an exclusive Facebook Live event at the Redken Symposium 2017, and more than 230,000 of you tuned in! Sam gave us some amazing braid how-tos while talking through his best kept secrets like how to control flyaways once and for all! If you missed our Facebook Live with Sam, no worries! We took his top seven tips and compiled them together in one place for you, sort of like a Sam Villa Cheat Sheet. Check ’em out!


1. The Two-Strand Braid—It’s All About Rhythm
“Open the door, walk through, close the door and lock the door.” No, we’re not reciting your inner monologue every time you leave your home. It’s the concept Sam thinks of whenever he creates a simple, two-strand braid.


Before you start braiding, take some Redken Rough Paste 12, emulsify it in your hands and run the product through the hair. “Product is not an option, it’s a necessity,” says Sam. Then separate the hair into two equal sections. Split the right strand open, pull the left strand through and bring the split strand back together. That’s it! Repeat that all the way down the hair, rememebering to always split on the right side.


2. 3-D Three-Strand
We know what you’re thinking, “I’m a hairstylist. Do I really need to learn how to braid with three strands?” Trust us, this isn’t the standard three-strand braid that you’ve already mastered. Sam offers a fresh take on the traditional braid.


Separate the hair into three equal sections and, just like you did with the two-strand braid, split open the right section and pull the middle section through. The only difference here is that the right section isn’t the only section that’ll be split. 


Pinch and repeat on the left side. Split the left, open and pull through the middle. “You’re going to get a braid that looks like it’s four strands. I call this 3-Dimensional,” says Sam. “What I love about this is I’m not doing all the palming and pinching and twisting. All you do is slice, open and pull through.” Once you finish the braid, from here you can easily create a small donut or chignon.


Bonus Tip: If your client says pins don’t stay in her hair, there are two tricks you can try. One is to pour some Redken Powder Grip 03 into a bowl, add in some hair pins and mix. Doing this will give your hair pins some tackiness. Another trick is to fish hook the hair pin. Bend each side of the hair pin into a fish hook and treat it like you normally would a regular hair pin. However, make sure you tell your client a fish hook pin is in their hair so they don’t try and pull the hair pin out later.


3. The String Braid
The string braid is similar to a three-strand braid in that both braids require three sections of hair. However, the string braid is composed of two large sections on the outside and a small section in the middle like a string, hence the name string braid.


Once you have your sections, you braid just like a normal braid—outside over middle, outside over middle, outside over middle—and you continue to work down. You’re probably questioning what the purpose of the string braid is? It’s all about what you do with the braid after. Once there is hardly any hair left on your string, that’s when you stop and tie the braid off with an elastic.


Then, grab a small piece of hair at the ends and pull the big sections out, creating texture. The purpose of the string is to hold the braid together as you pull the bigger sections out. Then, take your Redken Control Addict 28 Hairspray and spray the ends below the elastic. Use your hand to rough it up and create even more texture.


4. The Ever-Popular Four-Strand Braid
Just about everyone in the hair industry is obessing over the four-strand braid, but that doesn’t mean it’s easy to create. “I really recommend that if you can’t do these things, get the rhythm down by using ropes. Use rope first then go to the hair,” shares Sam. “With rope, you can manipulate your hands and learn how they work.”


Separate the hair into four equal strands. Using your right hand only, place your pointer finger between the two middle strands and twist so your palm is now facing the floor. Using your free left hand, go underneath the twist and grab the far right section and go straight into a peace symbol, between the middle twist and far left section. Release the strand of hair that is now on the far right side.


Now your right hand is free. Go underneath the braid, grab the far left section and bring it between the middle and far right sections. The far left strand now becomes a middle strand. Make a peace symbol again and twist the strand with the other middle strand. Continue this pattern until you reach the end.


5. Accessorize, Accessorize, Accessorize
Sam believes hair accessories will become very popular, and soon your clients will be asking for them. So he showed us how to accessorize using a belt buckle. It’s the perfect accessory to add a little flair to any style without taking away from the overall look.


Before you can even think about placing the buckle in the hair, you first need to remove the buckle from the belt and snap off the center piece that connects the buckle to the belt. “When you’re working with this, you need to be aware of how thick of a section you have and how big the belt buckle is,” notes Sam. “You don’t want to take too thick of a section and try to squeeze it through the hair.”


Take a small section of hair, just enough to fit through the top half of the belt buckle, and grab a hair pin. Open the hair pin up, place it around the section of hair and close the pin. Take the hair and place it through the top section of the buckle, then pull the pin down. Repeat for the bottom half of the buckle, but this time, place the hair pin over the top of the section. Once you’ve done that, take your belt buckle and slide it up all the way to the knot.


6. How-To: Cover an Elastic With a Double Hair Pin


After seeing this trick, you won’t be covering your elastics any other way! Once you have the hair in a ponytail, grab a large, strong double hair pin and place it on a diagonal underneath one piece of the elastic. Then, take a small strand and wrap it around the elastic and the hair pin, just like you normally would.


When you have about 2 inches of the strand left, pinch the ponytail tight where the hair pin is and grab a second hair pin. Come through the strand, keeping it between the second hair pin and sew it through the first hair pin, similar to a needle and thread. Then push the second hair pin through and remove it from the ponytail.


7. Tame Those Pesky Flyaways
No matter how hard you try, you can never seem to tame those pesky flyaways—until now! So how does Sam do it? With a color brush and some Redken Shine Flash 02. Generously spray your color brush with Shine Flash and move the brush over the flyaways, smoothing them down.


“I’ll find with the hairline, I’ll use a toothbrush and on top I’ll use a powder brush” shares Sam. “A toothbrush at the hairline gets really deep inside whereas if I come on top, I might not need the bristles to go so deep.” For those of you who work on a lot of photo shoots, this is the tip to keep in mind so you can achieve those clean, sleek styles.


Missed our Facebook Live with Sam?
Watch the whole video below!


More from
Sam Villa